The Autodesk Revit Vault Server Integration allows Vault to deeply index Revit family files, including parameters and objects, so that you can search Revit family files with the Revit Vault Add-in.
Once you download and install the Autodesk Revit Vault Server Integration package, the Revit Indexing feature must be enabled in the Autodesk Data Management Server Console before you can use Revit Family Search.
Release Availability
This feature is available in Autodesk Vault Professional 2014.
Install the Revit Vault Server Integration
- Download the Revit Vault Server Integration package from the Subscription Center.
- Launch the .exe file to begin the installation.
- Follow the steps in the Installation Wizard to complete the installation.
Once the package is installed, you must enable the Revit Indexing feature in the ADMS Console.
Follow these steps to install the Revit Vault Server Integration.
Enable Revit Indexing with the ADMS Console
- Launch the ADMS Console.
- Right-click on the Vault that you want to index for Revit Family Search and select Revit Indexing Service.
You can also select Revit Indexing Service from the Actions menu.
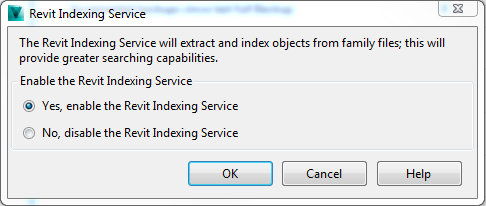
- On the Revit Indexing Service dialog, select Yes, enable the Revit Indexing Service.

- Click OK to save your selection. Note: The Vault Server starts indexing objects in family files. Depending on the number of family files in the vault, the initial indexing could take some time.
You can now use Revit Family Search on the Load from Vault dialog.