Procedural Overrides
This tutorial shows how to use Parameter Overrides to override the shading of a polymesh within an Arnold Procedural.
The scene files for this tutorial can be downloaded here.
Export Geometry
First, we will write out the Robot mesh as an ASS procedural.
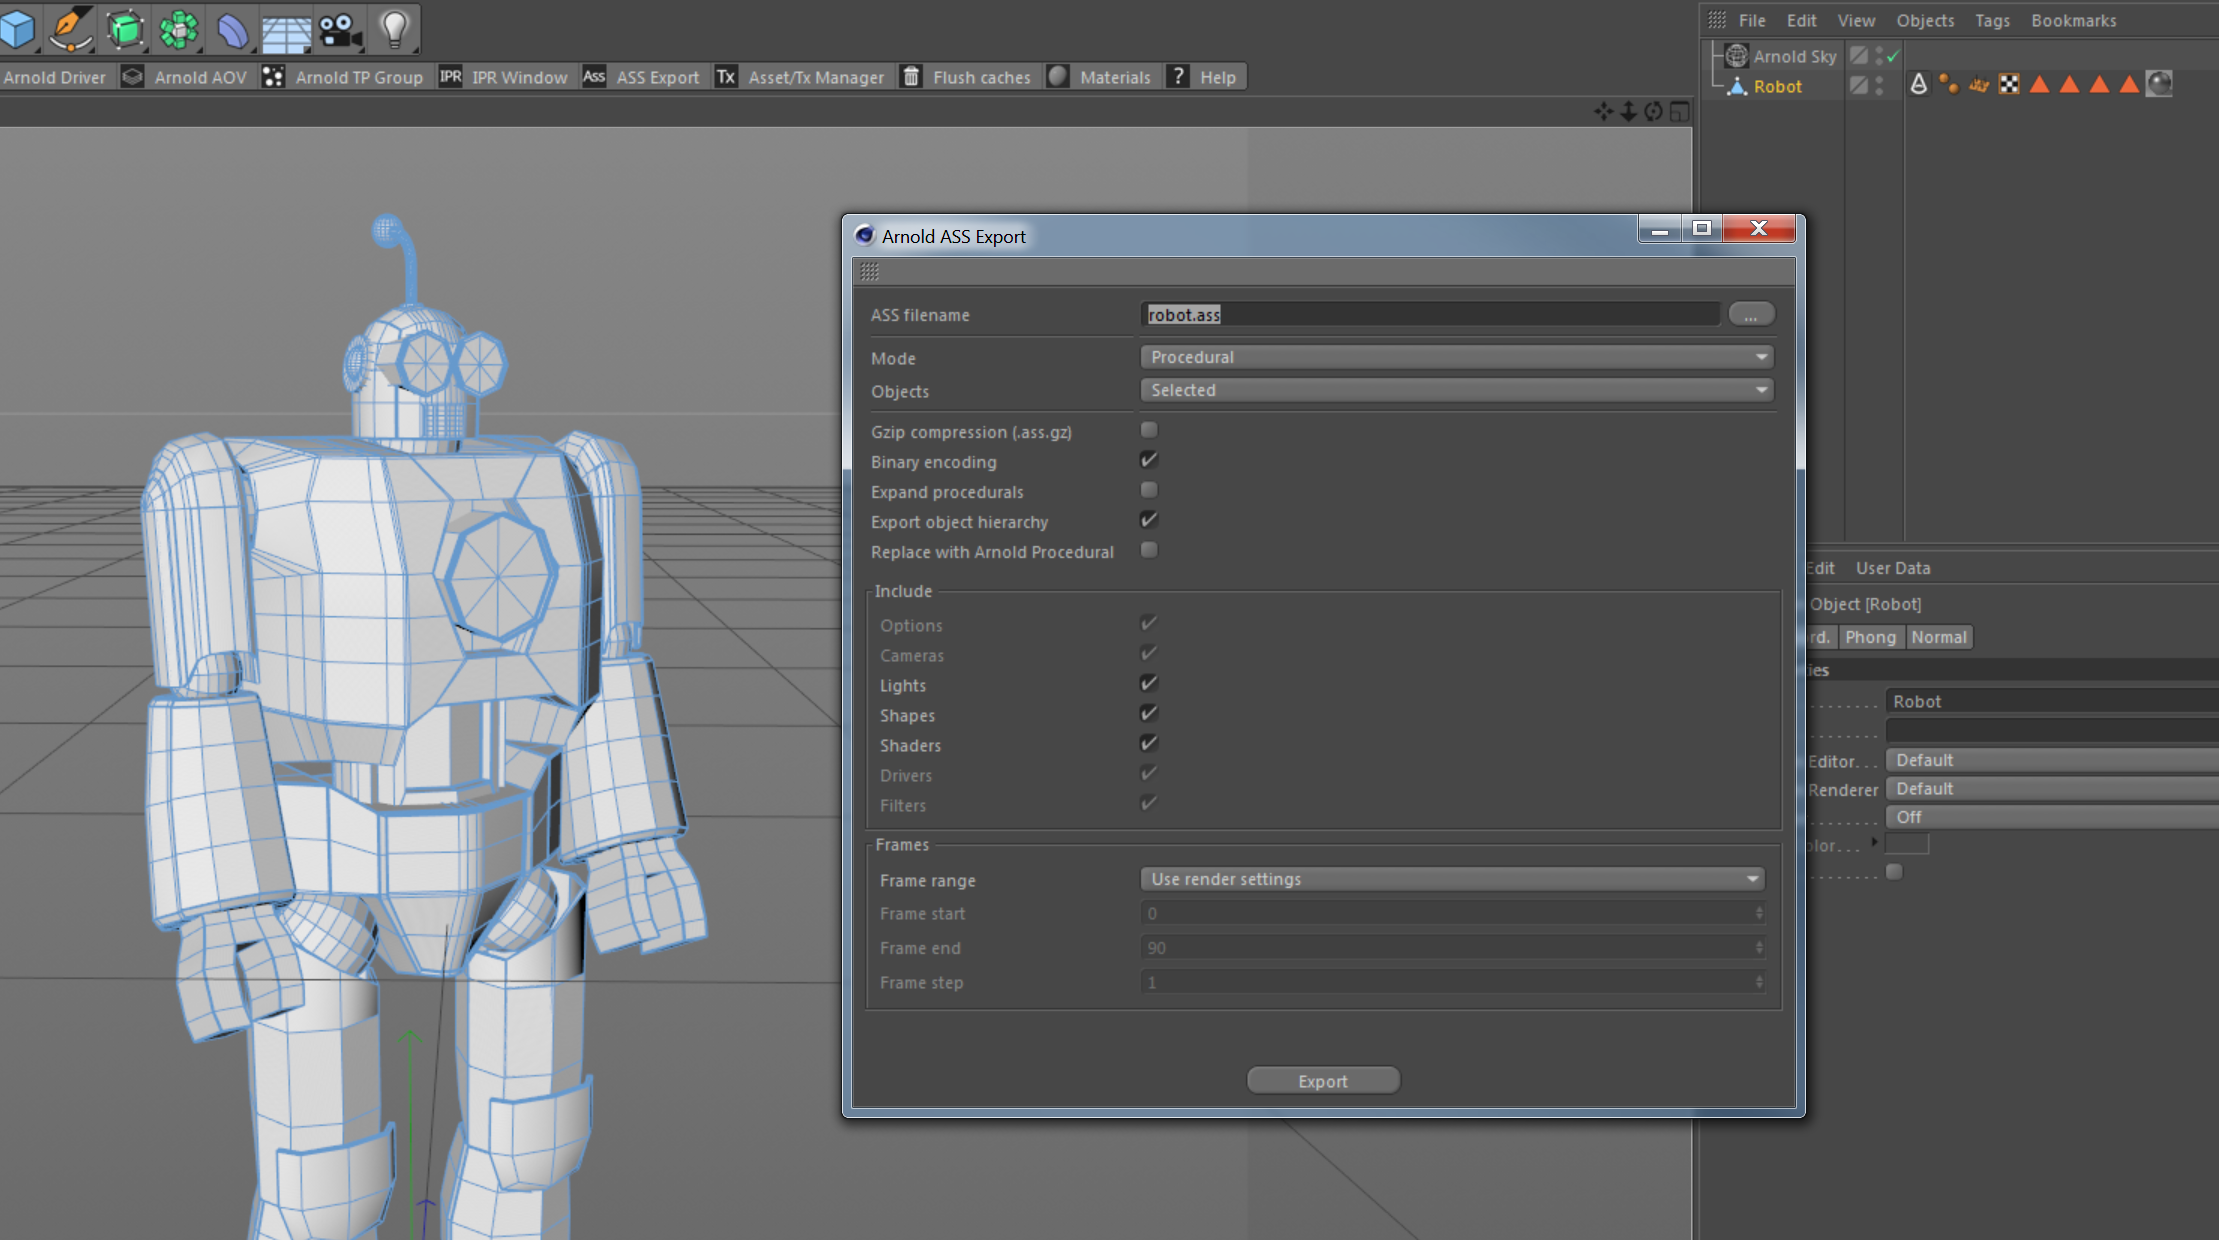
- Open the robot_proc.c4d scene and select the Robot object. Note that it contains polygon selections for the left and right hand and leg.
- Go to Plugins > C4DtoA > ASS Export, set the ASS filename to robot.ass, change the Mode to Procedural and press Export.
Shader Override
Next, we will load the procedural in a new scene and override the shaders of the Robot object.
- Create a new scene and add an Arnold Procedural object.
- Load the robot.ass file in the procedural.
- Setup the lights and cameras as required.

- Go to the Overrides tab of the Arnold Procedural object and change the Number of parameter overrides to 1.
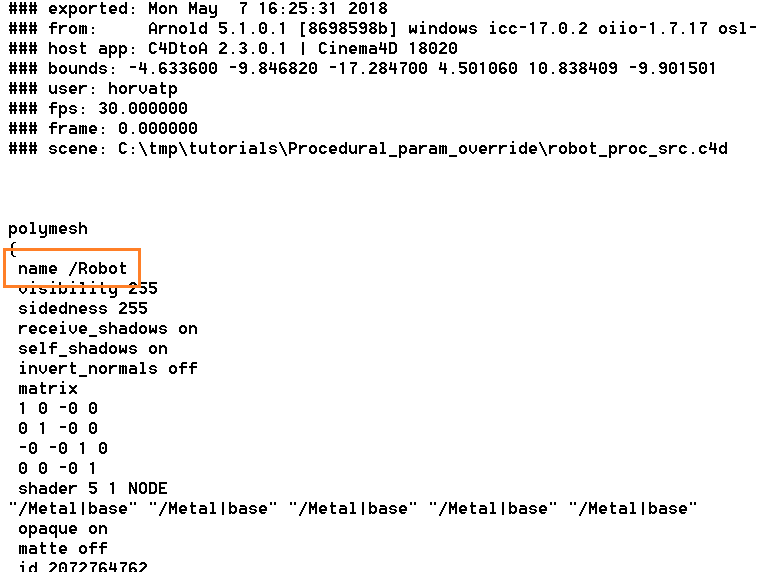
- Set the name of the polymesh to the Selection field you want to override. This is the name of the Arnold polymesh node which you can find in the ASS file: /Robot. Look at the Operators page for details about how the Arnold node names are generated by C4DtoA.
- Change the Mode to Shader and drag & drop your shader (e.g. Gold) to the Shader field. This will override the main shader assigned to the Robot object.

Override Shaders of Polygon Selections
Note that the shader override above assigned to the polygon selections as well. The shaders in Arnold are stored in an array (as you can see in the ASS file). The first item is the shader assigned to polygons which do not belong to any polygon selections, and the other items are the shaders assigned to polygon selections. In the example above we have replaced the array to one shader.
In this example we override the polygons of the left and right hand, to do so, we have to define specific elements in the shader array.
- Go to the Overrides tab of the Arnold Procedural object and enable Use Index by the first override. Leave the Index number on 0, this defines the shader of polygons with no selection.
- Add two more overrides (set the Number of parameter overrides to 3).
- Set the Selection to /Robot, the Mode to Shader and drag & drop your shader (e.g. Plastic ) to the Shader input.
- Enable Use Index and set the Index of the second override to 1. This will override the shader of the Right Hand , which is the first polygon selection.
- Enable Use Index and set the Index of the third override to 2. This will override the shader of the Left Hand, which is the second polygon selection.

Turn the Polymesh into a Volume
Any polymesh can be rendered as a volume in Arnold, we just have to set the step_size parameter of the polymesh to a non-zero value and assign a volume shader. Let's apply this to the Robot.
- Go to the Overrides tab of the Arnold Procedural object and add two overrides (set the Number of parameter overrides to 2).
- Set the Selection to /Robot for both overrides.
- Set the Mode of the first override to Shader and drag & drop your volume shader to the Shader input.
- Set the Mode of the second override to Float parameter, set the Parameter to step_size and the Value to 0.1. The Robot is now rendered as a volume.

You can override any parameters of the polymesh (or any Arnold node) via expressions. Look at the Set Parameter operator page for more details about the assignment expression syntax. You can check the ASS file for available parameter names or run kick -info polymesh.
Override Shader Parameters
We can override any parameters of any Arnold nodes inside the procedural. For instance, we can change the Base Color and Specular Weight of the default shader of the Robot object.
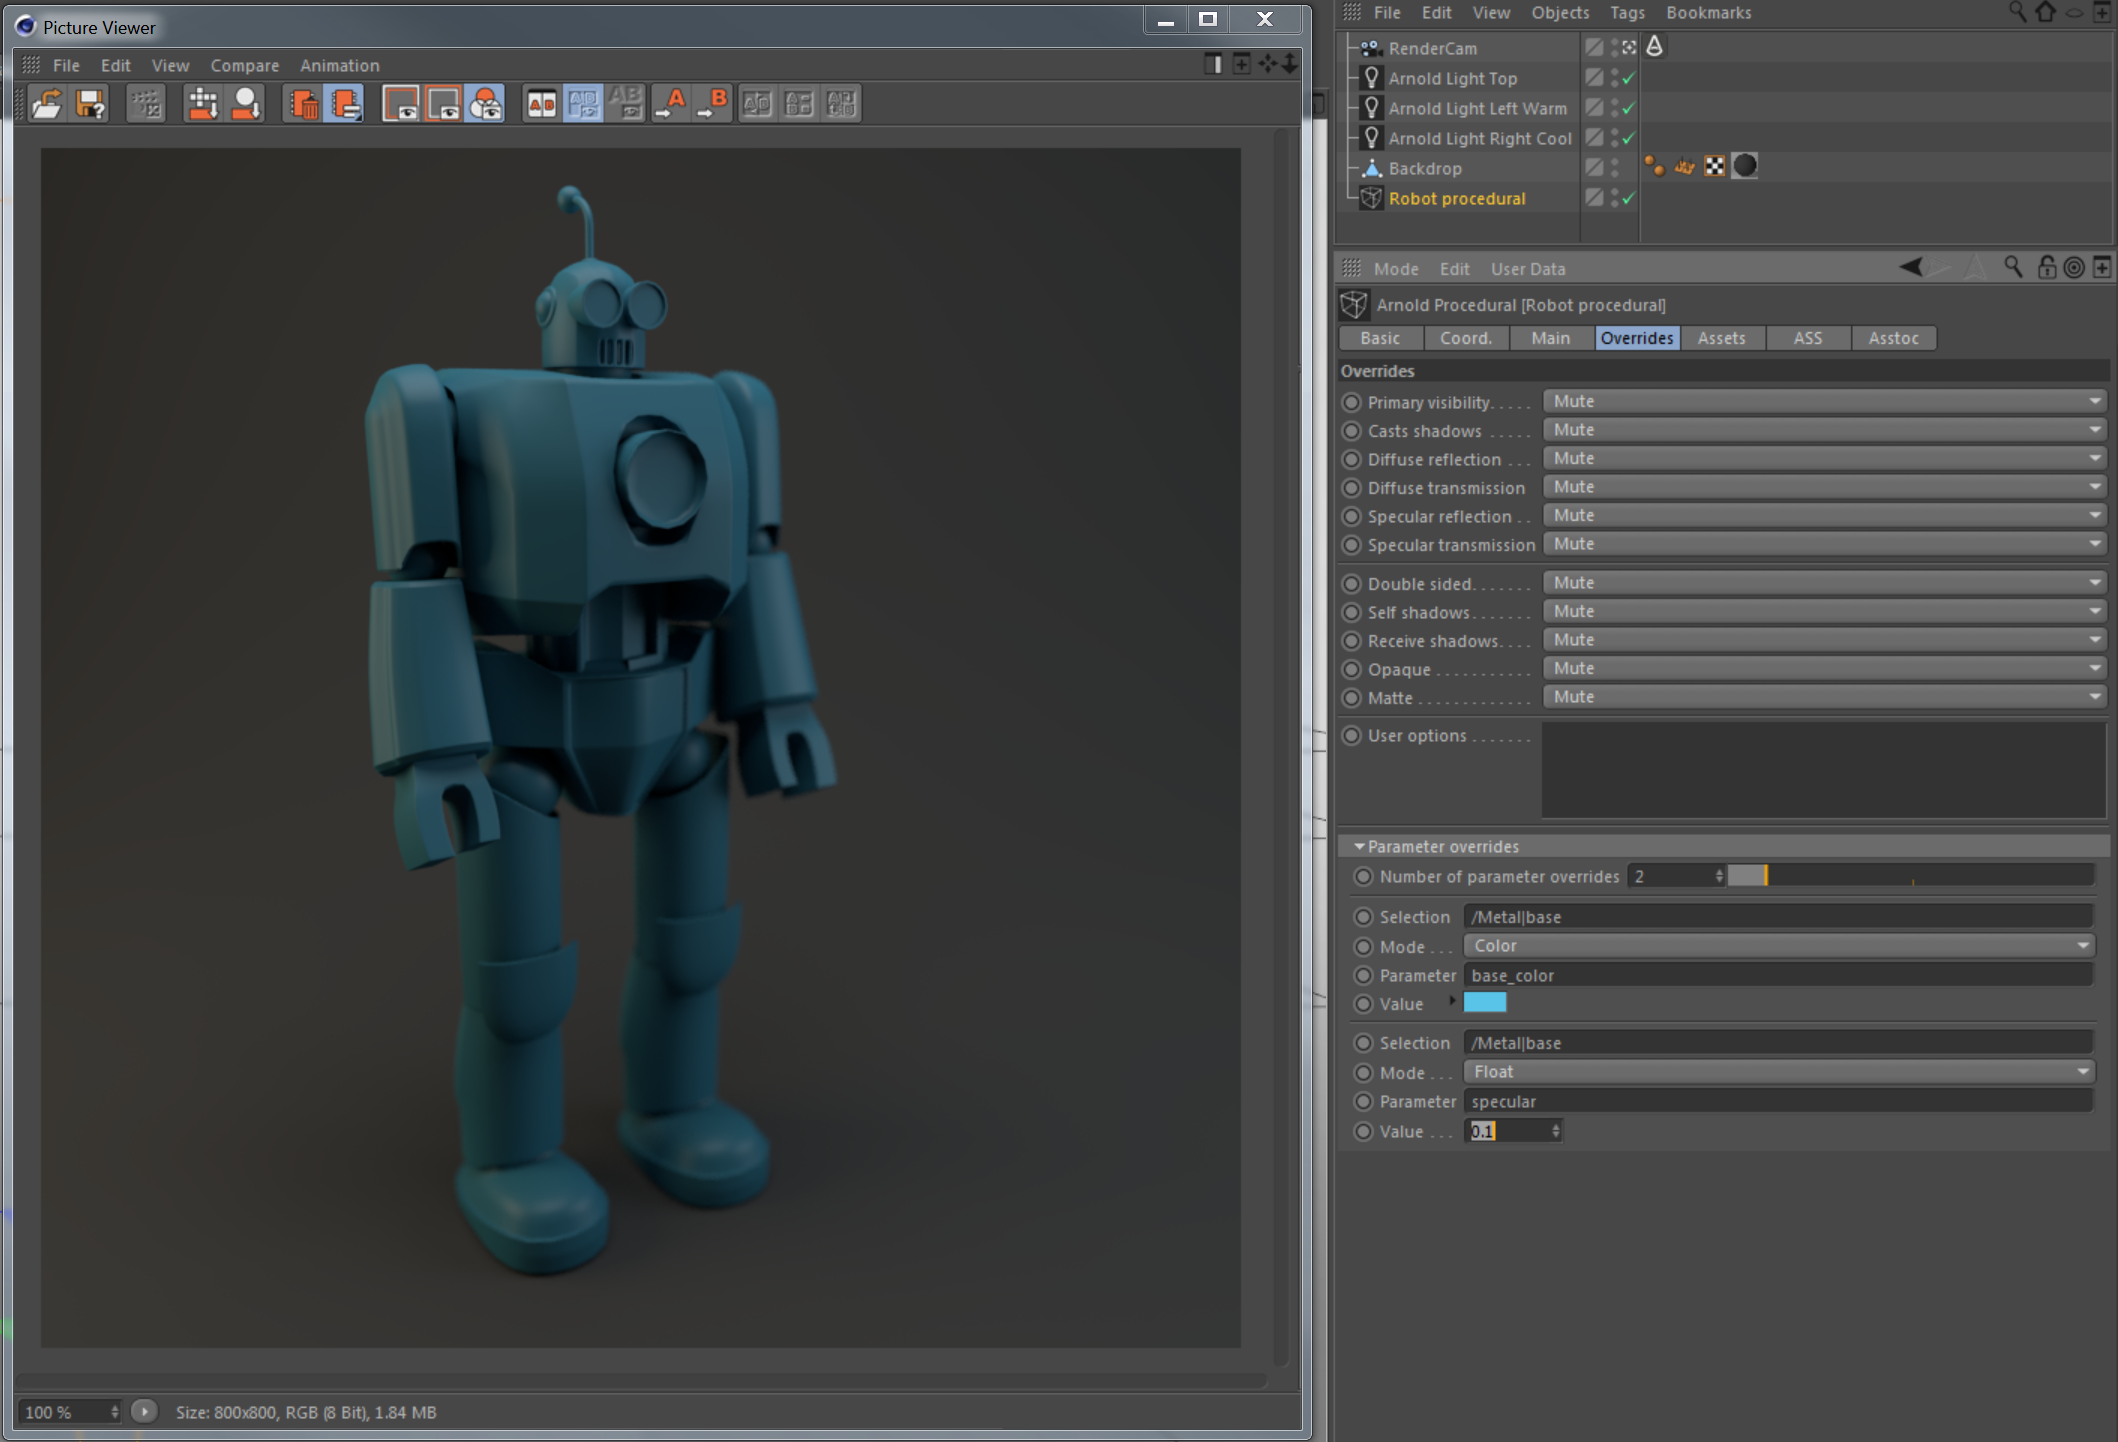
- Go to the Overrides tab of the Arnold Procedural object and add two overrides (set the Number of parameter overrides to 2 ).
- Set the Selection to /Robot for both overrides.
- Set the Mode of the first override to Color, set the Parameter to base_color and define the color value.
- Set the Mode of the second override to Float, set the Parameter to specular and define the weight.
You can check the .ass file for available parameter names or run kick -info standard_surface.
Override Displacement
We can easily override the displacement shader and any displacement parameters of the Robot object.
- Go to the Overrides tab of the Arnold Procedural object and add two overrides (set the Number of parameter overrides to 2 ).
- Set the Selection to /Robot for both overrides.
- First we override the surface shader, so set the Mode of the first override to Shader and drag & drop your material (e.g. Gold ) to the Shader input.
- Then we override the displacement shader. Set the Mode of the second override to Displacement and drag & drop your material with a displacement shader (e.g. Gold displacement) to the Displacement input.
- To override the displacement height enable Override displacement parameters and set the Height to *20 cm*.

Override Subdivision
In this example we override the subdivision settings and disable the Catmull-Clark subdivision of the Robot object.
- Go to the Overrides tab of the Arnold Procedural object and add an override (set the Number of parameter overrides to 1).
- Set the Selection to /Robot.
- Set the Mode to Subdivision and set the Type to None.

Set Parameter Operator
The parameter overrides on the Arnold Procedural object are just wrappers around the set_parameter operator. The same result can be achieved using the operator directly. For instance, overriding the shader of the Robot object.
- Go to Arnold Render Settings > Main > Advanced and click on the Create new operator network button.
- Create a set_parameter operator.
- Set the Selection to procedural and drag & drop the Arnold Procedural object to the Procedural field.
- Set the Selection string to /Robot.
- Add an Assignment expression and set the value to shader[0] = '/Gold|standard_surface'. This will override the first item in the shader array with the standard_surface shader defined in the Gold material. However, the Gold material is not exported to Arnold by default because it's not assigned to any object. Therefore you have to drag & drop it to the Linked nodes field.
