Rendering Displacement Maps from C4D
In this tutorial, we will demonstrate the best practices for rendering a vector displacement from C4D with Arnold. We will create some nose geometry using the C4D Sculpting tools. We will then bake this geometry into a vector displacement map from C4D and render it using C4DtoA with the correct settings.
Note: The scene (R18) can be downloaded here.
The tutorial is broken up into the following stages:
Sculpting
Baking the Vector Displacement
Vector Displacement Shader
Subdivision
Displacement
If ears are more of your thing, there is also an ear vector displacement example to accompany this tutorial.
Sculpting
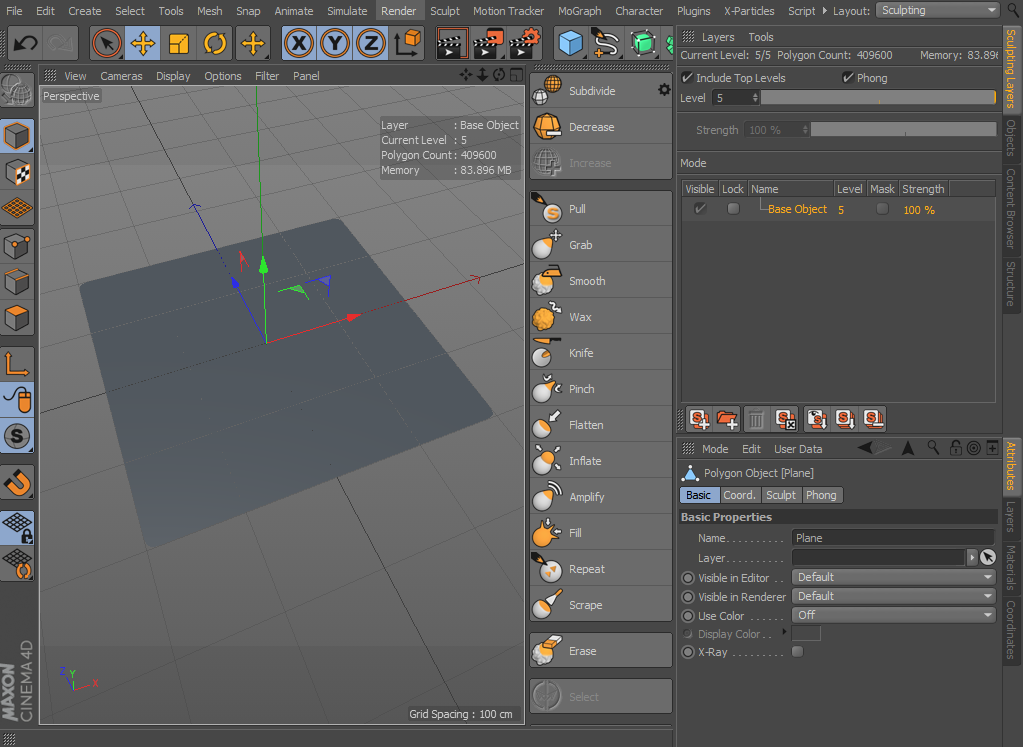
- Start off by creating a plane and press 'C' to turn it into a polygon mesh. Go into the Sculpting layout in C4D and subdivide the level 5 times.
- Select the Pull tool and load the Brush Preset called *'face_nose'.*
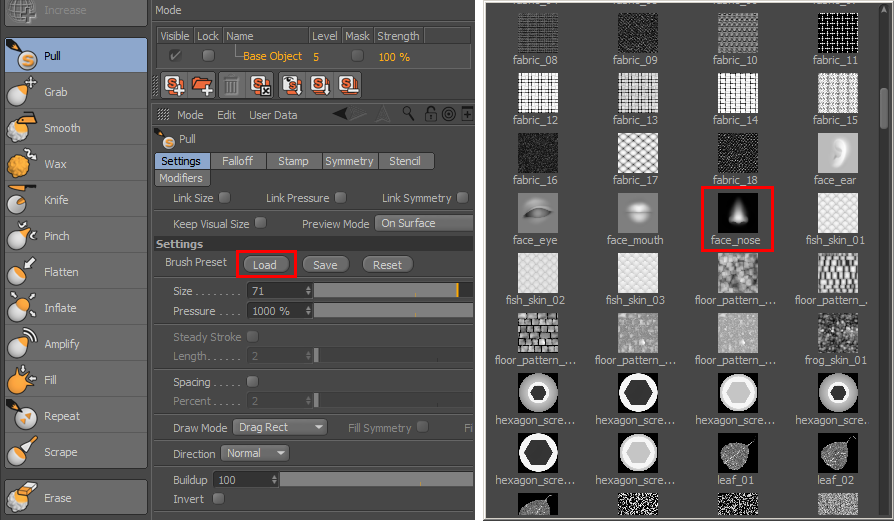
- Increase the Pressure to around 8000% and click and drag in the center of the plane until the nose fills the plane. Select the Grab tool, enable X(YZ) Symmetry and increase the brush size to around 130%. Grab the tip of the nose and pull it down so that it overhangs.
 |
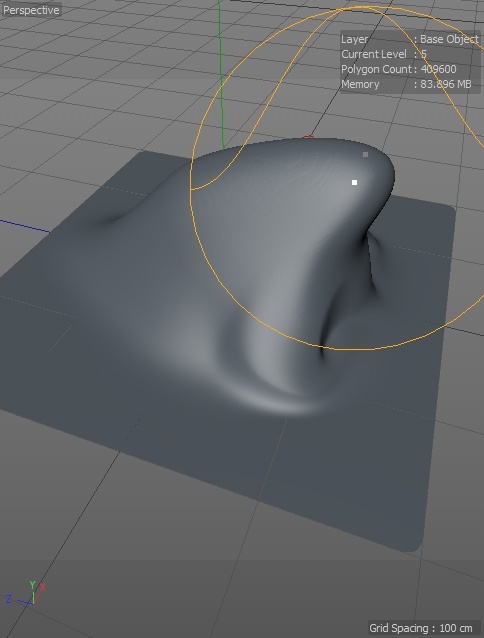 |
| Nose brush preset 'pulling' out geometry | Grab end of nose and pull it down with the Grab tool |
B aking the Vector Displacement
A conventional displacement map will not be able to provide us with the correct shape of the nose, so we must, therefore, export a vector displacement map instead. You can choose between world, object or tangent space maps depending on your needs.
- A world map defines displacement in a fix coordinate system which means it can be used for static objects.
- An object map contains data in a coordinate system relative to the object. It is useful when the object is animated and has no deformation.
- A tangent map is based on the normals of the polygons which results in correct displacement when the object deforms. Tangent space maps are frequently used for character animation.
Tangent Space
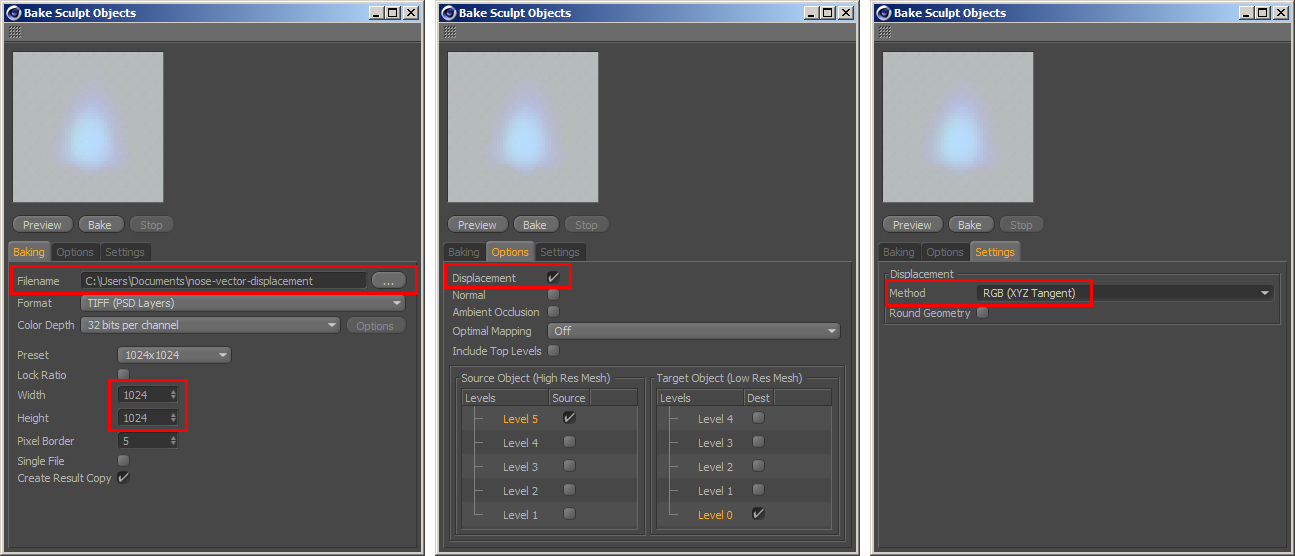
- Choose Bake Sculpt Objects at the bottom of the Sculpting options. Choose where you want to save the vector displacement map. Lower the preset resolution to 1024x1024 for this test (you may want to increase this resolution for production-ready scenes). Under Options , enabled *Displacement.* Select Bake and bake out a 32 bit TIFF file. Under Settings, change Method to *RGB (XYZ Tangent)* as we will also use tangent vector space for our vector displacement. If we used Object space, we would have to enable Flip X to invert the normal back.
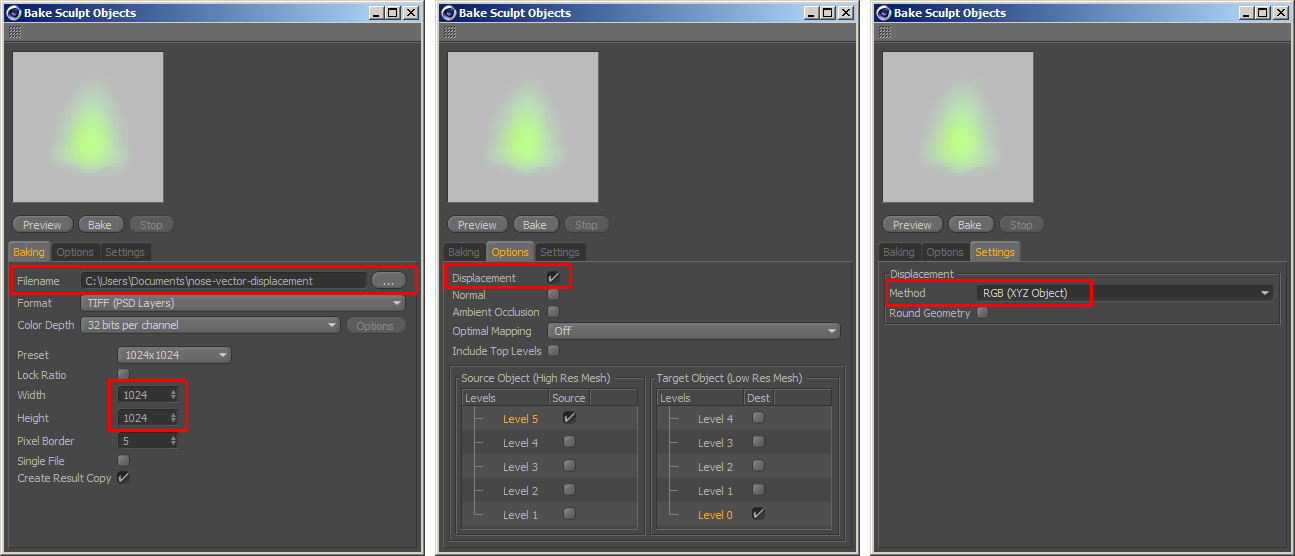
Object Space
The following settings are used when baking the map using object space.
Vector Displacement Shader## World Space
World space requires the same settings as the map used for object space .
Tangent Space
- Create another plane and move it out to the side. Assign a Standard Surface shader to the plane and open the Arnold Material window. Select the skin material type in the shader and set a color in the Subsurface group.
If the skin shader is too nosey noisy, you can try increasing the number of SSS samples.
- Create a vector_displacement shader and connect it to the Arnold Displacement port. Change the Vector encoding to signed. The vector_space should be tangent because this is the setting that we baked the vector displacement map with. Change the order from XYZ to XZY.
- Create an image shader and open the vector displacement texture that we baked earlier. Connect it to the input of the vector_displacement shader.
- Increase the scale to around 1.4.
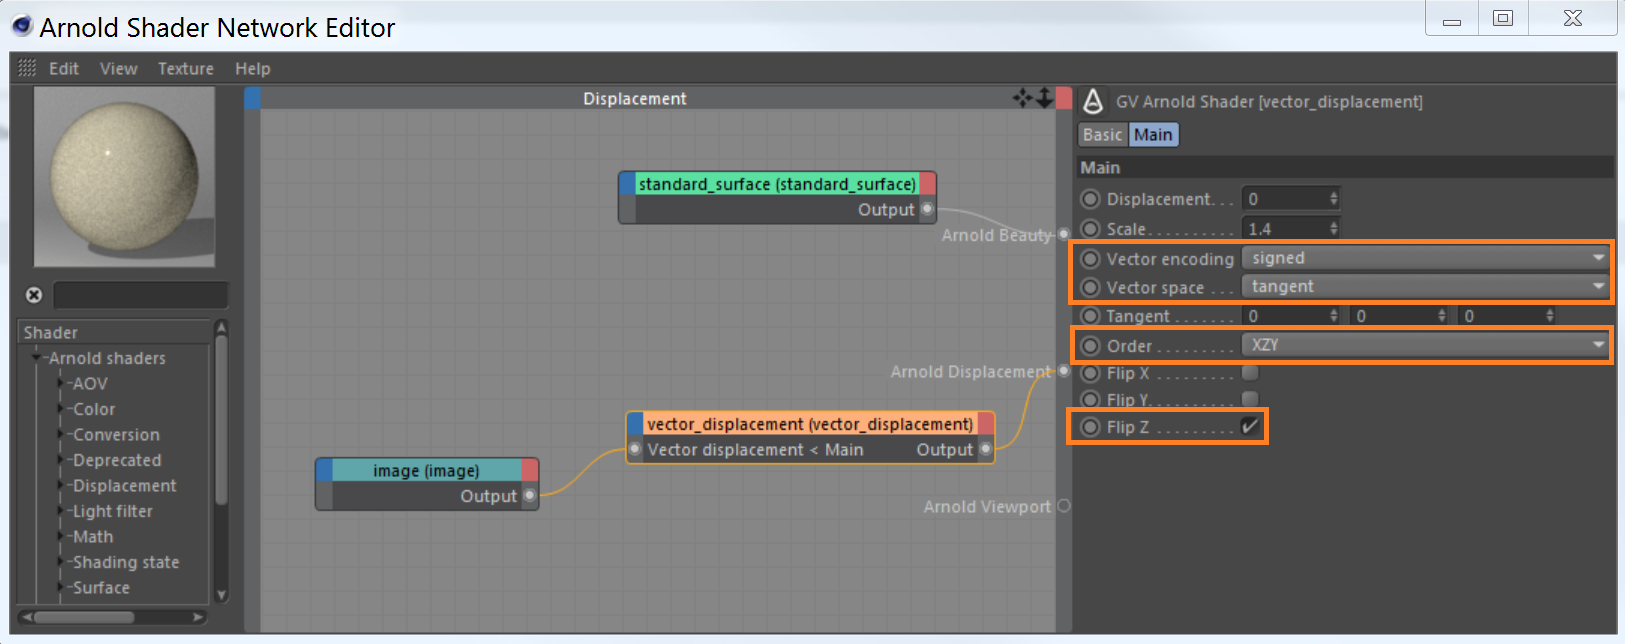
'Vector space' of vector_displacement is set to tangent. The order is XZY. Flip_z is enabled.
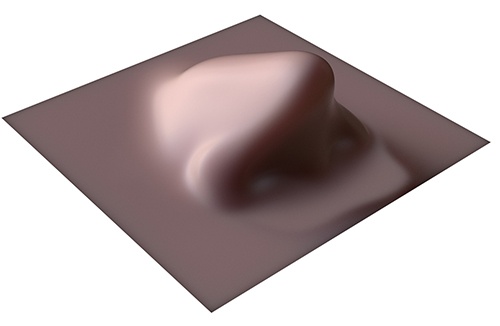
Below you can see the difference when rendering with and without Flip Z enabled.
 |
 |
| Flip Z: Enabled | Flip Z: Disabled |
Object Space
- When using an object space vector displacement map, change the order to XYZ and ensure that flip_z on the vector_displacement shader. This will invert the Z input channel of the vector displacement.
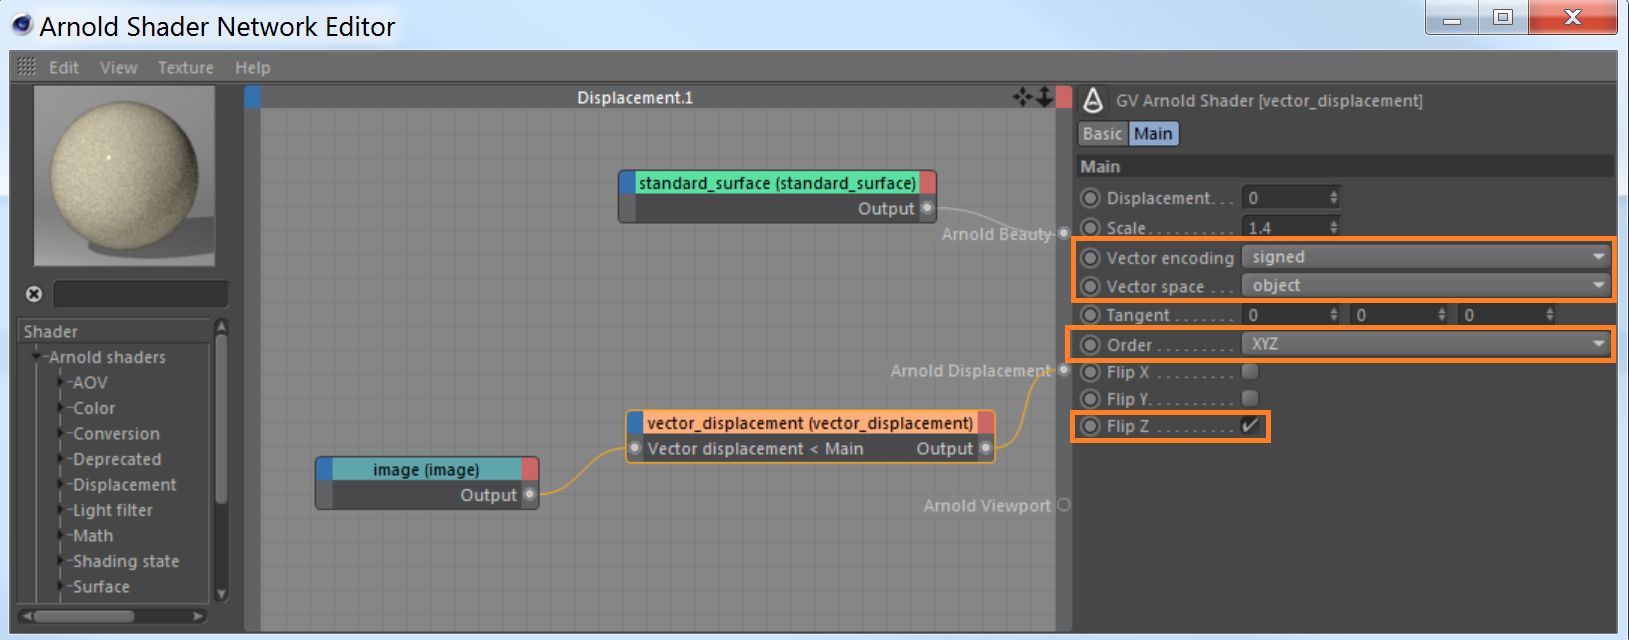
'Vector space' of vector_displacement is set to object. Order is XYZ. Flip_z is enabled.
Subdivision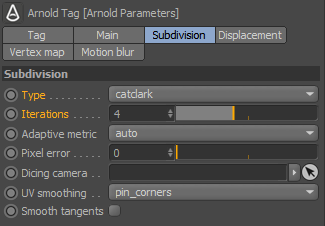
- We need to add some extra subdivisions to the plane so that the nose vector displacement renders with enough detail. Add an Arnold Tag to the plane. Select the Subdivisions tab and change the type to Catclark and increase the number of Iterations to 4.
If you have a more complex base mesh, you may also want to set the UV smoothing to linear to prevent shifting in the displacement.
Displacement
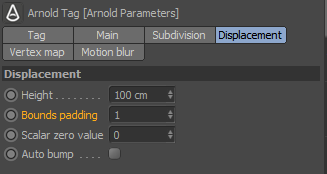
- Under the Displacement tab, increase the Bounds Padding to 1 to extend the bounding box of the plane. Otherwise, you may get strange artifacts. Below you can see the difference when rendering with Bounds Padding 0 versus 1.
 |
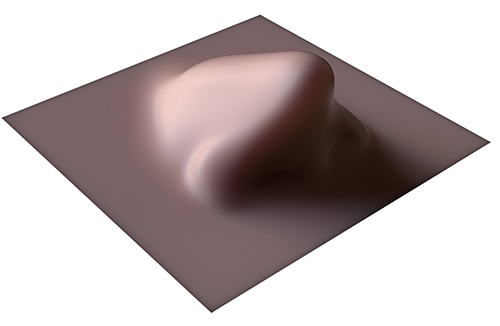 |
| bounds_padding: 0 | bounds_padding: 1 |
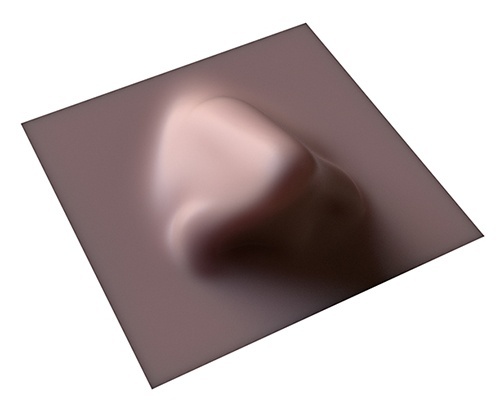
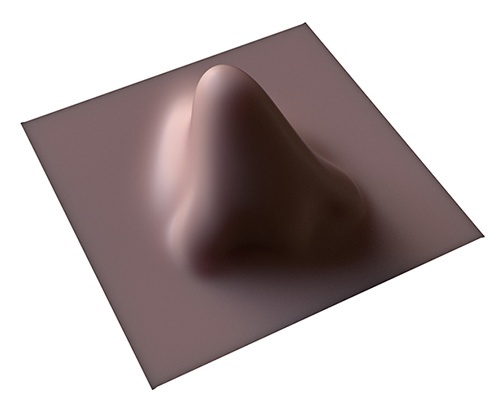
- Finally, render the two planes side by side to make sure that the vector displacement is rendering the same as the original sculpt.
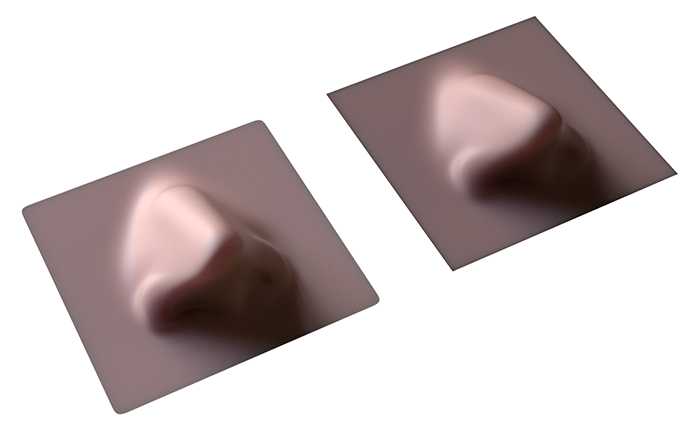
Original sculpt (left). Vector displacement (right).