
Use this procedure to define subdivisions that are created within the elevation when you generate it. Each subdivision is specified as a distance from elevation line.
You can view the location of a subdivision by viewing the elevation line with its boundary in an isometric view. In this view, you can use grips to relocate a subdivision.
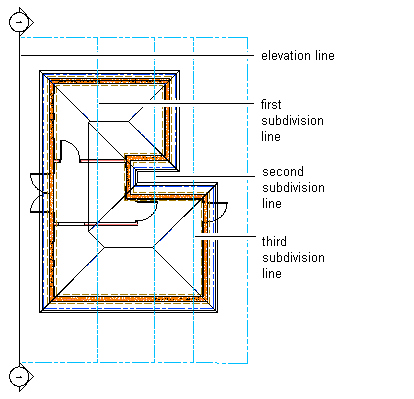
An elevation line with graphic subdivisions
You can control the lineweight and other display properties of the subdivisions to add different levels of depth to elevation.
- Double-click the elevation line you want to change.
- On the Properties palette, expand Basic, and expand Dimensions.
- Click the setting for Subdivisions, and then add or modify subdivisions:
If you want to… Then… create a subdivision click  . To change the default distance from the elevation line, select the subdivision, click the value, and enter a new value.
 change the length of a subdivision select the subdivision, click its value, and enter a new value. delete a subdivision select the subdivision, and click  .
. - Click OK.