
Use this procedure to add a step to the roof line or the floor line of a curtain wall. You can also add a step on the Roof/Floor Line worksheet on the Properties palette.
Note: This option is available only when the roof line or the floor line has not been edited. After the line has been changed, you cannot automatically add a step using this option.
- Select the curtain wall, and click

 .
. A temporary profile is created for you to edit the geometry of the Roof line.
- Click .

If Add Step cannot be selected, the roof line or the floor line was previously edited.
- Select the roof line or the floor line.
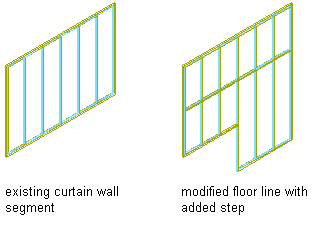
Modifying a curtain wall floor line by adding a step
A third vertex is added to the line halfway between the two ends of the line and four feet from the line. A step is created from the selected vertex to the second vertex.
- Continue editing the roof line or the floor line, if needed.
- Save or discard the changes:
If you want to … Then … restore the roof line and the floor line to their shape before editing click . 
save the changes click . 