IPR Window - Arnold for Cinema4d
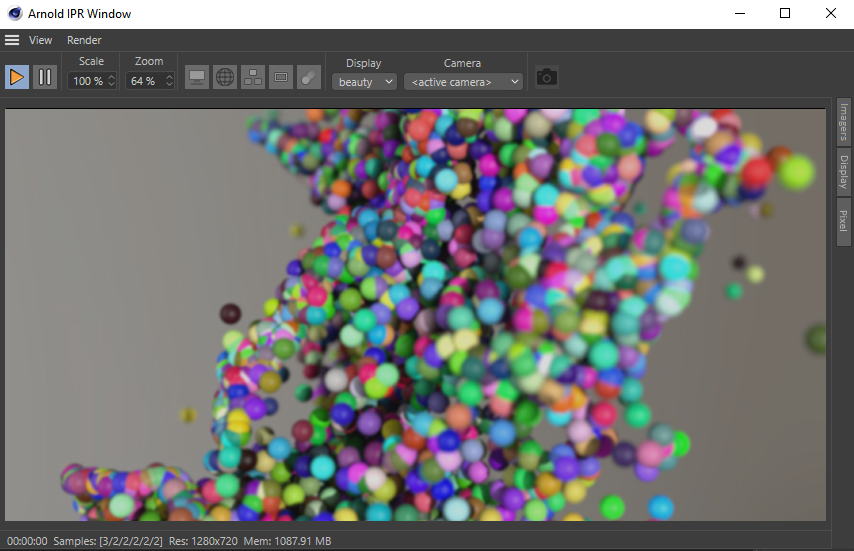
The Arnold IPR window is designed to give real-time feedback on changes made in the scene, offering a significant workflow speed-up. The Interactive Preview Render window will automatically update the render every time it detects a change in the scene (such as moving the camera, objects, or lights, or any kind of lighting or shading modification). This speeds up your workflow as it is not necessary to keep starting new renders because the IPR is constantly updating for you.
The interactive preview render uses a progressive refinement method to provide a fast response. The image is rendered several times by increasing the AA samples in each of the steps (previous steps are not reused). The render will complete when the target AA is achieved (it will output the same image as the final frame render). You can change the step settings of the progressive refinement in the Arnold render settings.
- While the IPR is running, material previews are not rendered because only one render session can be active in Arnold at the moment. If you stop the IPR, then the material previews will be updated. The last rendered preview is displayed with a small orange frame showing that the preview is delayed. The IPR will also stop if you start a render from the Picture Viewer for the same reason.
- The IPR requires the viewport (editor) window to be open. If the viewport window is closed, the IPR does not update any changes, resulting in an invalid state. This is a limitation in C4D as it stops calling the Arnold scene hook when the viewport window is closed.
- C4D's built-in IRR (Interactive Render Region) feature also works with Arnold; however, it has a lot of limitations and it's not recommended. Use this IPR window instead.
Info: Information about imagers can be found here.
Toolbar
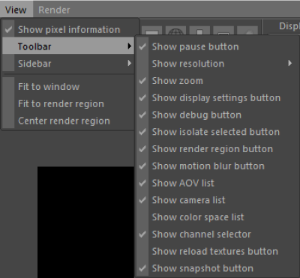
The visibility of toolbar items can be specified via the View > Toolbar menu.
Play
You can use the play  button on the toolbar to start and stop the interactive render. It's a two-state button, highlighted if the IPR session is active. Render starts automatically when the IPR window opens.
Pause
The pause  button stops updating the scene while turned on. This means, the current render still continues, but the render does not update on scene changes until unpaused. It can be useful to save time between multiple changes when individual updates take too long.
Test Render
The test render  button runs a final render on the current frame and displays the result directly in the IPR window. While running a test render, the IPR session is stopped and all features specific to an interactive session are disabled, such as render region, switching camera or color space, debug shading, isolate selected, etc.
Resolution
Defines the render resolution in the IPR window. The following resolution modes are available:
custom: Sets the render resolution to the given value, independently of the final render resolution defined in the Render Settings. Various presets are available via a pop-up menu. The current aspect ratio can also be locked.
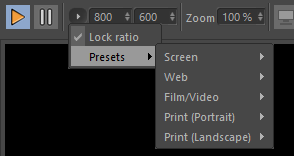
scale: Scales the final render resolution defined in the Render Settings by the given percentage. Lower resolution gives faster interactive render times without affecting your scene settings.
fit: Scales the render resolution to always fit the window, maintaining the current aspect ratio. Resolution is adjusted automatically when resizing the window.
fill: Overrides the render resolution to always fill the entire window. The original aspect ratio is not maintained. Resolution is adjusted automatically when resizing the window.
Zoom
The Zoom level of the image area. Works the same way as zoom in the Picture Viewer. You can also use the mouse wheel to zoom in or out of the image. Zoom does not affect the render time or quality of the IPR.
Imagers
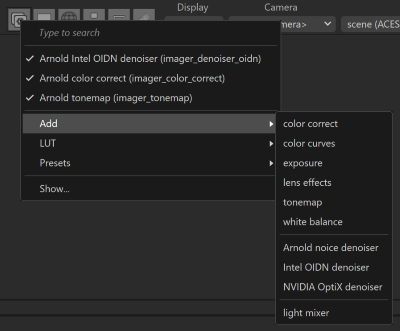
This button  enables or disables imagers in the scene. Individual imagers can be enabled or disabled via the context menu of the button (right click). The context menu also allows you to add a new imager, select a LUT file for tonemapping, and manage presets. For further editing of the imager list (e.g. change order, remove imagers, etc.), open the Post side panel or click Show... in the context menu.
Display Settings
This button  enables or disables the display settings (e.g., exposure, saturation, etc.) in the IPR window. Display settings are applied to the color corrected render output (after view transform) and affect only the IPR window (they are not applied to the PV or batch render).
Debug Shading
This button  enables or disables debug shading mode. The active debug shading mode can be defined in the Render > Debug shading menu or from the context menu of the button (right mouse button).
Isolate Selected
This button  enables or disables the isolate selected mode, which helps you to debug scenes by isolating the selected nodes in the render. The following nodes can be selected:
- Object: Renders the selected geometry only; all other geometries are rendered as a black matte.
- Light: Isolating a light disabled all other lights, and the scene is lit exclusively with the selected light.
- Material: Renders geometries with the selected material assigned, all other geometries are rendered as a black matte.
The selection can be locked from the context menu of the button (right mouse button)  , which ignores selection changes.
Render Region
Use the render region tool  to marquee select an area within the IPR window that you wish to render. You can press Shift and left mouse button to define the region. You can also use the boxes on the corners and sides of the region to define the area that you want to update, and the center box to move the region around the IPR window. The selected region in the IPR window will update as you adjust the scene. This speeds up workflow when fine-tuning areas of a scene, such as a particular shader or lighting effect.
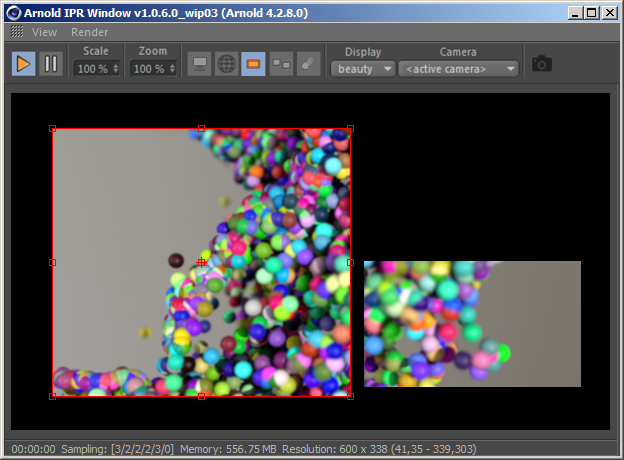
Marquee region updates only that part of the rendered image
Motion blur
This button  enables or disables the motion blur effect in the IPR when it's enabled in the scene.
Motion blur requires a full copy of the scene by every change which affects performance. That's why motion blur is ignored by default.
Auto Tx
This button  enables or disables auto tx generation in the IPR window.
Display
You can select an AOV to display in the IPR window. All available AOVs (active and inactive) are listed. Click Setup AOVs... in the menu to add AOVs to the scene.
Camera
You can select the render camera from the interactive preview. The box lists all Camera objects of the scene, along with two special items:
<active camera>: always reflects the camera selected in the viewport.<default camera>: the default C4D camera, which is active when no Camera objects are activated.
Color Space
When enabled, the Color Space combo box is visible in the toolbar, listing the available color spaces based on the active color manager (e.g., OCIO). Select the option ' scene' to use the default view color space defined in the render settings.
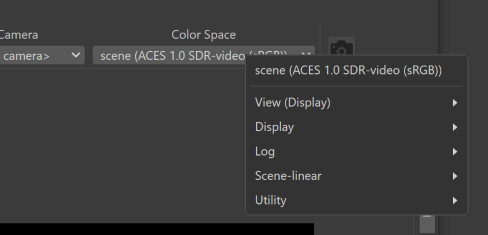
Channel
You can select which color channel to display in the IPR window (e.g,. R, G, B, etc.).
Reload Textures
This button  allows you to quickly flush the texture cache and restart the IPR when you edit a texture file.
Snapshot
Click on this button  to send the current IPR image to the Picture Viewer. Making snapshots this way allows you to compare the output of different scene settings and also enables you to save the image to the disk.
Custom information, such as render time, sampling settings, memory usage, etc., can be imprinted into the name and/or over the image via the Snapshot settings dialog (Render > Snapshot settings... or right mouse click on the button). For more details on the text overlay settings, please check the Text overlay page.
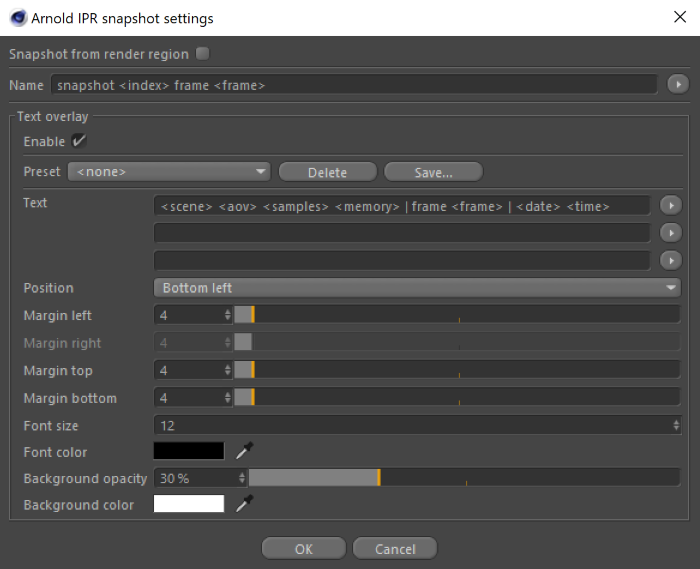
Snapshot specific tokens which can be used in the name and text overlay:
<aov>: name of the active AOV displayed in the IPR window.<index>: snapshot index (e.g. 004).
Copy
This button  copies the image displayed in the IPR window to the clipboard.
Sidebar
The sidebar holds settings of various features, such as post-processing (imagers) and display controls. The sidebar panel can be opened from the View menu or by clicking on one of the sidebar tabs. The location of the sidebar (top, bottom, left, right) can be configured from the View menu.
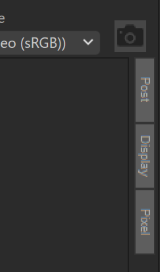
Post (Imagers)
The post-processing panel allows you to manage the imagers of the scene. See the Post Processing (Imagers) for more details.
Display
The display settings panel allows you to adjust the displayed image by applying color correction settings or displaying composition helper overlays. See the Display Settings page for more details.
Pixel Information
The pixel information panel displayed detailed color information of the pixel under the mouse pointer. See the Pixel Information page for more details.
Menu bar
View menu
Show Pixel Information
Displays the coordinates and color of the pixel under the mouse pointer in the status bar. 32-bit RGB values in render color space and 8-bit RGB values in view color space are displayed.
You can sample a 5x5 pixel area under the mouse when pressing the Ctrl/Cmd key.

Toolbar
Defines visibility of the items on the toolbar (see above).
Sidebar
Defines the location of the sidebar and the active sidebar panel (see above).
Fit to Window
Updates the zoom to fit the image to the window.
Fit to Render Region
Moves the render region to the center and updates the zoom to fit the window.
Center Bitmap
Moves the image to the center of the window.
Center Render Region
Moves the render region to the center of the window.
Clear Bitmap
Clears the bitmap and displays a black image.
Render menu
Render All AOVs
When enabled, all selected AOVs are rendered at once, which means the IPR does not restart when you change the displayed AOV. It could be useful for debugging complex scenes where you have to change between AOVs frequently.
Rendering all AOVs affects performance, and it's recommended to disable that by default.
Debug Shading
Overrides shading in the scene with the selected utility shader for debugging purposes. Debug shaders are presets stored in the Asset Browser. You can add custom debug shader presets to the Arnold > Shaders > debug folder, and they will be listed in the Debug Shading menu.
Isolate Selected
Isolates the selected objects, lights, and materials in the render if enabled.
Copy to Render Settings
Copy debug shader settings to Render Settings > Diagnostics > Feature overrides > Shader override used in final render (Render to Picture Viewer).
Snapshot Settings
Opens the Snapshot settings dialog, where name and text overlay settings can be configured. See the Snapshot section above.
Copy Region to Render Settings
When you enable Render Region in the IPR and click on 'Copy region to render settings', then the region (left, right, top, bottom) is set as the render region in the Render Settings window. This enables you to transfer the same region render dimensions to the Picture Viewer window.
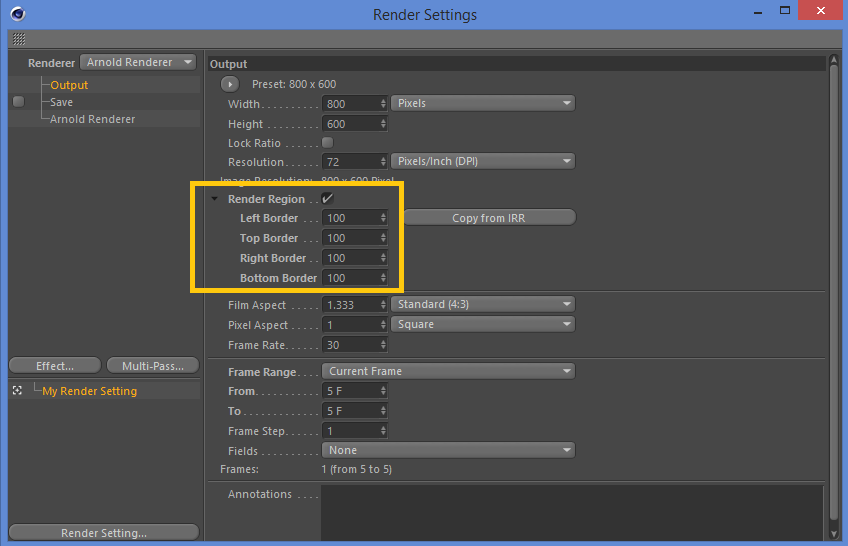
Region render dimension setting copied to Render Settings window
Anamorphic Workflow
When enabled, the IPR window shows the de-squeezed image, allowing you to work on the original pixel aspect.
Render to Viewport
Display the render on top of the viewport instead of the IPR window.
Auto Start When Window Opens
If enabled, the IPR starts automatically when the window opens (e.g., open from the Arnold plugin menu).
Status Bar

The status bar provides information about the actual render and output. (Rendering...) label is displayed at the beginning of the status bar message while the interactive render is running. The following information about the render is presented in the following order:
- Debug shading mode if enabled.
- Render time.
- Camera/Diffuse/Specular/Refraction/SSS/Volume indirect sampling rates. Check the Sampling page for more info.
- Memory usage of the IPR process.
- Resolution of the render.
- Region dimensions if region render is enabled.
- Pixel information when enabled.
Camera Controls
Camera controls are available in the IPR window, similar to the viewport:
- Alt + LMB + move: Rotates the camera.
- Alt + MMB + move: Moves the camera.
- Alt + RMB + move: Moves the camera closer/farther (zoom in / out).
- Alt + scroll: Moves the camera closer/farther with a unit (200 cm).
Alternatively, you can use 1,2,3 + LMB as well, similar to the viewport.
Controls are working only if the IPR is active.
In the viewport, zooming (scaling) moves the camera towards the object under the mouse cursor and speed depends on the distance from this object. In the IPR window, zooming (scaling) always moves the camera forward and with the same speed, independently of the mouse cursor.
Shortcuts
Available keyboard shortcuts in the IPR window:
- Alt + W and C: Moves the image to the center of the window.
- Alt + W and F: Updates the zoom to fit the image to the window.
- Alt + W and G: Moves the render region to the center and updates the zoom to fit the window.
- Alt + W and H: Updates the scrollbar and moves the render region to the center of the window.
- Alt + W and P: Pause the IPR.
- Alt + W and R: Start/stop the IPR. Opens the IPR window when it's not visible.
- Alt + W and S: Take a snapshot to the Picture Viewer.
- Alt + W and T: Run test render.
- Alt + W and Y: Enable / disable region render.
- Alt + W and V: Redirect render to the viewport.
Shortcuts can be changed in the Window > Customization > Customize Commands... menu.
Other built-in shortcuts:
- Ctrl + C: Copy image to clipboard.
- Shift + LMB + drag: Select an area within the IPR window that you wish to render.
- Ctrl + LMB: Select the object under the mouse.
- Ctrl + Shift + LMB: Adds/removes the object under the mouse to/from the selection.
- Ctrl + Alt + LMB: Pick focus distance in the IPR window. If you have a camera with depth of field enabled, you can simply change the focus by clicking on an object in the image.
Context Menu
A context menu is displayed in the IPR window when you right-click on an object.
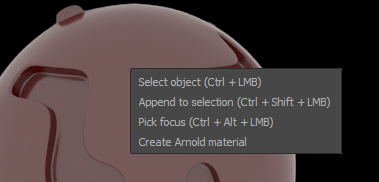
- Select object: Select the object under the mouse.
- Append to selection / Remove from selection: Adds/removes the object under the mouse to/from the selection.
- Pick focus: Pick focus distance in the IPR window. If you have a camera with depth of field enabled, you can simply change the focus by clicking on an object in the image.
- Create Arnold material: Create a new Arnold Shader Network material in the scene and assign it to the object under the mouse.
- Copy: Copy image to clipboard.
- Center Bitmap: Move image to the center of the window.
Info: You can drag & drop a material onto an object rendered in the IPR window.
