
Budget Settings
Project administrators can access the settings for Cost Management from the Settings tool in the left navigation. This article focuses on the Budget settings:
- Budget Code Format
- Budget Name Format
- Budget Overview Columns
- Lock the Budget
- Allow Internal Budget Transfer
- Schedule Budget Snapshots
- Budget Forecast
- Date Range Based Resources
- Main Contract Schedule of Values
- Main Contract Types
- Budget Payment Application Approval Workflows
- Document Templates
- Dates for Main Contract and Budget Payment Application
- Custom Attributes
- Default Email Message
Budget Code Format
Create your budget code format by following the guidelines in the Budget Code Setup article. Define the budget code segments before importing a budget into Cost Management.
See the Budget Code Setup article to learn how to:
- Set up budget code segments
- Download a budget template and import a budget
- Work with the segment code master list by adding, editing, and locking segment values
Budget Name Format
Select one or more budget segment descriptions as the default name of new budgets.
When you rename budget segments, delete them, or change the order in the Budget Code Segments setting, the default names will also change.
Budget Overview Columns
Project administrators can manage the name, group, and order of existing columns. They can also create custom columns based on project values or other columns.
To manage existing columns and create custom calculated budget columns, click Manage.
To change where existing columns appear (group and position), rename them and control which appear by default. Select the column name and choose the desired option beneath the list view.

To learn more about managing custom columns, see the Create Custom Columns article.
Lock the Budget
Once the original budget setup is finalized, select the Lock Budget button to lock it.
After a budget is locked, the quantities, units, unit costs, and ratios of the forecast are also locked. However, with the Forecast tool, you can still:
- Edit the start and end dates
- Create or delete forecast distributions
- Link schedule tasks to the budget
- Calculate ratios
Allow Internal Budget Transfer
Enable this setting to allow team members to perform internal budget transfers from the budget summary view.
Toggle on Approval Workflow to create a workflow for budget transferring. Learn more about setting up Approval Workflows.
Learn more about internal budget transfers which you can do in the Budget tool, from forecast adjustments, or in the Change Order tool for PCOs and SCOs.
Schedule Budget Snapshots
Set up automatic snapshots to capture budget data at regular intervals. You can configure the frequency, day, time, and duration for which snapshots should be taken:
- Choose between weekly or monthly snapshots.
- Specify the day of the week for weekly snapshots. For monthly schedules, snapshots occur only once per month.
- For monthly schedules, define the specific instance of the day within the month (for example, first, second, or last). The default value is first. For example, selecting second Tuesday schedules the snapshot for the second Tuesday of each month.

When configuring snapshots, you’ll receive an estimate of how many snapshots will be generated within the specified time frame.
To delete a schedule, click Edit schedule, and then select Remove schedule.
Snapshots are accessible in the Budget tool, where you can filter between manually and automatically created snapshots. Learn more about Budget Snapshots.
Budget Forecast
Budget forecast allows you to forecast both revenue and costs, providing visibility into projected fees by calculating the difference between forecasted budget revenue and forecasted costs. This enables general contractors to manage scenarios where time-related resources may change (such as increased hours) without exceeding the Guaranteed Maximum Price (GMP), requiring either change order transfers or internal budget transfers.
Turn on to show budget forecast columns and allow budget forecast adjustments. Recommended when using a cost plus main contract.
If the toggle is on:
Columns Billed To Date, Budget Forecast Adjustments, Forecast Budget To Complete, and Forecast Final Budget are visible by default in the budget overview.
Budget forecast adjustment columns Qty, Unit, Unit Cost, and Amount are visible by default in the budget overview and forecast adjustment bottom flyout.

Budget forecast columns in date range resources are visible by default. See Date Range Based Resources to learn how to configure the frequency settings.
You can generate a PCO from budget and forecast adjustments and make budget transfers.

Related articles:
Date Range Based Resources
If budget forecast is on, you can configure the billing and actual cost frequency so that Qty Elapsed updates on the same schedule. If the revenue forecast is off, there is an option to configure the actual cost frequency only. In both scenarios, this setting cannot be changed once any date range based resource has been distributed in cash flow.
- Set frequency to monthly or weekly. Monthly is the default one.
- Set offset to a number from 0 to 99. 0 is the default value.
Qty Elapsed represents the count of completed periods (weeks or months) based on your frequency settings. The system determines this by:
Calculating the arrival date for each period based on your settings:
- Monthly frequency: Last calendar day of the month + offset workdays
- Weekly frequency: Last workday of the week + offset workdays
Counting completed periods: If the current date is on or after the arrival date for a period, that period counts toward the Qty Elapsed total.
Respecting workday settings: The calculation follows your project's defined workdays.
| Offset = 0 | Offset > 0 | |
|---|---|---|
| Monthly frequency | Qty Elapsed for budget or cost forecast updates monthly, on the last calendar day of the month | Qty Elapsed for budget or cost forecast updates monthly, {Offset} workdays after the last calendar day of each month |
| Weekly frequency | Qty Elapsed for budget or cost forecast updates weekly, on the last workday of the week | Qty Elapsed for budget or cost forecast updates weekly, {Offset} workdays after the last workday of each week |
In the budget bottom flyout, the Billing Frequency and Actual Cost Frequency columns indicate the frequency settings. All resources will share the same frequency configuration.
See Date Range Based Forecasting to learn how to use these settings to create and manage date range resources.
Main Contract Schedule of Values
Show change orders in the main contract as line items or a column. Individuals can toggle this view in the main contract, but this selection sets the default view. See the Main Contract article for more information.
You can toggle this view for:
- The Main Contract tab
- The Budget Payment Application tab
To do so:
- Expand the Main Contract Schedule of Values section.
- Select As Line Items or As a Column using the radio button.
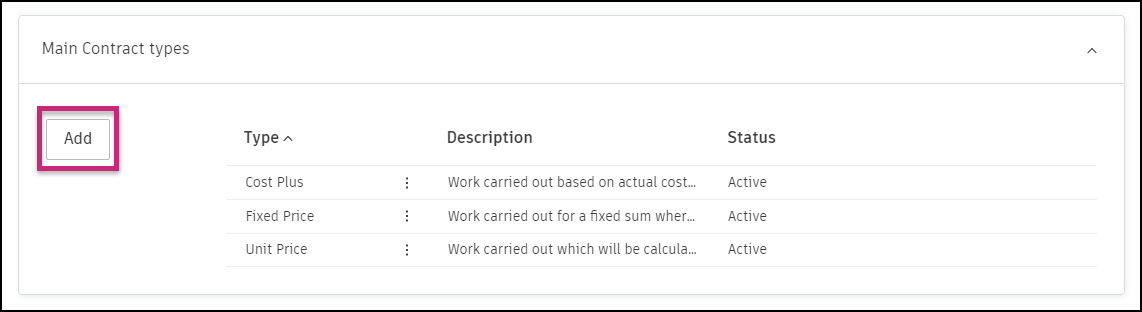
Main Contract Types
A main contract is the primary contractual agreement entered into directly, for example, between an owner and a main contractor. When creating a new main contract, you can choose your main contract type from the predefined options or add one in the settings to fit your company's needs.
Choose from the presented options:
- Cost Plus - Work carried out based on actual cost plus additions such as overheads and profit.
- Fixed Price - Work carried out for a fixed sum where actual costs incurred may differ from the incoming value paid. If you choose this option, markup cost item values will be spread over normal cost items in approved owner changes. Learn more about spreading markup budget values. When this option is selected as the main contract type, any additional costs added to change orders will be hidden from the client. For example, if a 10% markup is added to a $10,000 concrete works change item, the client will only see the final cost of $11,000 on their invoice.
- Unit Price - Work carried out which will be calculated based on detailed measurement of task progress.
To add a main contract type, click Add in the upper left corner of the Main Contract Types.
To assign a contract type to a line item by a drop-down list:
Go to the Budget tool.
Switch to the Main Contract tab.
Enter edit mode by clicking
 .
. 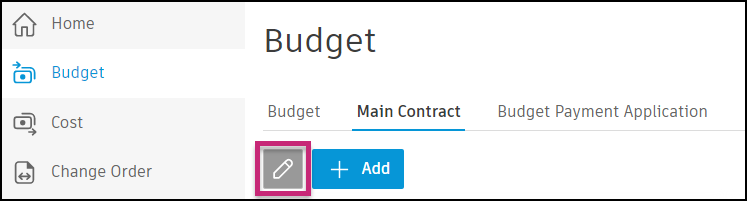
Choose the contract type in the Type column.
To learn how to create a contract, see the Work with Contracts article.
Budget Payment Application Approval Workflows
Project administrators can create custom approval workflows for budget payment applications. This allows you to automate the routing of documents for internal review and keep the consistency and transparency of company-defined processes across projects. Learn more about approval workflows.
Document Templates
Create standard main contract and budget payment application template formats using fields that automatically populate with data. See the Document Templates in Cost Management article for more information.
Dates for Main Contract and Budget Payment Application
You can define a default value for dates and choose to have them displayed on the home page. This will help you manage the schedule in Cost Management. To do so, open the More menu  and click Edit.
can't be displayed on the home page and can't be edited.If applicable, you can choose the default value for the date. Use the relative date option for cases where an activity is relative to the date of another activity (for example, creating a procurement schedule). The relative date option is only available for editable system-generated dates and custom dates.
Available document variable examples are shown by clicking Show More. You can use those to prepare a document template.

Custom Attributes
Create custom attributes for the details panels within budget items, main contract items, and budget payment applications in Cost Management. See Create Custom Attributes for more information.
Default Email Message
Customize the default email message for budget payment applications submitted for review.