
Billing Periods
Once your budget and main contracts are ready, you need to set up the master schedule and billing periods. These schedules define the frequency of payments to subcontractors and from the owner.
In this article:
Create Billing Periods
Billing periods must be created for payment applications.
You can set up billing periods for:
- Budget payment applications from the main contract's details panel or within the Budget Payment Application tab
- Cost payment applications in the Cost Payment Application tab
The master schedule is the billing periods agreed to in the main contract, which you can then inherit to the subcontract billing periods. The first schedule must be created from scratch. Other schedules can be copied from existing contracts.
Create Billing Periods from the Main Contract Tab
To set up your billing periods for the main contract from the Main Contract tab:
Select the Budget tool from the left navigation.
Select the Main Contract tab.
Click the name of the main contract to open the details panel.
Click Manage in the Master Schedule section.
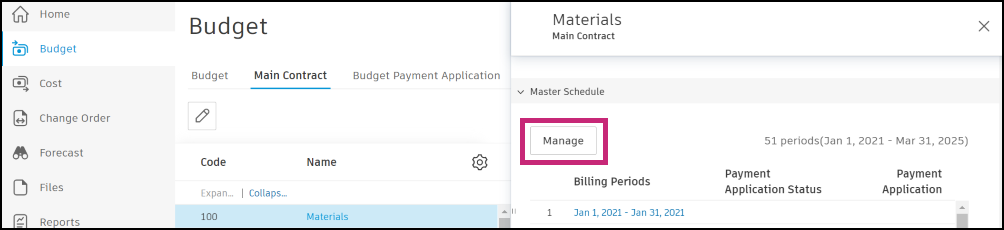
Now follow the steps in the Add New Billing Periods section.
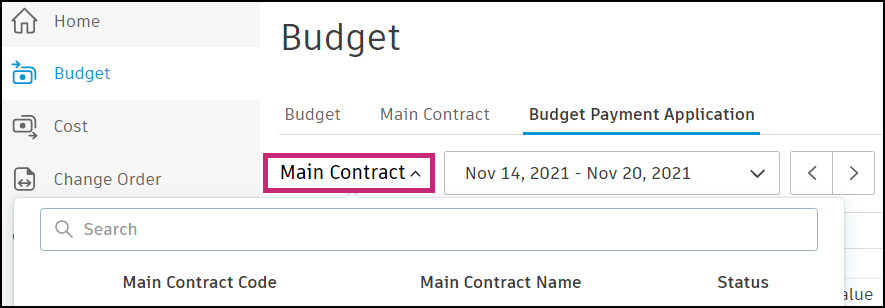
Create Billing Periods from the Budget Payment Application Tab
To set up your billing periods for the main contract from the Budget Payment Application tab:
Select the Budget tool from the left navigation.
Select the Budget Payment Application tab.
Select the relevant main contract from the drop-down list.
Click the date drop-down list and select Manage Master Schedule.
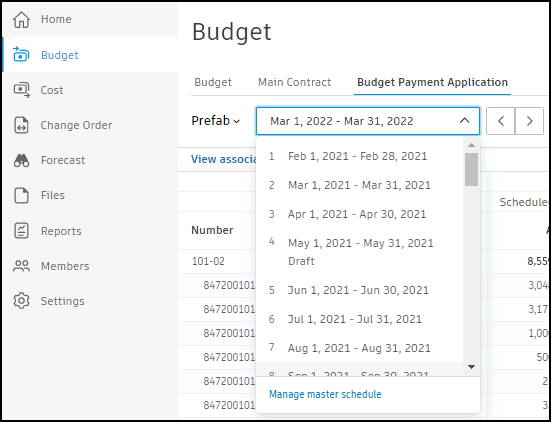
Now follow the steps in the Add New Billing Periods section.
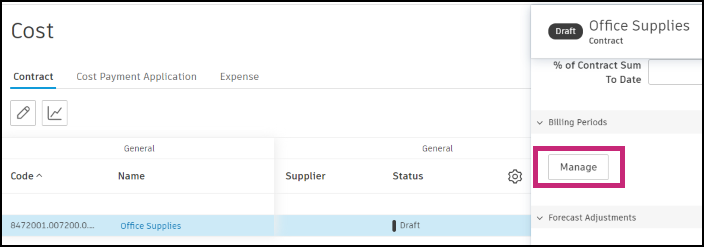
Create Billing Periods from the Cost Payment Application Tab
To set up your billing periods for subcontracts from the Cost Payment Application:
Select the Cost tool from the left navigation.
Select the Cost Payment Application tab.
Hover over the relevant main contract from the list.
Click Open Details View.

Click the date drop-down list and select Manage Billing Periods.

Now follow the steps in the Add New Billing Periods section.
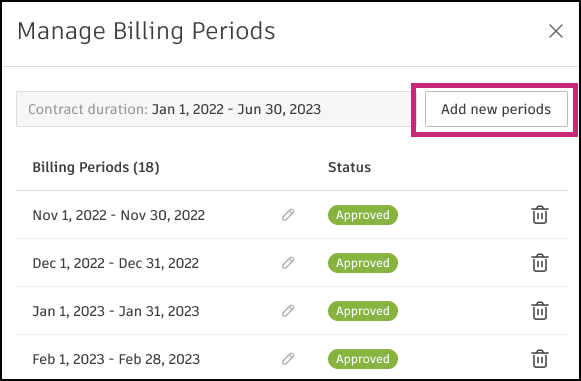
Add New Billing Periods
You can either copy billing periods from another main contract using the drop-down list or manually create periods.
To create periods:
Click Add New Periods.
Choose a start date and end date.
Select a frequency for the periods using the divide drop-down list:
- Weekly
- Bimonthly
- Monthly
- Do not divide
Click Done. The new period is now visible on the list.
Choose a payment application due date:
- After Start Date
- Before End Date
- After End Date
Note: This will only take effect on new payment applications.Click Save.
Modify Billing Periods
After you create billing periods, you may want to modify them for several reasons. For example, the terms of the contract have changed, you want to change the invoice generation date, or you want to change the billing cycle start and end dates.
Within the billing periods management panel, you can:
- Delete individual billing periods using the trash can icon
 .
. - Add new periods with the button in the upper right corner. See the Add New Billing Periods section to learn how to do that.
- Set a due date applicable for all new payment applications.
- Delete all billing periods to start over.
The billing periods management panel can be opened from the:
Main Contract tab. In this view, you can also see payment application statuses and amounts for each period.
Budget Payment Application tab. See this section to find more information.
Cost Payment Application tab. See this section to find more information.
Billing Periods section in the Contract tab. In this view, you can also see payment application statuses and amounts for each period.
Next Steps
After creating billing periods, you can create budget and cost payment applications.