
Reporting and Diagnostic Logs
- How to Collect Diagnostic Logs Video Tutorial
- About Diagnostic Logs
- Generating Diagnostic Logs Workflow
- Configure the Diagnostic Mode
- Create the Diagnostic Logs
- Submit the Diagnostic Logs
- Collecting the Diagnostic Logs Manually
- Collecting and Viewing Sync Data
How to Collect Diagnostic Logs Video Tutorial
About Diagnostic Logs
Diagnostic logs are helpful for analyzing any unexpected behavior of Desktop Connector. For example, logs are helpful if the Desktop Connector sync engine stops working on a specific file, folder, or both.
Generating Diagnostic Logs Workflow
To generate diagnostic logs, the general workflow is as follows:
- Turn on verbose logging by Configuring Diagnostic Mode.
- Run the workflow, then before shutting down Desktop Connector Create the Diagnostic Logs.
- Copy the ZIP file and Submit the Diagnostic Logs to Autodesk Support.
Use this document as a guide to collect Diagnostic Logs by following each topic and the steps as shown.
Configure the Diagnostic Mode
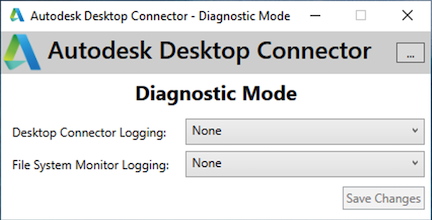
Start and configure the Diagnostics Mode before creating log files and use the Verbose logging option to gather detailed error reports:
Right-click the
 tray icon.
Hold the Shift key and click the gear in the top right of the home screen.
Select Help and then select Diagnostics Mode
Select Verbose in both drop-down menus.
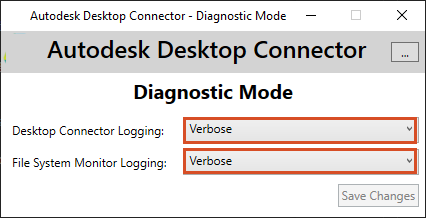
Click Save Changes
Close the window by selecting the x in the upper right corner.
Create the Diagnostic Logs
Click the Desktop Connector
tray icon. If you right-click the tray icon the dialog box will appear and you can move directly to step 3.Click the Gear
 in the top right of the home screen.
Select Help.
Select Diagnostics Logs.
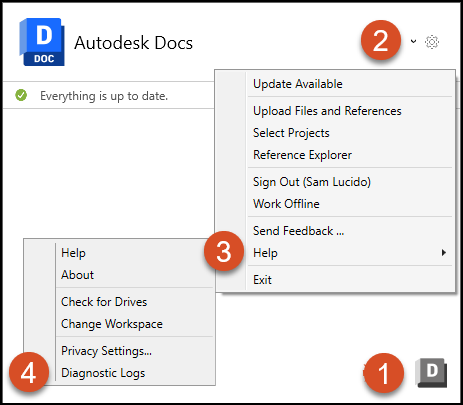
- Desktop Connector will start collecting recent log files.
- The Diagnostic Log Files dialog opens.
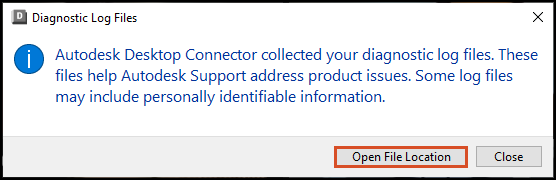
Click Open File Location to access your logs.
Submit the Diagnostic Logs
The default path for storing log data is:
C:\Users\<username>\AppData\Local\Autodesk\Desktop Connector Diagnostics.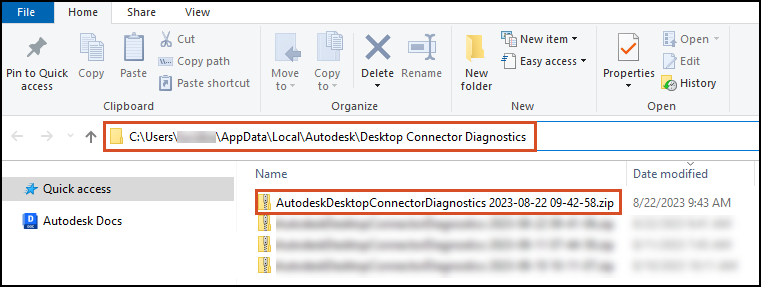
You can then take the compressed ZIP file and contact Autodesk Support to log a ticket and troubleshoot the issue.
Follow the Configure the Diagnostic Mode steps again to turn off verbose logging. This time, choose "none" in both drop-down menus instead of "verbose" to save space on your computer.
Collecting the Diagnostic Logs Manually
If Desktop Connector doesn't start or crashes at start, the Diagnostic Logs can be captured manually.
- Navigate to
C:\Program Files\Autodesk\Desktop Connector and run the file ADriveDiagnosticsMode.exe. - Choose Verbose on both drop-down menus, save the changes, and close the dialog box.
- Restart Desktop Connector until it crashes or nothing happens.
- Navigate to
C:\Program Files\Autodesk\Desktop Connector\DiagnosticLogsCollector and run the file DiagnosticLogsCollector.exe. - A ZIP file will be created in
C:\Users\<username>\AppData\Local\Autodesk\Desktop Connector Diagnostics. - Copy the ZIP file and Submit the Diagnostic Logs to Autodesk Support.
- Redo the first step and set the Diagnostics mode back to "None" to save space on your computer and for better performance.
Collecting and Viewing Sync Data
Starting with version 16.4 of Desktop Connector, the Diagnostic Log collector will also gather a list of files and folders which have not yet been synced. You can view the synced data by following these steps.
Sync data for files and folders will now be a part of the log ZIP file found here:
C:\Users\<username>\AppData\Local\Autodesk\Desktop Connector Diagnostics\AutodeskDesktopConnectorDiagnostics 2023-xx-xx.zip\UnSyncFileInfo\UnSyncDataInfo.The file or folder contains a list of
unsyncedfiles that are pending sync and should attempt to sync. If the file does not attempt to sync you may need to Reset Desktop Connector.The file contains a list of
excludedfiles which are files that will not attempt to sync. This could be files that have been added while Desktop Connector was not running, or files that Desktop Connector is filtering out from uploading (possibly not supported by the server). If files are added while Desktop Connector is not running they will not sync, you will need to readd that file while Desktop Connector is running.With v16.6 of Desktop Connector we now will also collect data for unsynced folders. That data can be found in the same folder location within the zip file named
UnSyncDataInfo. Then under the file namedUnSyncFolderData.txt.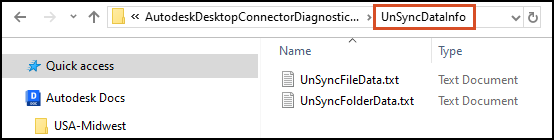 Note: The following is an example of the
UnSyncFileData.txtfile and theUnSyncFolderData.txtshowing no unsynced files or folders. Both text files are found within the same location.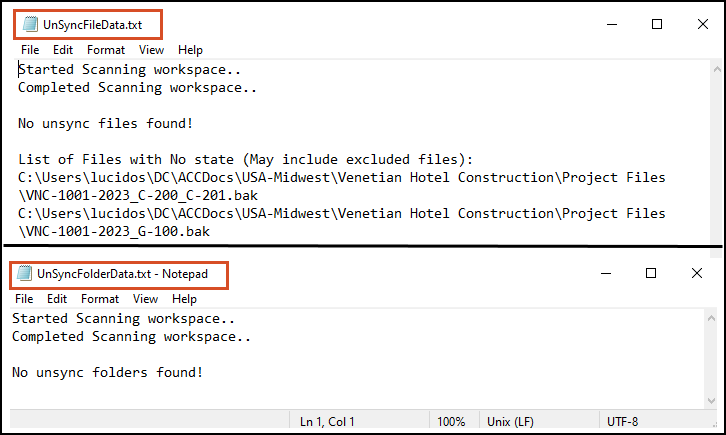
Related Concepts: