
Issue:
When taking off items in Fabrication products, specific dimensions and settings should be set to a default value. Manual editing is required for each item.
Also, while taking off Fabrication items in Revit, the dimensions are either invalid or are locked and needs to be changed as per the requirements.
How to configure Fabrication to lock/set items-specific options to default values?
Solution:
To set default settings for a pattern:
Go to the Item Folders:
In CAMduct or ESTmep, click "Item Folders".
In CADmep, enter FOLDERS.
Browse to the item to edit.
Right-click the Item you need to edit > Edit:
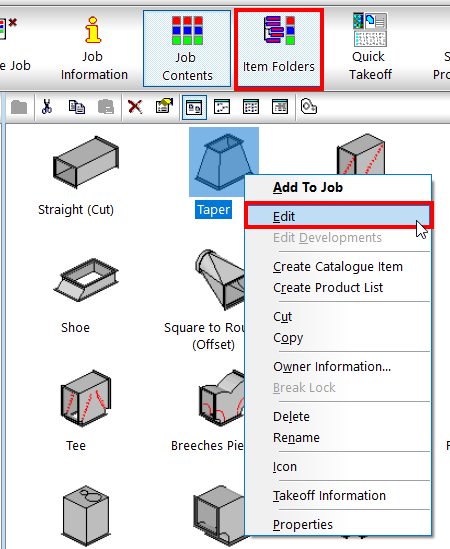
Edit the dimensions and other options as desired.
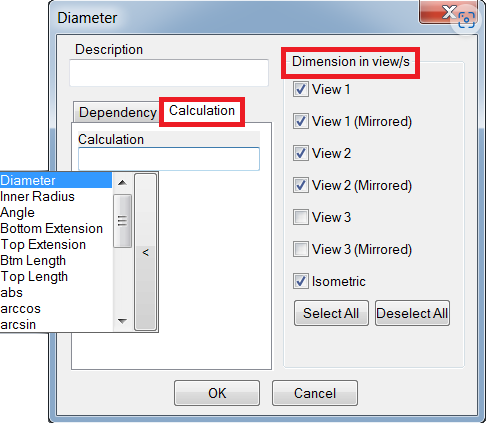
Eventually, additional functions can be added to the calculated dimensions, and also the dimension in View(s) can be set from here.
Optionally lock the values that have been changed, for instance:
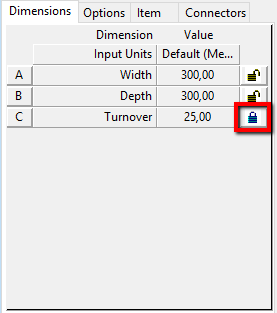
This will prevent entering invalid values.
Click Accept to apply the changes.
Note: Specifications and Material fields are gray-out in CAMduct while editing the item.
In this case, the Specification defaults and therefore the Material have to be set in the database:
Click File > Setup > Database.
Click Takeoff
Click "Current Specs":

In the "Change Specification(s)" dialog, set the required Specifications for each item type:
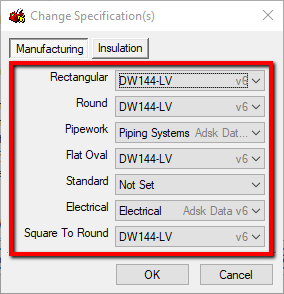
Click OK to close the dialog.
Click OK to close the Database.