Publishing tutorial: Creating a Noisy Circle node
Introduction: What is publishing?
Publishing in LookdevX is the ability to create custom nodes based upon a compound's interface and implementation. This is useful when you want to reuse a group of nodes either in the same scene or a different one. It can also be useful to share such custom nodes with other people. In this tutorial, you will learn how to publish a "Noisy Circle" shader, built from existing nodes in the standard library.
Node reuse
When working with LookdevX, users frequently want to reuse groups of nodes either in other projects or elsewhere in the same project. For example, if a user wanted to create a "Noisy Circle", they could connect a Noisy UV node to the Circle node and change its center and radius per the clip below:
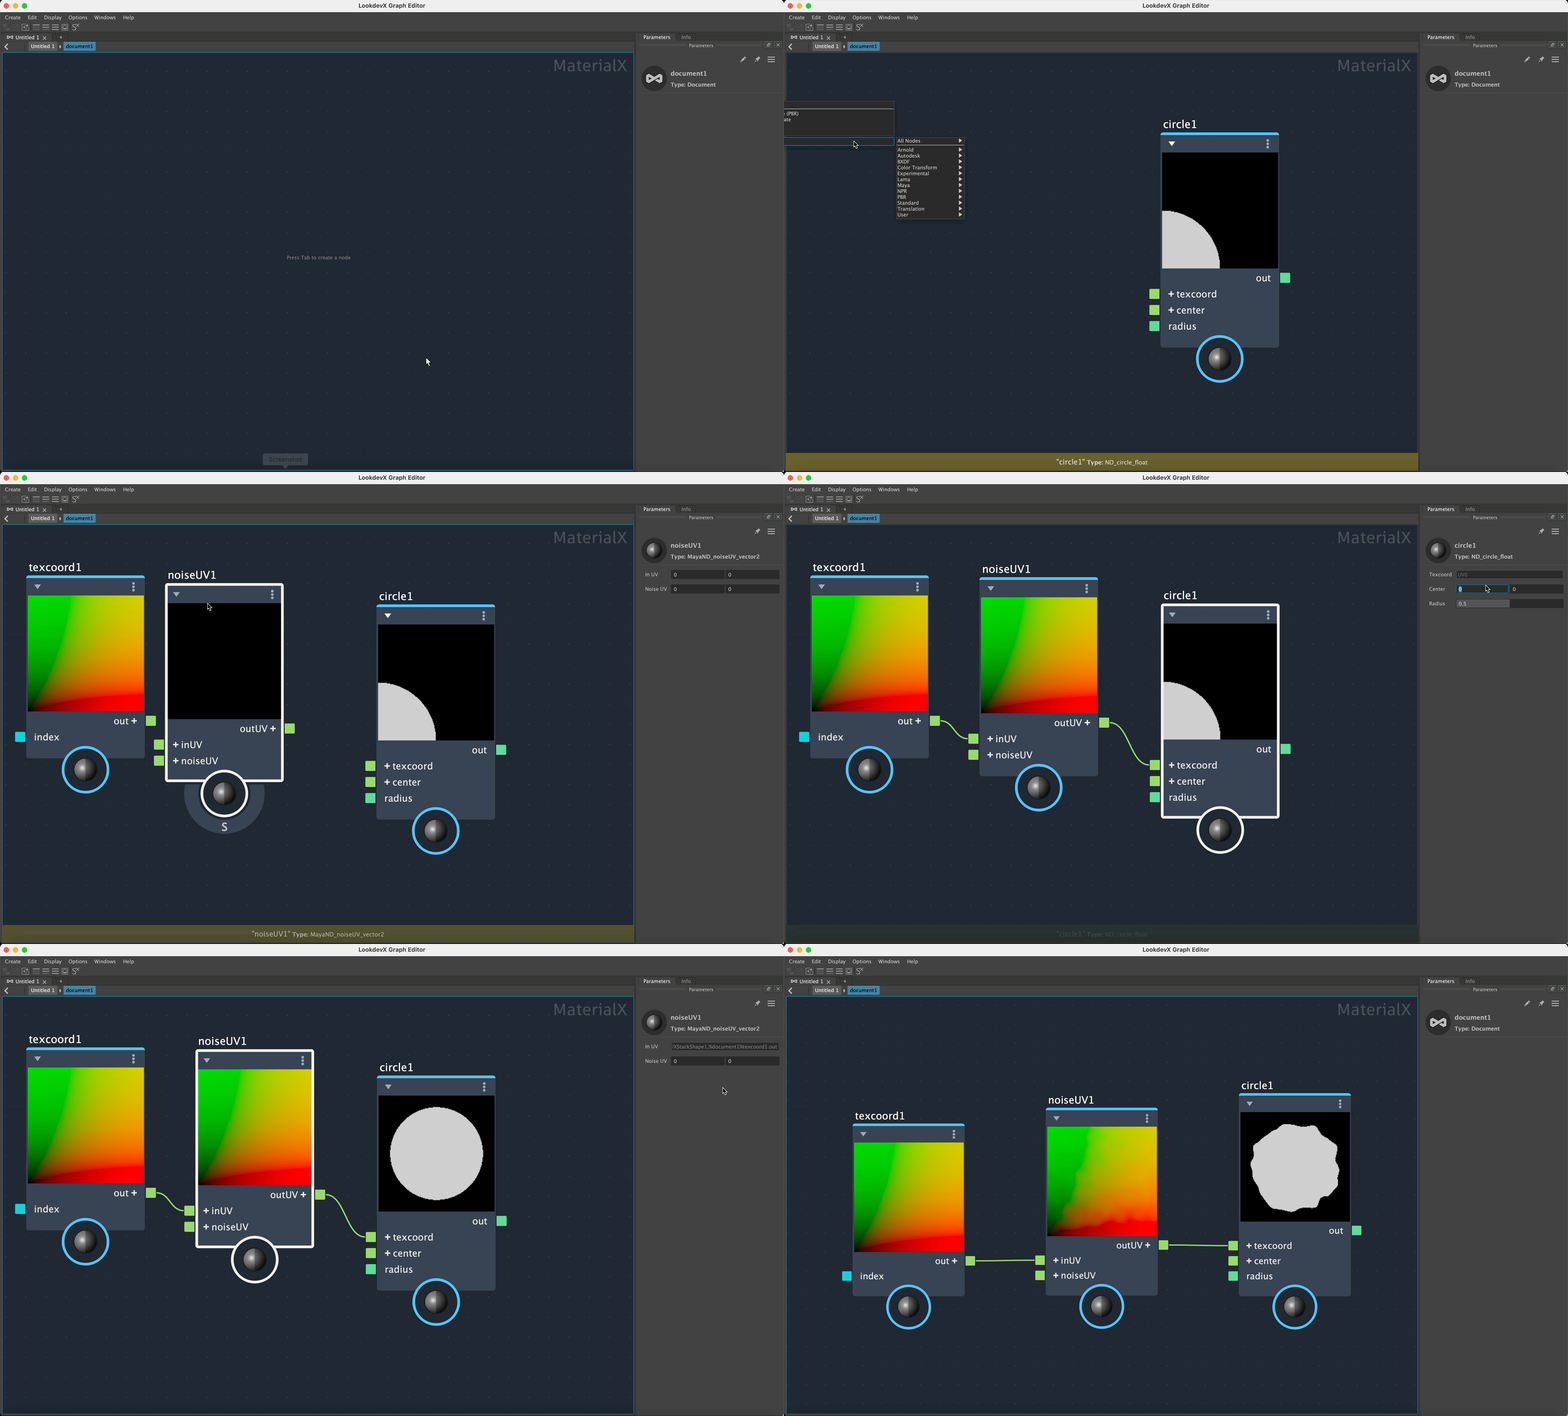
This works well when they only want to use this functionality a single time. But what happens if they want to reuse this functionality? That's where the concept of publishing comes into play. Publishing lets users create a new custom node from a compound. Users can then create instances of this custom node just like any other node in LookdevX.
Tutorial
1. Starting point
You can publish a new custom node from any compound in your graph. However, creating everything from scratch can be tedious, especially if the goal is to create a custom node that behaves similar to an already existing node, as in the case with this "Noisy Circle" example: The desired behavior is similar to the Circle node from the standard library.
Compounds themselves implement a lot of nodes in the standard library. Thus, the implementation of the circle node is used as a starting point for the new custom "Noisy Circle". To do so, per the clip below, create a circle node and use "Make Editable". This creates a compound containing an editable copy of the circle's implementation.
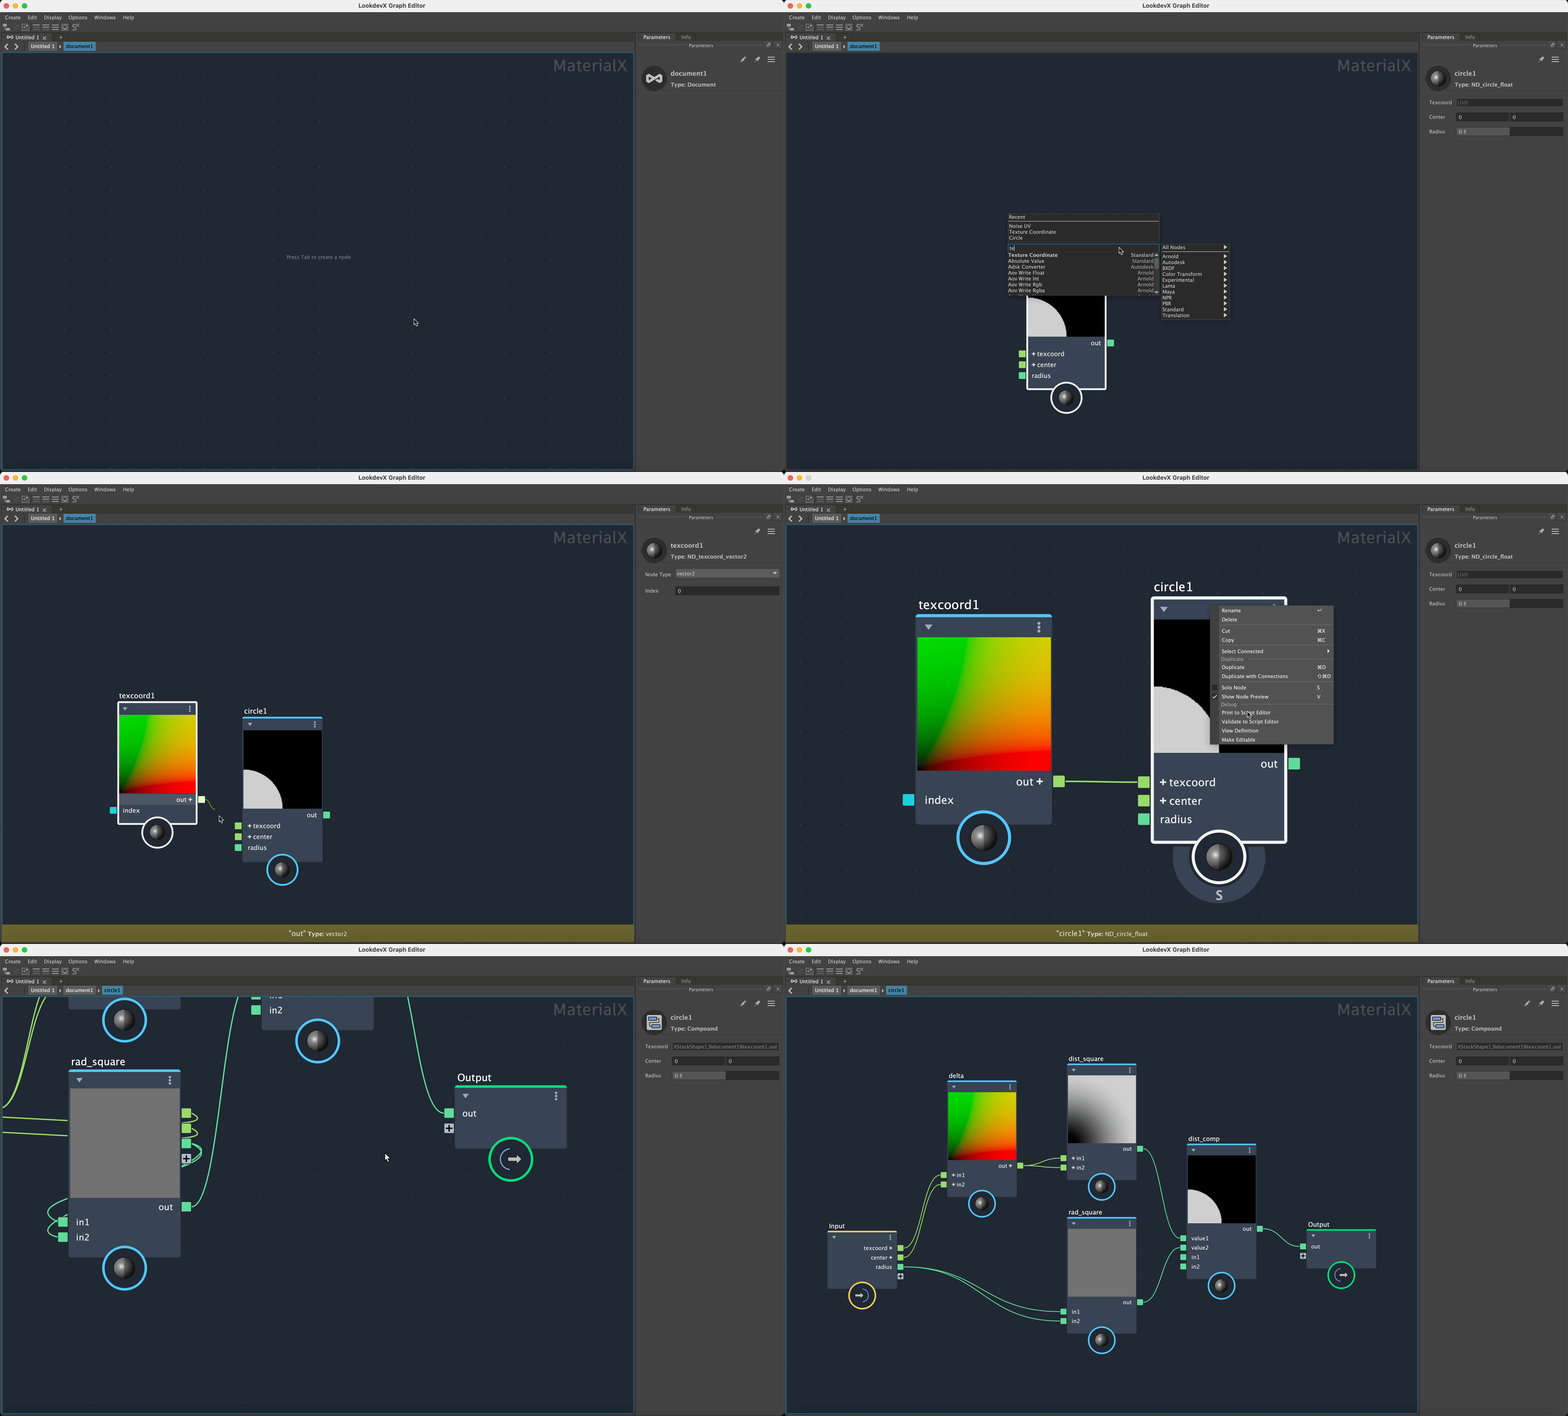
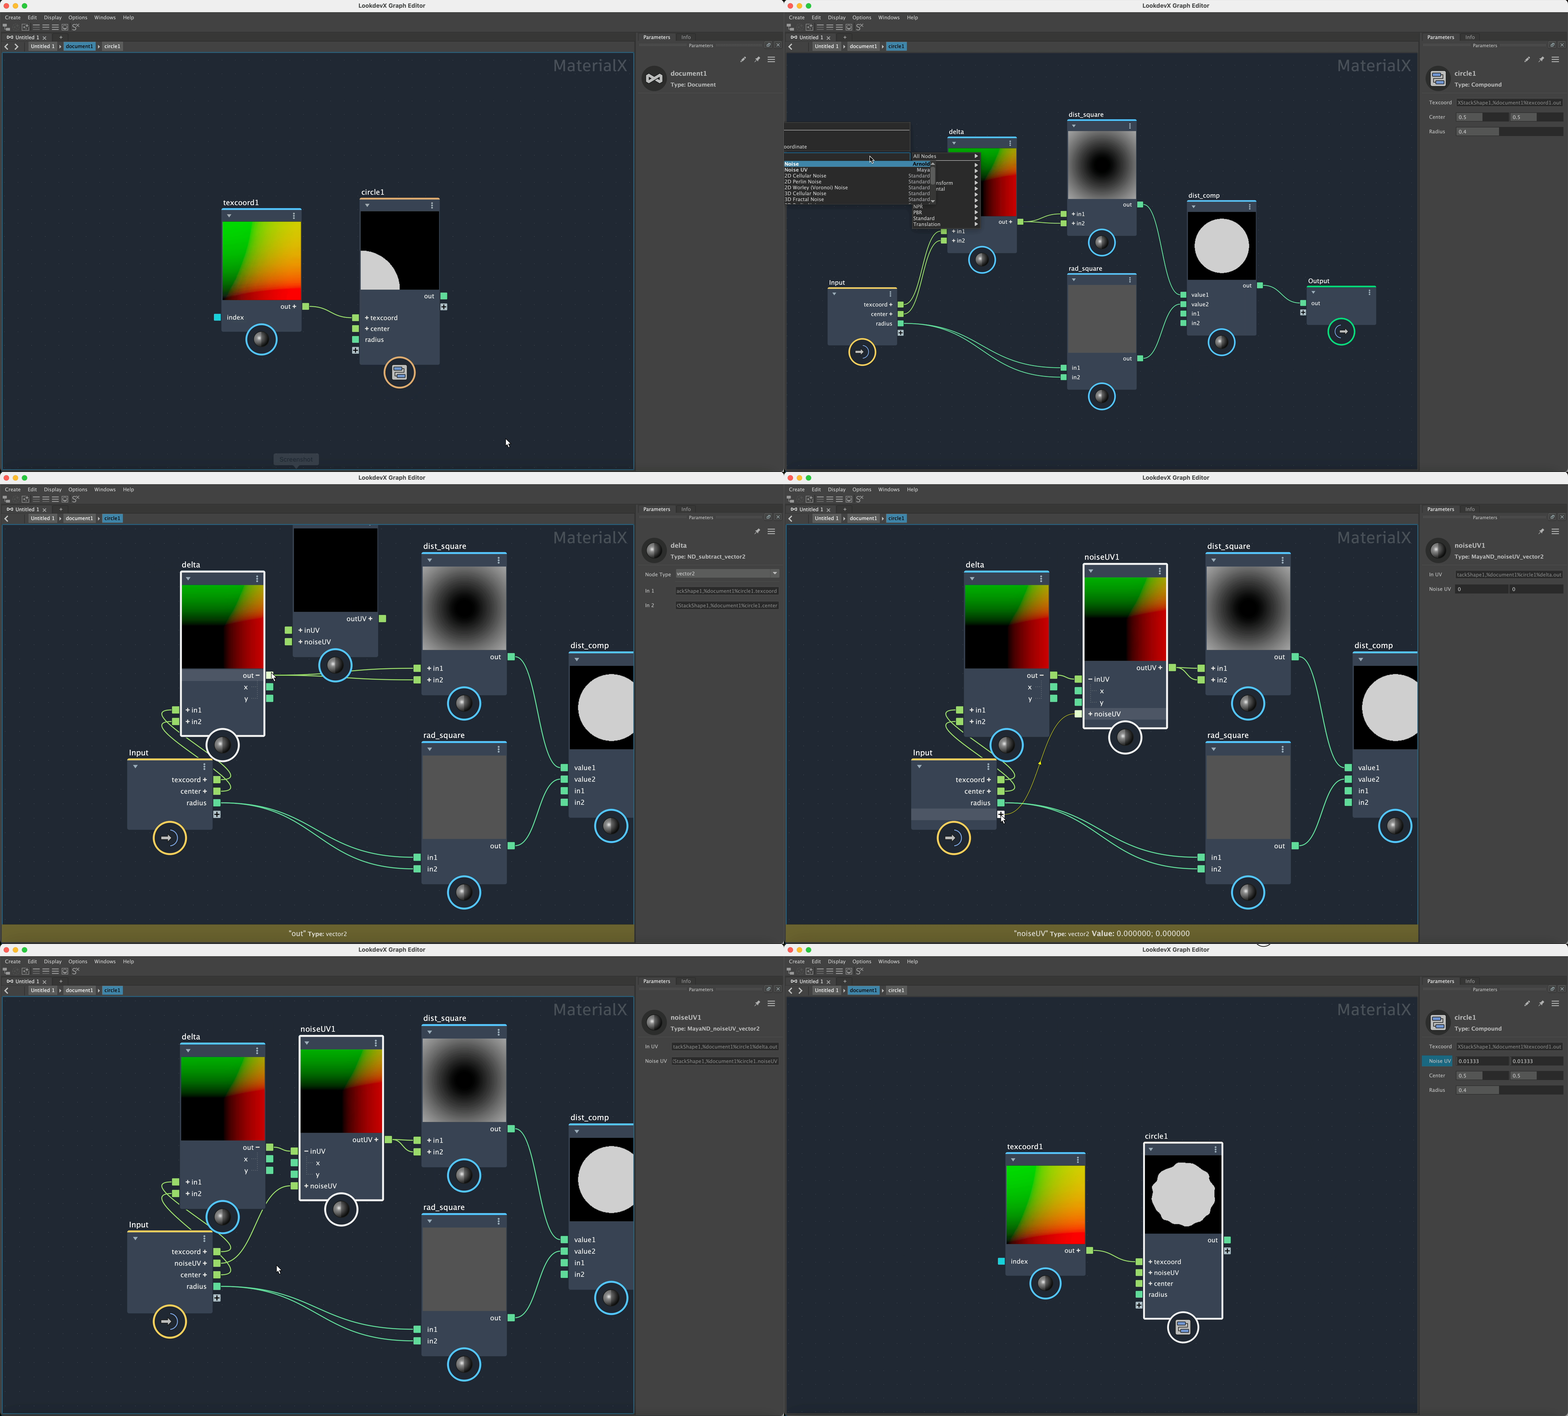
Now that we have an implementation of a basic circle, we can modify it to obtain a "Noisy Circle". First, we'll center the circle at UV (0.5, 0.5), second we'll change the radius of the circle. The values we set on the compound interface will become the default values of the custom node once we publish the compound.
Next, we'll add a Noisy UV node to add noise to the circle. To make the noise controllable promote the noiseUV input to the compound. This newly added port will be part of the custom node once we publish the compound, allowing users to modify not only the center and radius of the circle, but also the amount of noise applied to it.
2. Publishing a new node definition
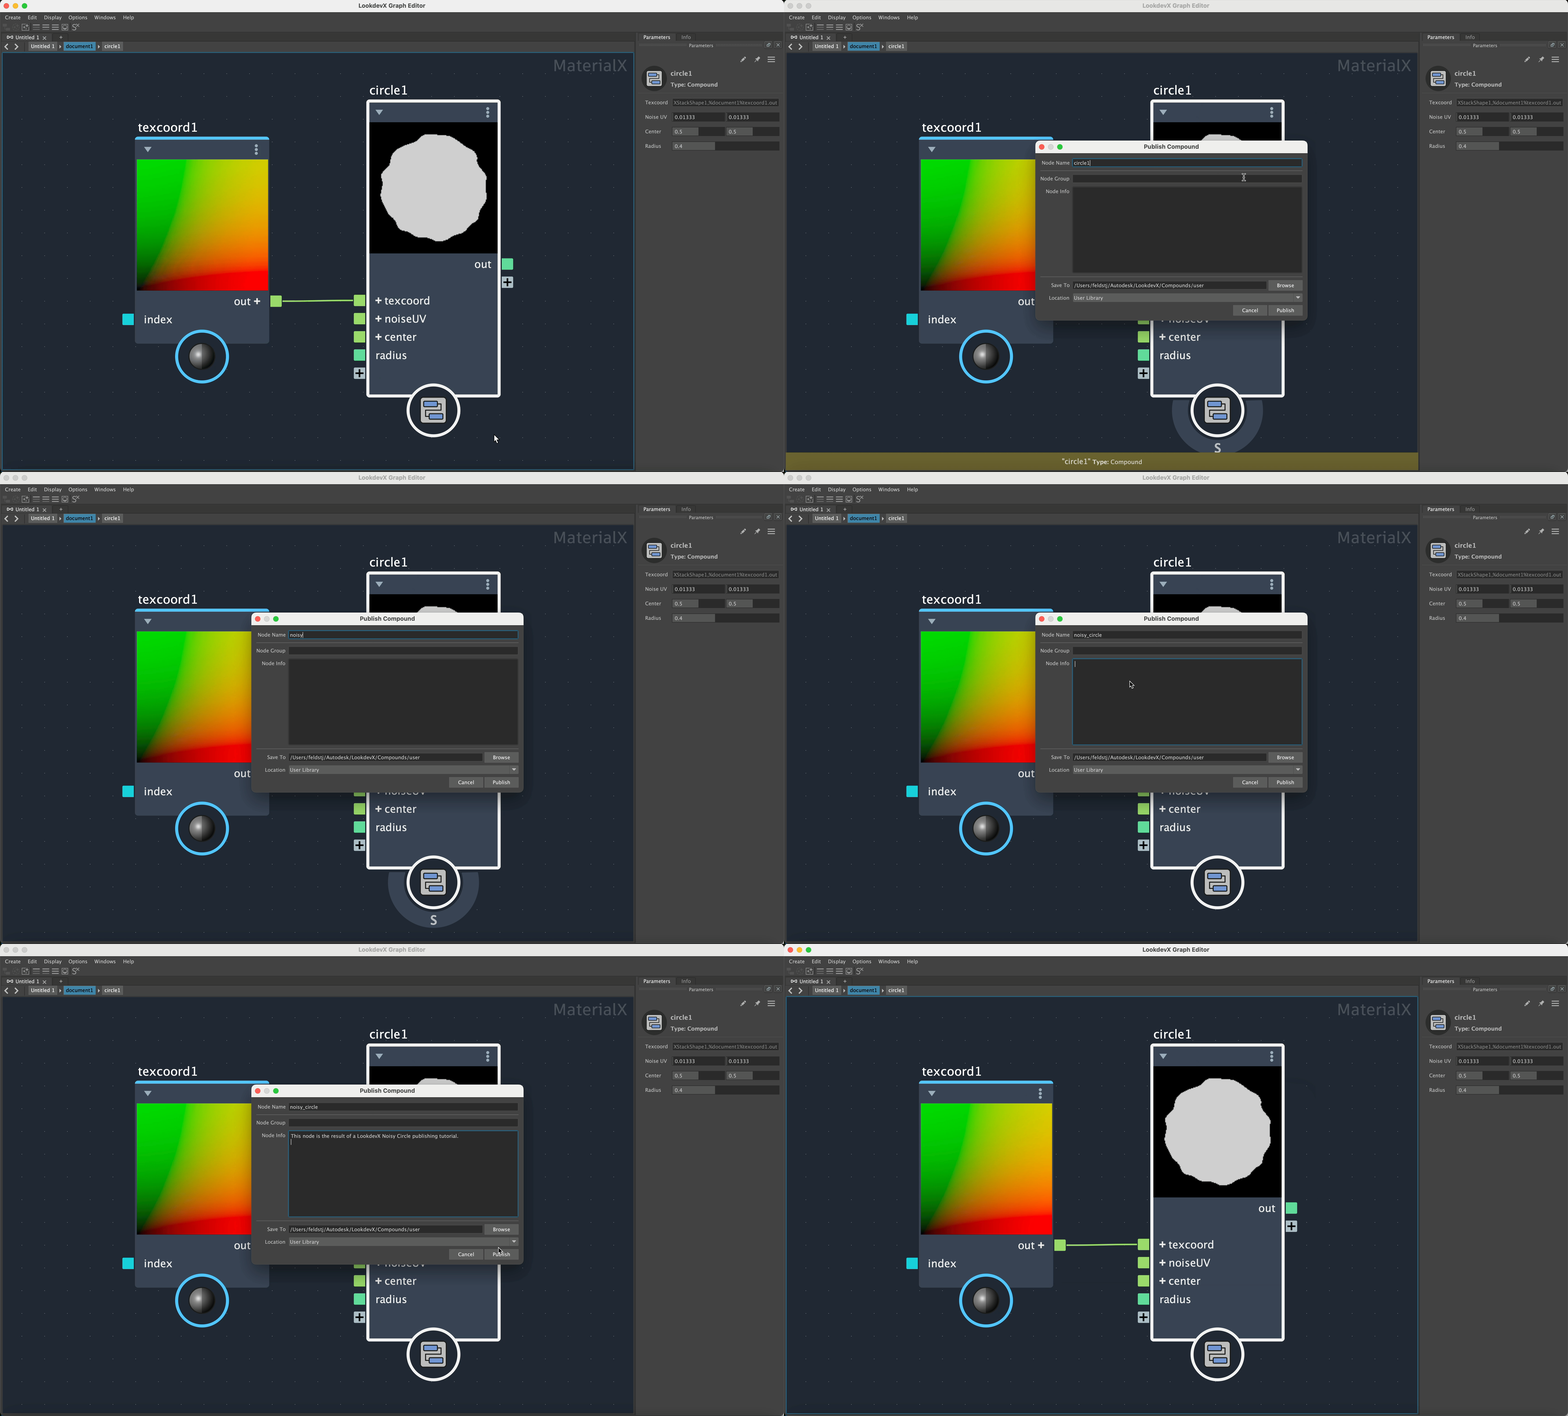
Now that we've tweaked the interface of our "Noisy Circle" compound, it's time to create a new custom node from this compound. Right-click the compound and select "Publish circle...". A dialog for publishing our compound displays. First off let's set the Node Name to "noisy_circle", then add a basic description of what our node does in the Node Info. Finally, click Publish.
3. Using the new custom node
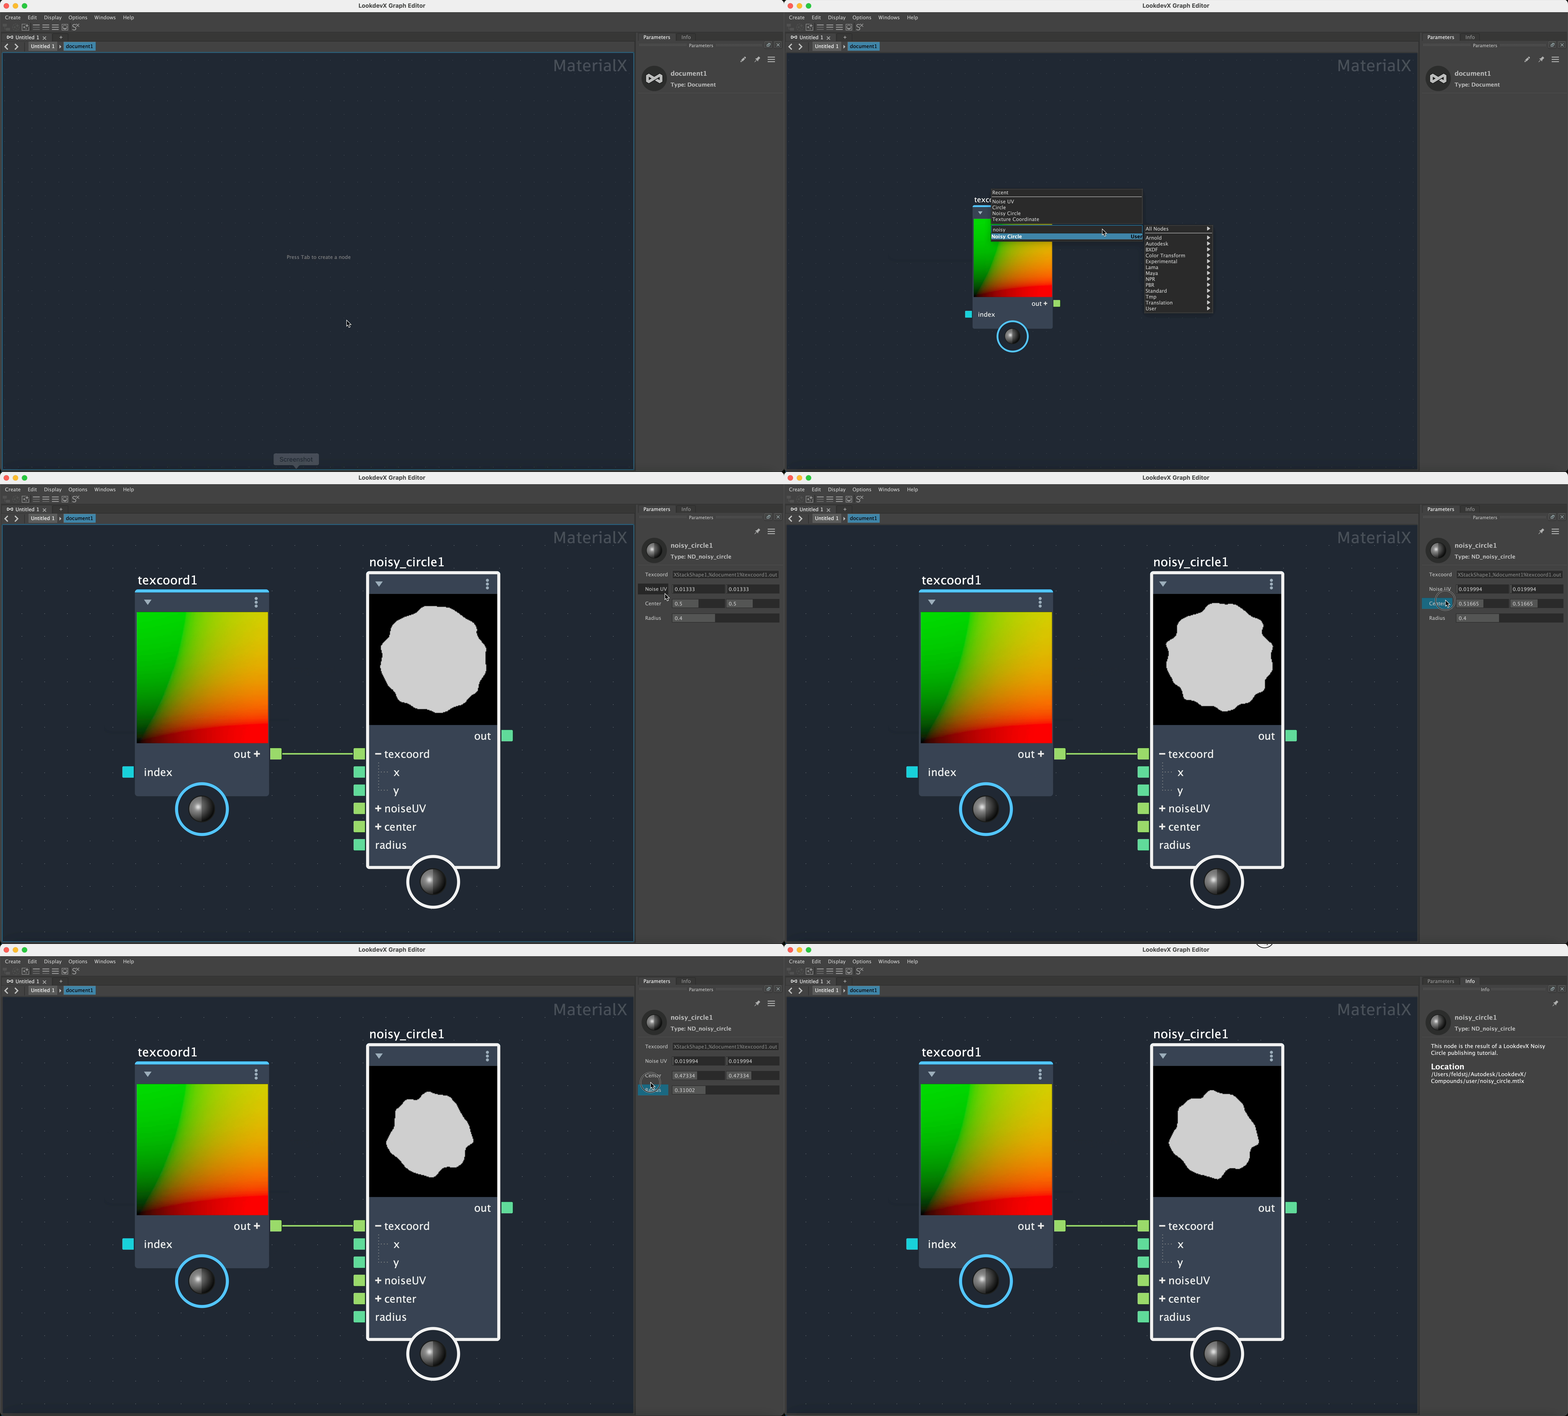
Now that we've created our new custom node it's time to use it! Simply press the TAB key in LookdevX to create a new node in the graph and instead of creating a Circle node, we'll now create the newly generated "noisy_circle" node. You can even click on the Info tab to see the documentation that we wrote for the node.
Conclusion
Publishing makes it possible to create custom nodes for frequently used operations. You can create a custom node from a compound and instantiate it multiple times, sharing it between different materials or scenes, instead of duplicating a group of nodes multiple times.