
Ramp tutorial: Cel-shading
Introduction: What is a Ramp node?
The Adsk Ramp node creates color gradients from up to 30 control points. The interpolation method effects how colors change between control points and the ramp type dictates whether this is a simple linear (standard), radial, circular, or box gradient. The images below show what each combination of interpolation method and ramp types look like for the same set of control points.
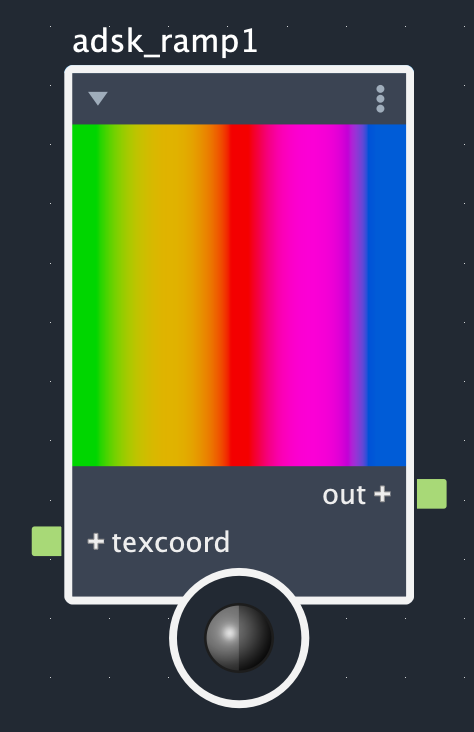
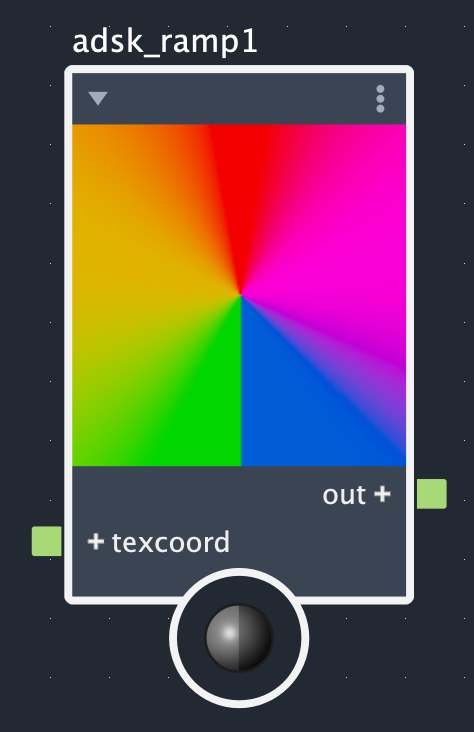

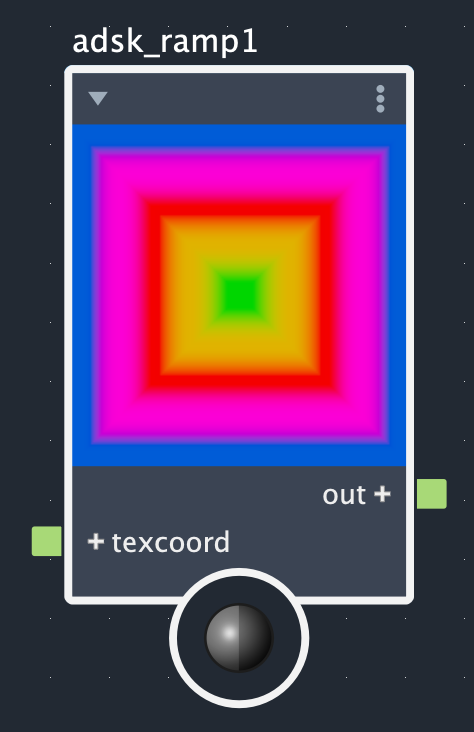
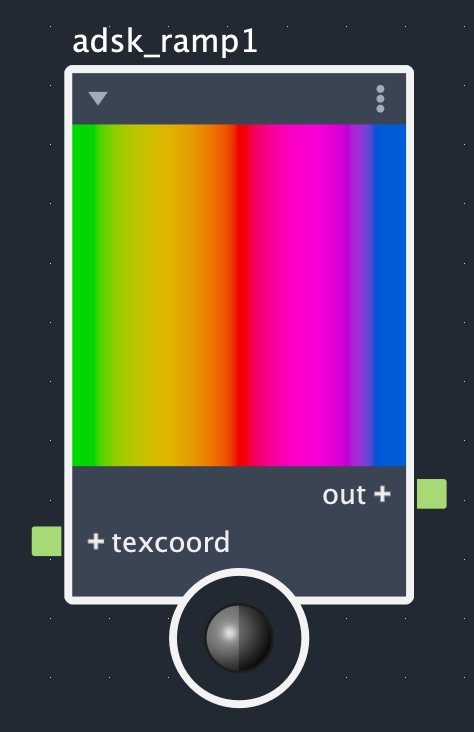
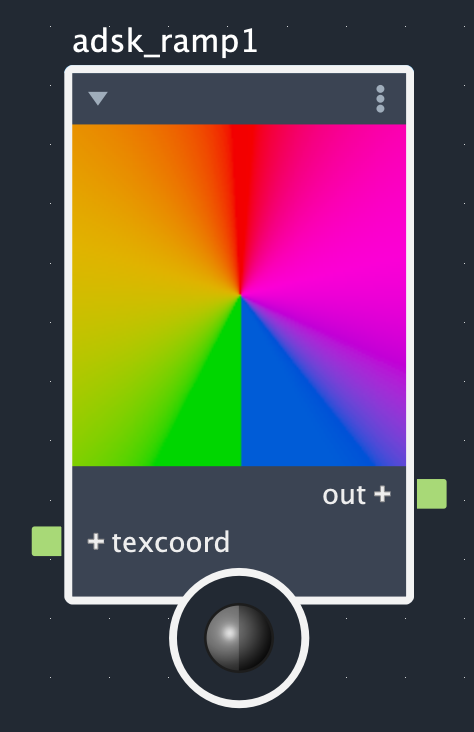
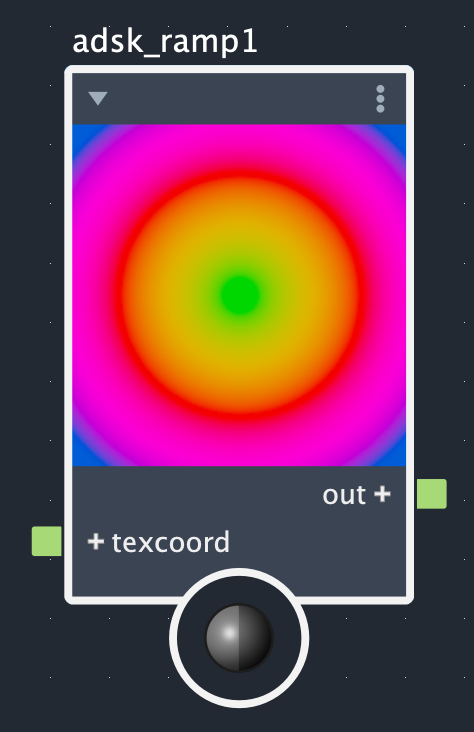
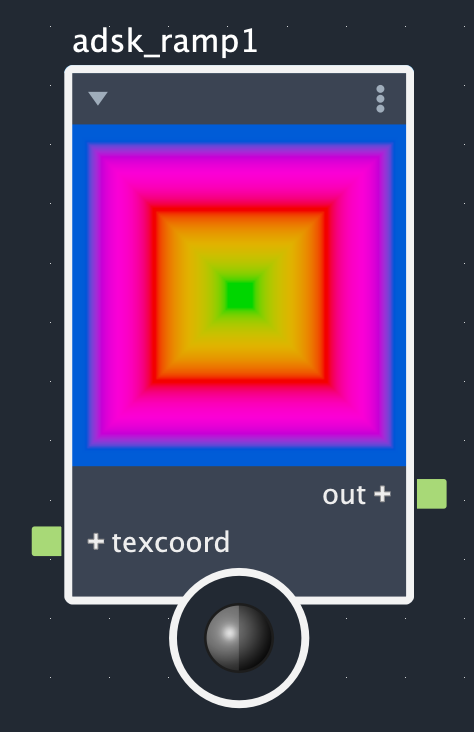
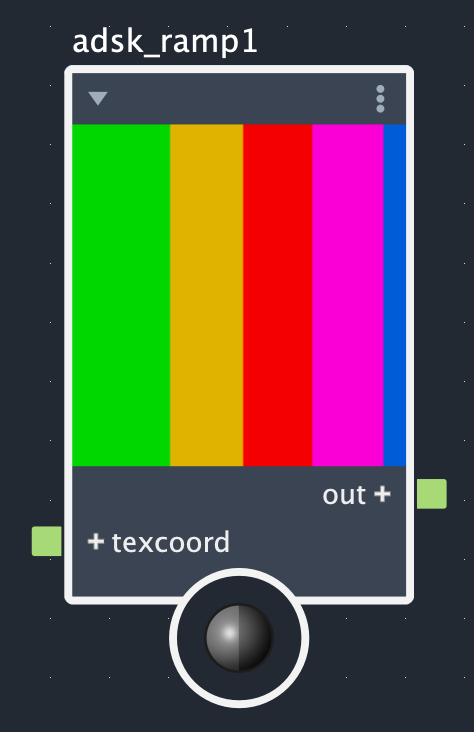
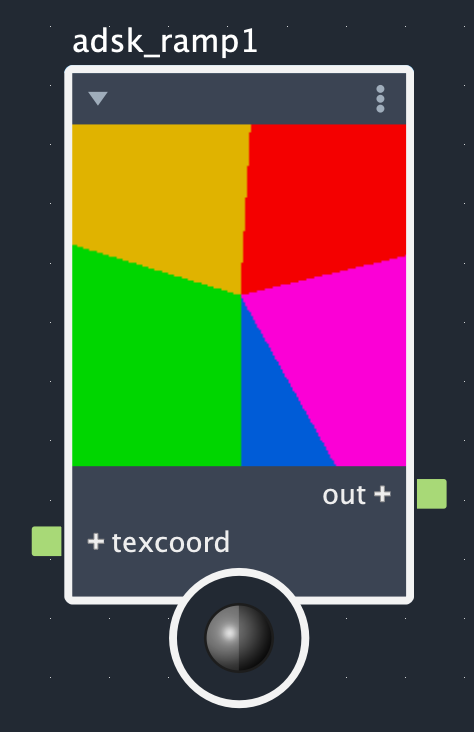
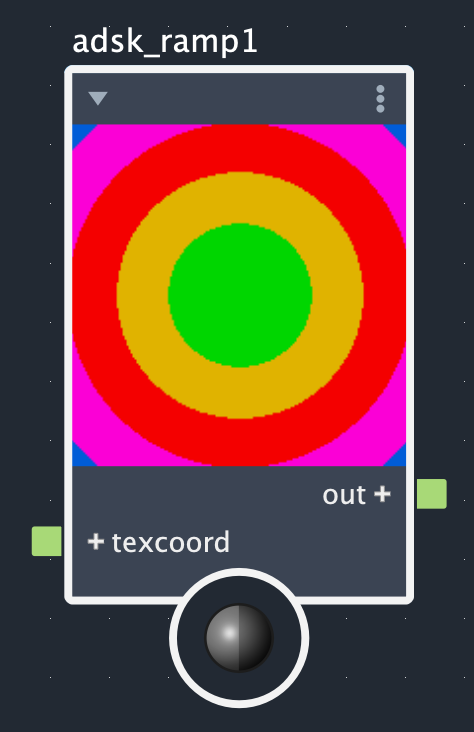
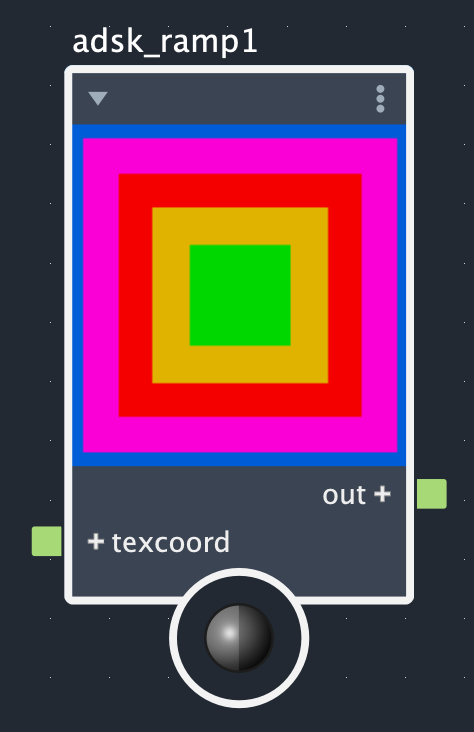
Rows: Smooth, linear, and step. Columns: Linear (standard), radial, circular, and box.
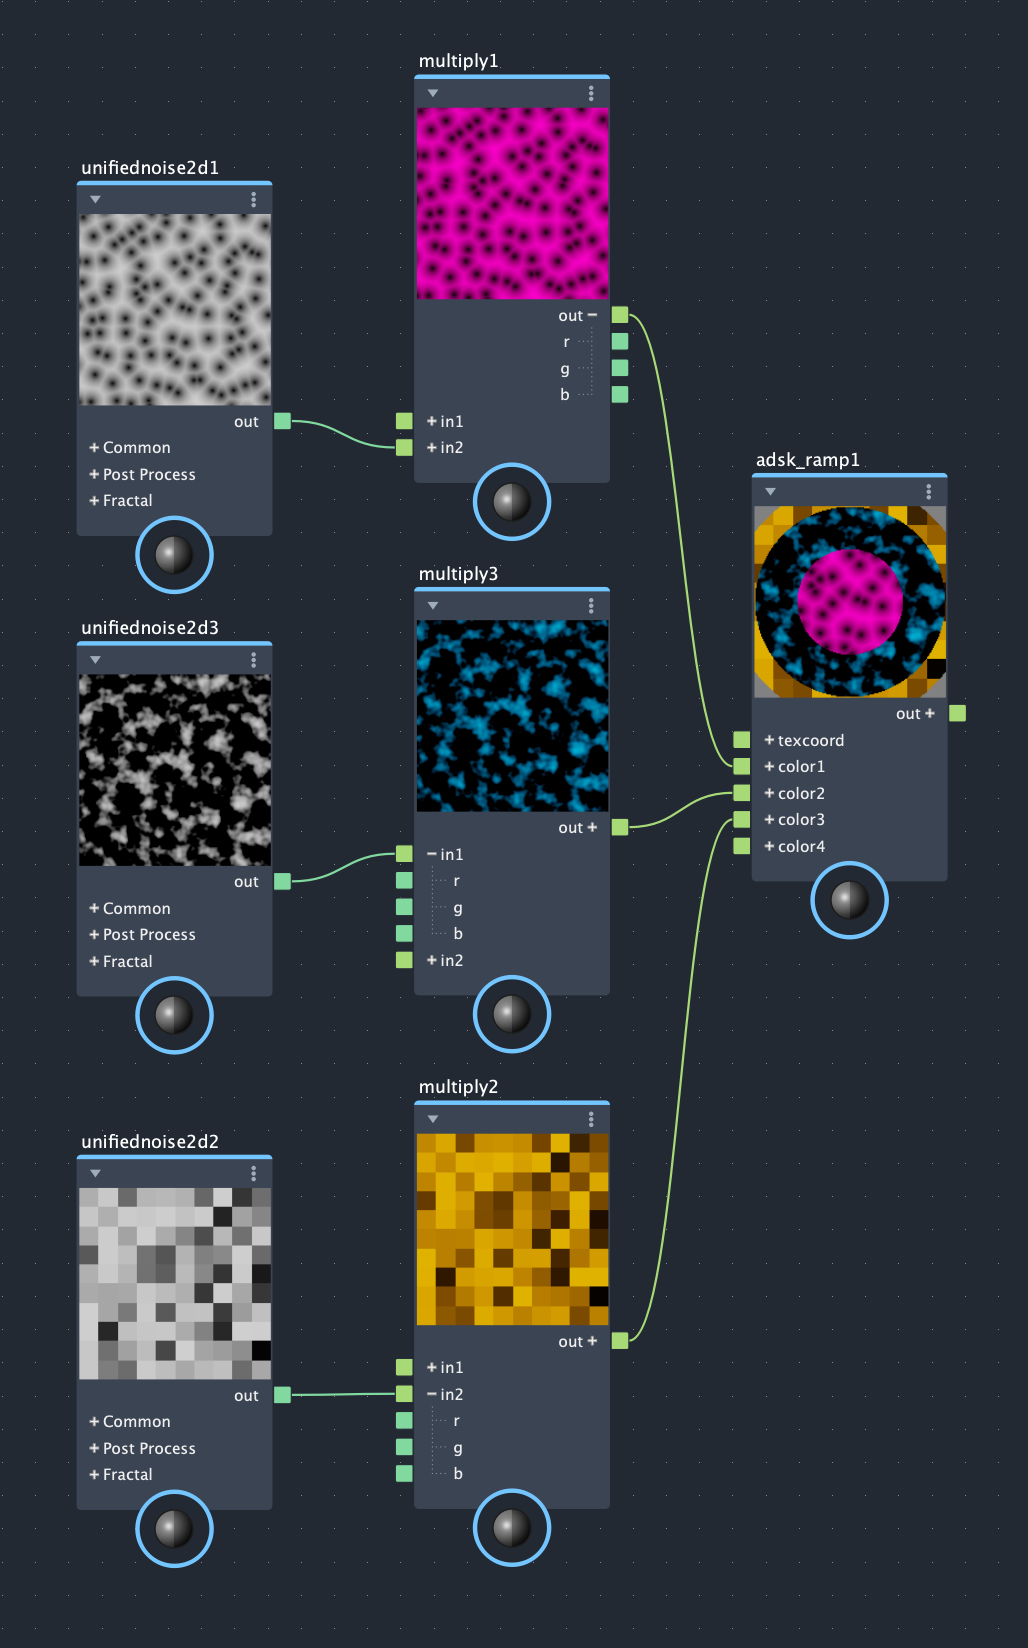
You can also expose control points on the ramp node itself to achieve even more intricate effects. After exposing a control point color, it's possible to connect a texture through an image node or even to connect other shader nodes to it. The images below show what this might look like by connecting several different types of noise to the exposed ramp inputs of a circular ramp with step interpolation:
Tutorial
Cel-shading introduction
Example scene: Ramp Tutorial
In this tutorial, we are going to explore two methods of cel-shading. The first technique will implement a standard cel-shader using two nodes: a Facing Ratio node and the Adsk Ramp node. The second example will extend the first by exposing control points and connecting cross-hatching images to them. This will create a cross-hatching effect that moves in a non-photorealistic way with the surface.
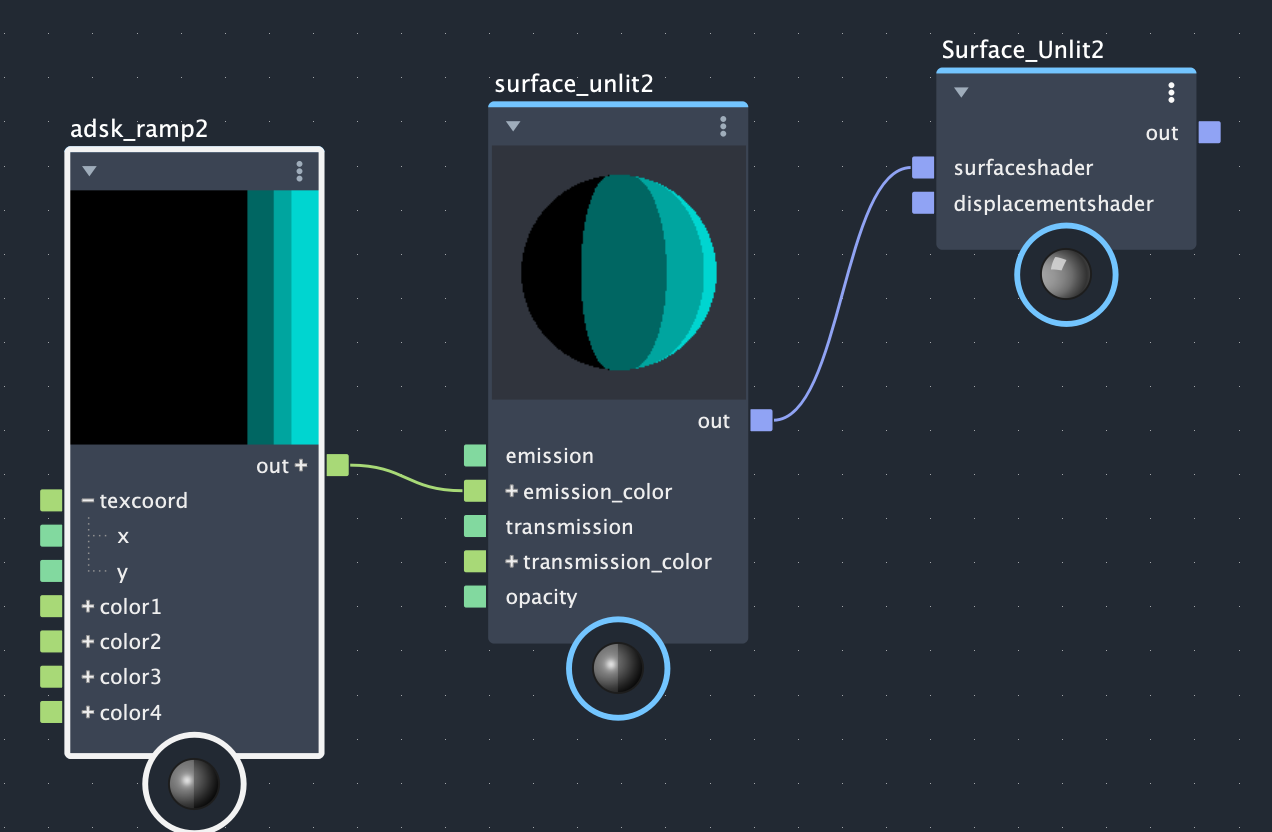
1. Creating our ramp
The first step is to open a scene that has an interesting character to apply our cel-shading effect to. See the robot.mb file included with the tutorial.
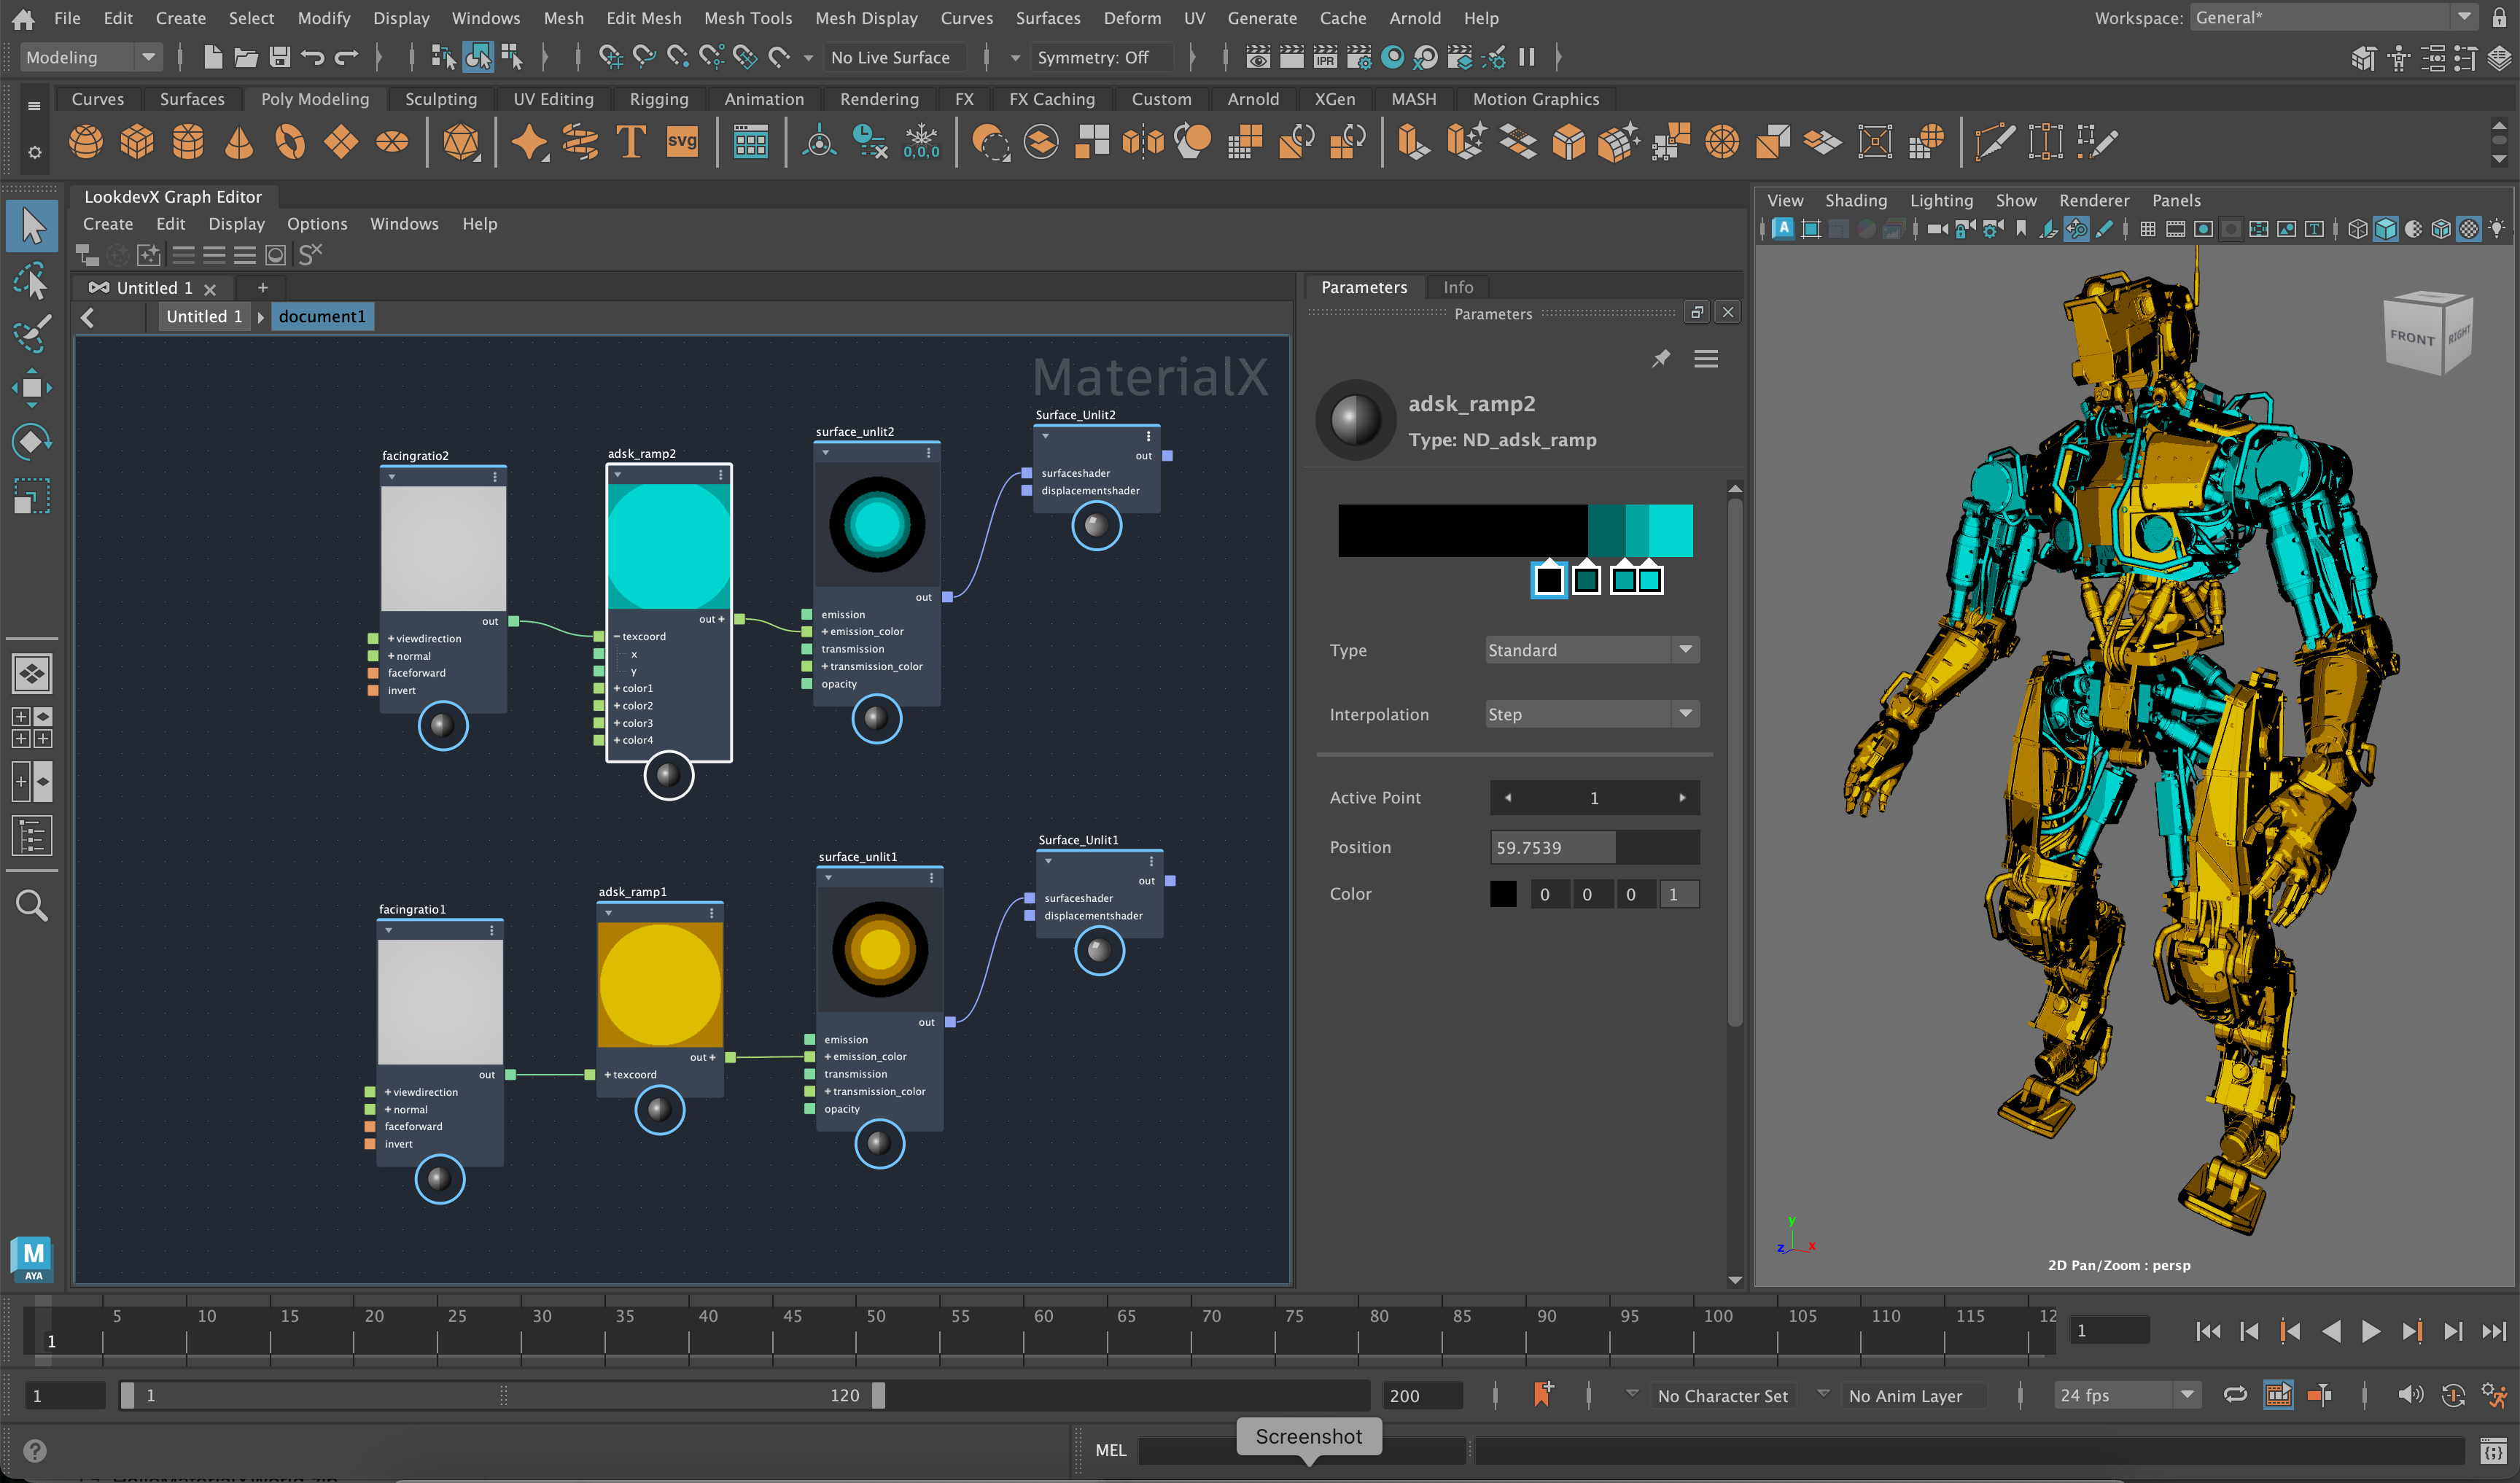
To start with go ahead and open LookdevX and create a brand new Surface Unlit surfaceshader. We use this material to prevent any default lighting from being applied to our cel-shading effect. Then create an Adsk Ramp node and connect it to the surfaceshader. After that, create some control points per the image below and set the ramp type to step:
You can assign this surfaceshader to the robot geometry, by selecting the geometry and right-clicking on the surfaceshader and selecting "Assign Material to Selection".
2. Setting up the Facing-Ratio node
Now that we have the ramp we want to use for the cel-shading effect, it's time to create a Facing Ratio node. Facing Ratio nodes compute the dot product of the view direction and the geometry's normal which essentially relates to do with the angle between the two vectors. We use this as a look up into our ramp to obtain the color we want for our cel-shading effect.
If we leave viewdirection at the default, the view direction will use the camera vector, creating an interesting effect where the lighting direction comes from the camera. If you assign your material to geometry, as the camera moves, the light position will update accordingly. In the image below, we've assigned two different colors of the cel-shading effect to the geometry.
Another option is to connect a dot node of type vector3 to the view direction. In this case, you can adjust the light direction manually through the value of the dot node. This will fix the light direction so it doesn't change with the camera.
3. Adding cross-hatching
Next, we'll look into extending our functionality by exposing color inputs and connecting textures to them. In this case, we'll use image nodes and cross-hatching textures to create a cross-hatching effect, but you could use any texture node or image node instead. In this case, we use smooth interpolation on our Adsk Ramp node to yield a more appealing result, but feel free to play around and see what interpolation method works best for you. The complete effect that combines cross-hatching and cel-shading is seen below:
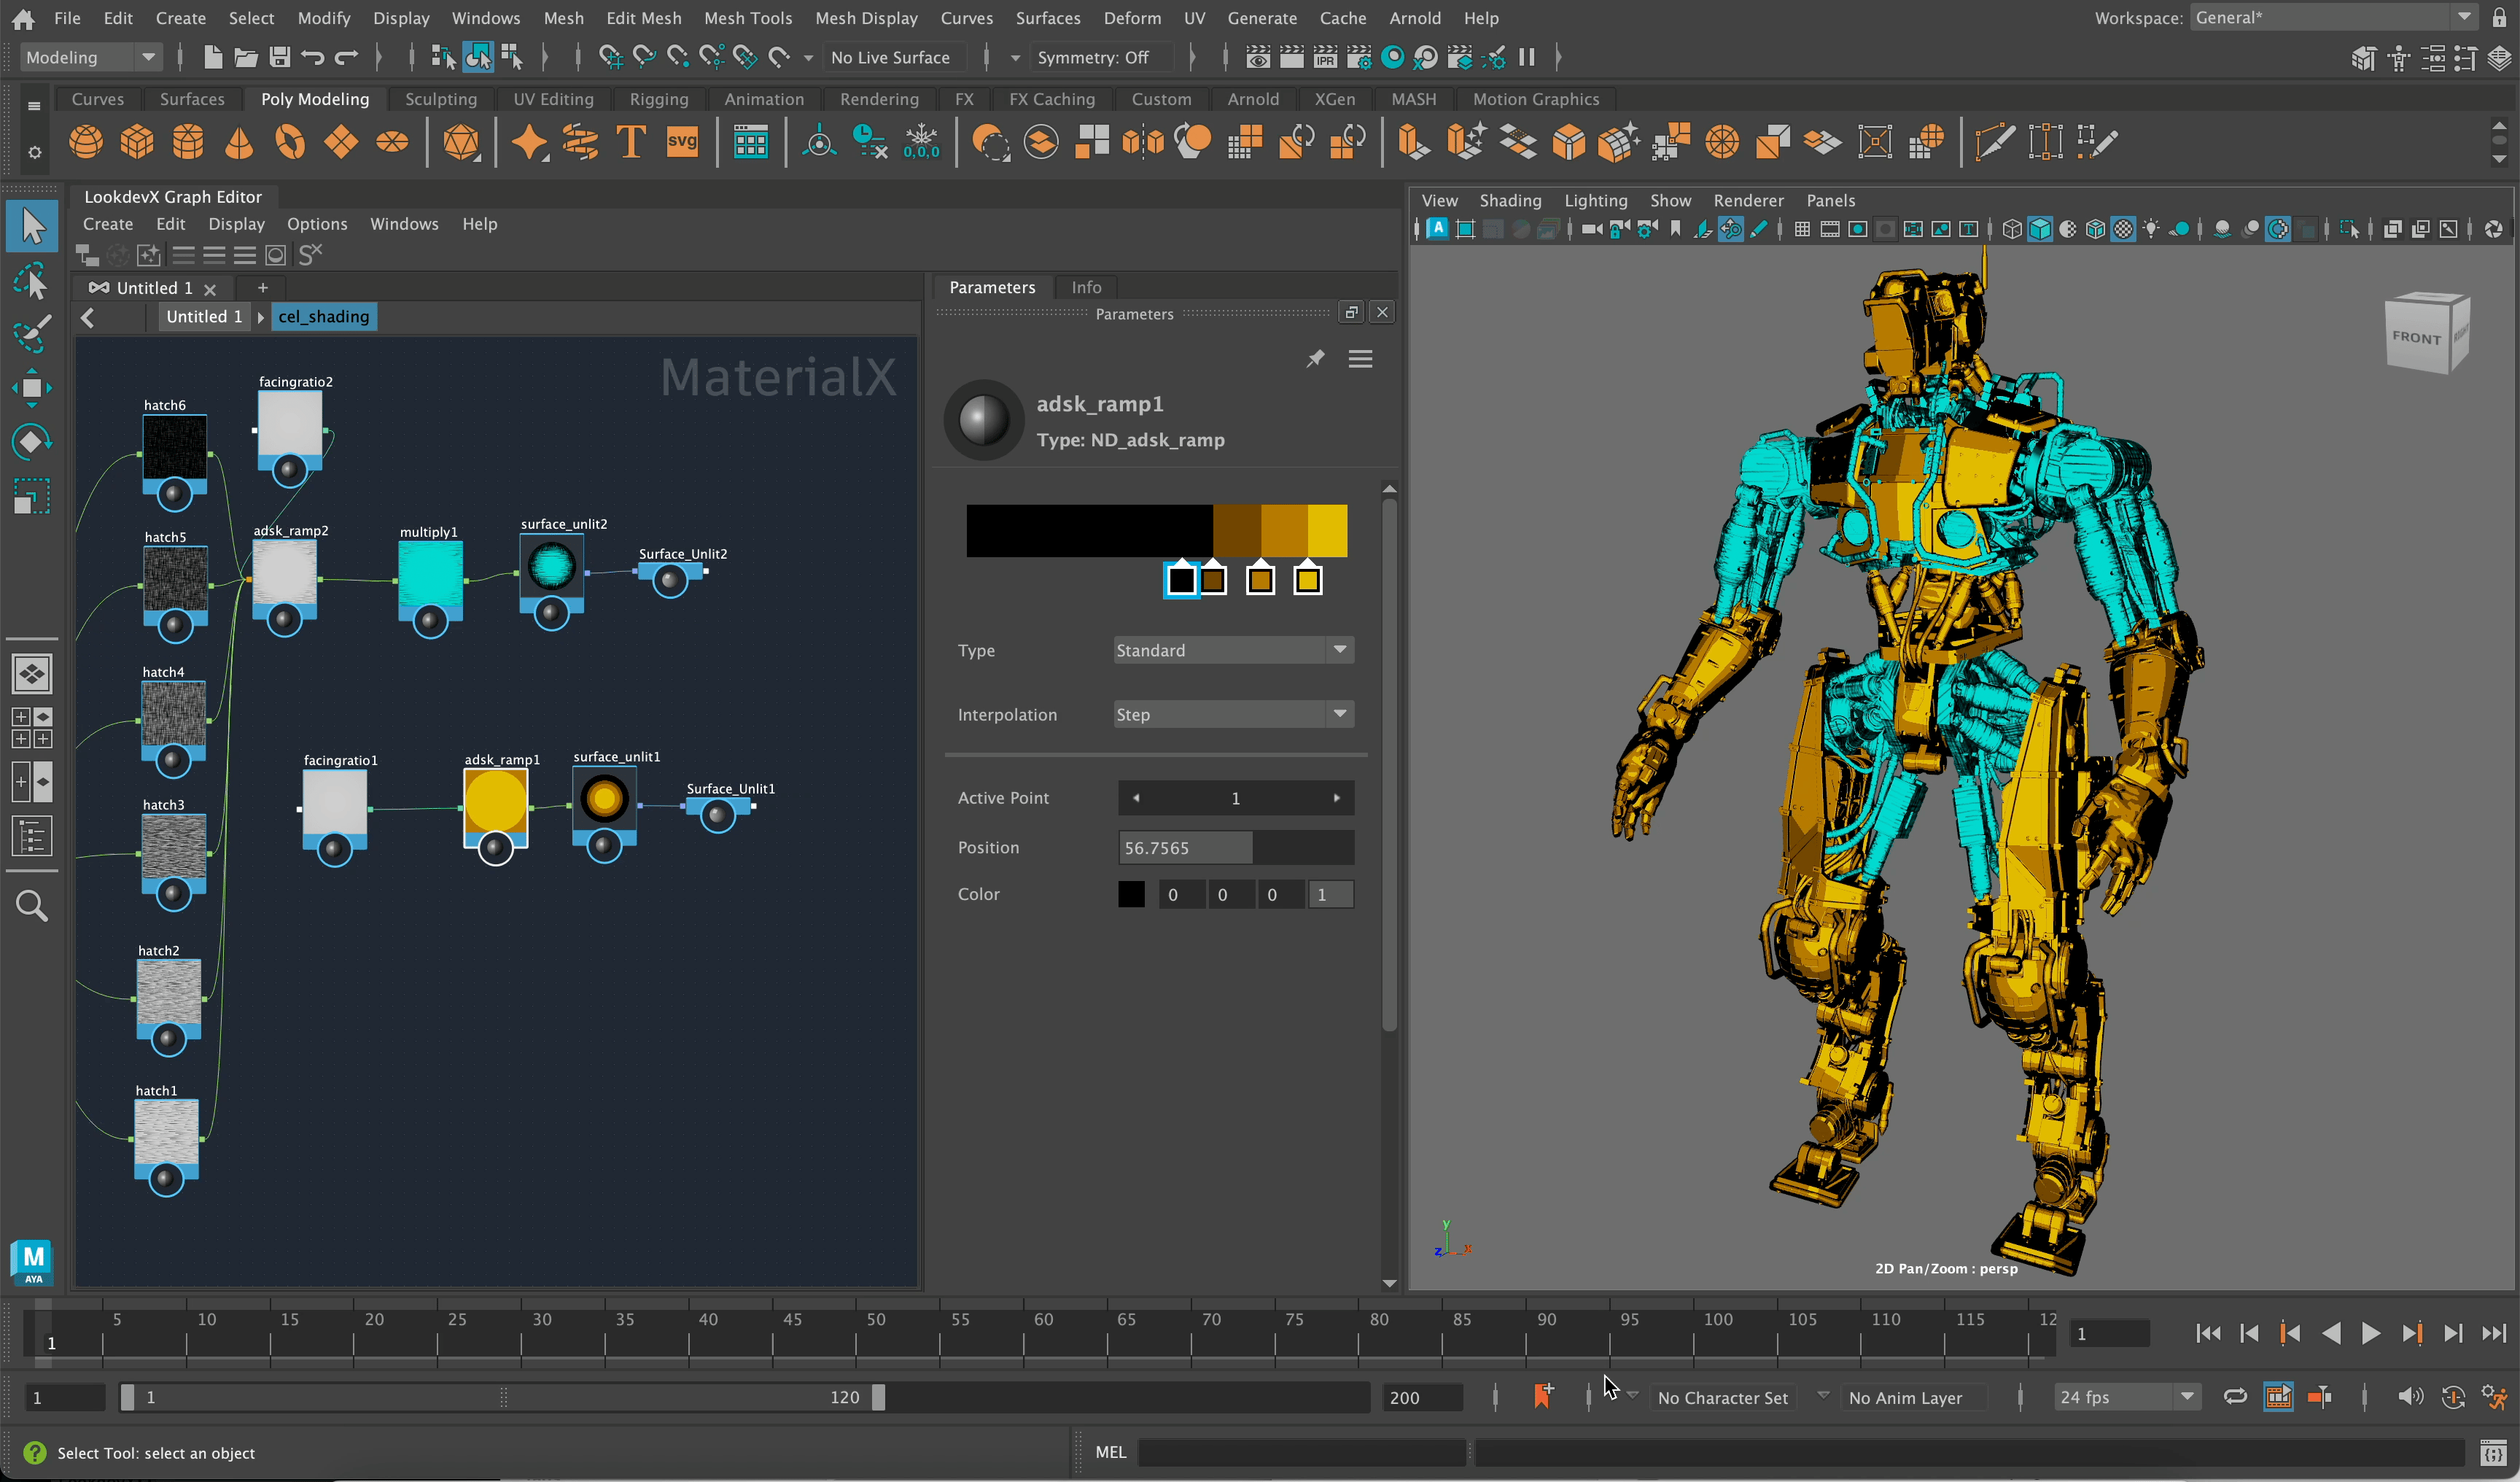
On top of the robot.mb file, the tutorial includes a cel_shading.mtlx file. You can load this file into LookdevX to see the materials generated in this tutorial. After loading the MaterialX file, simply assign the surfaceshaders to the respective pieces of geometry to see the results.
Conclusion
You can achieve a simple cel-shading effect with Adsk Ramp and Facing Ratio nodes. The Adsk Ramp is extremely versatile and is used for a wide range of different effects. See the Procedural Brick Tutorial for another such example.