
Set Clash Detective Options
Click the application button
 > Options.
Expand the Tools node in the Options Editor, and click the Clash Detective option.
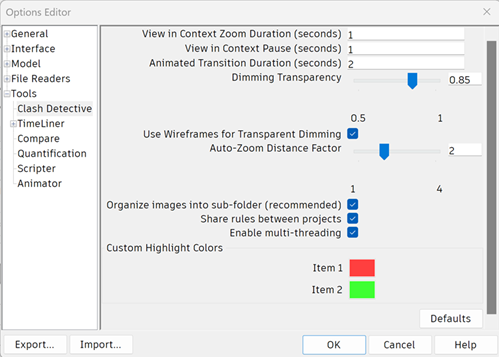
On the Clash Detective page, use the View in Context Zoom Duration box to enter the required value. When you use the View in Context functionality on the Results tab of the Clash Detective window, this value specifies how long it takes for the view to zoom out (using an animated transition).
Use the View in Context Pause box to enter the required value. When performing a View in Context, the view remains zoomed out as long as you hold the button. If you quickly click rather than press and hold the button, this value specifies how long the view stays zoomed out so that the transition is not cut in midflow.
Use the Animated Transition Duration box to enter the required value. When you click a clash in the results grid of the Clash Detective window, this value is used to smooth transitions from the current view to the next.
Note: This option is only applicable when the Animate Transitions check box is selected on the Results tab of the Clash Detective window.Use the Dimming Transparency slider to specify the level of transparency of items not involved in clashes.
Note: This option is only applicable when both Dim on the Isolation drop-down list and the Transparent Dimming check box are selected on the Results tab of the Clash Detective window.Select the Use Wireframes for Transparent Dimming check box to display items not involved in clashes as wireframes.
Note: This option is only applicable when both Dim on the Isolation drop-down list and the Transparent Dimming check boxes are selected on the Results tab of the Clash Detective window.Use the Auto-Zoom Distance Factor slider to specify the level of zoom applied to a clash in the Scene View when it is selected in the Results tab. The default setting is 2; 1 is the maximum level of zoom and 4 is the minimum level of zoom.
Note: If the Save changes check box is selected on the Display Settings expandable panel in the Results tab, then any changes made to the zoom level of a clash will override the Auto-Zoom Distance Factor settings.When generating HTML reports, use the Organize images into subfolder check box to put all images associated with reports into subfolders next to the report. If the report file is deleted, Windows will delete the subfolder as well.
Use the Share rules between projects check box to save rules to your machine, allowing them to be accessed from different projects. When this option is off, rules are only saved to your NWF/NWD file.
Use the Enable multi-threading check box to allow use of all your CPU cores when running clash detection. If you experience any issues when running Clash Detective, you can try turning this option off.
Use the Custom Highlight Colors options to specify the display color for clashing items.
Click OK.