My Playlists Section for Windows
The My Playlists section houses all the playlists that a user creates on a project.
From this section, a user can send their playlists to other users as well as edit the playlists they have already created. Once a user creates a playlist that playlist can be edited and updated even after it has been sent.
Select a playlist to edit

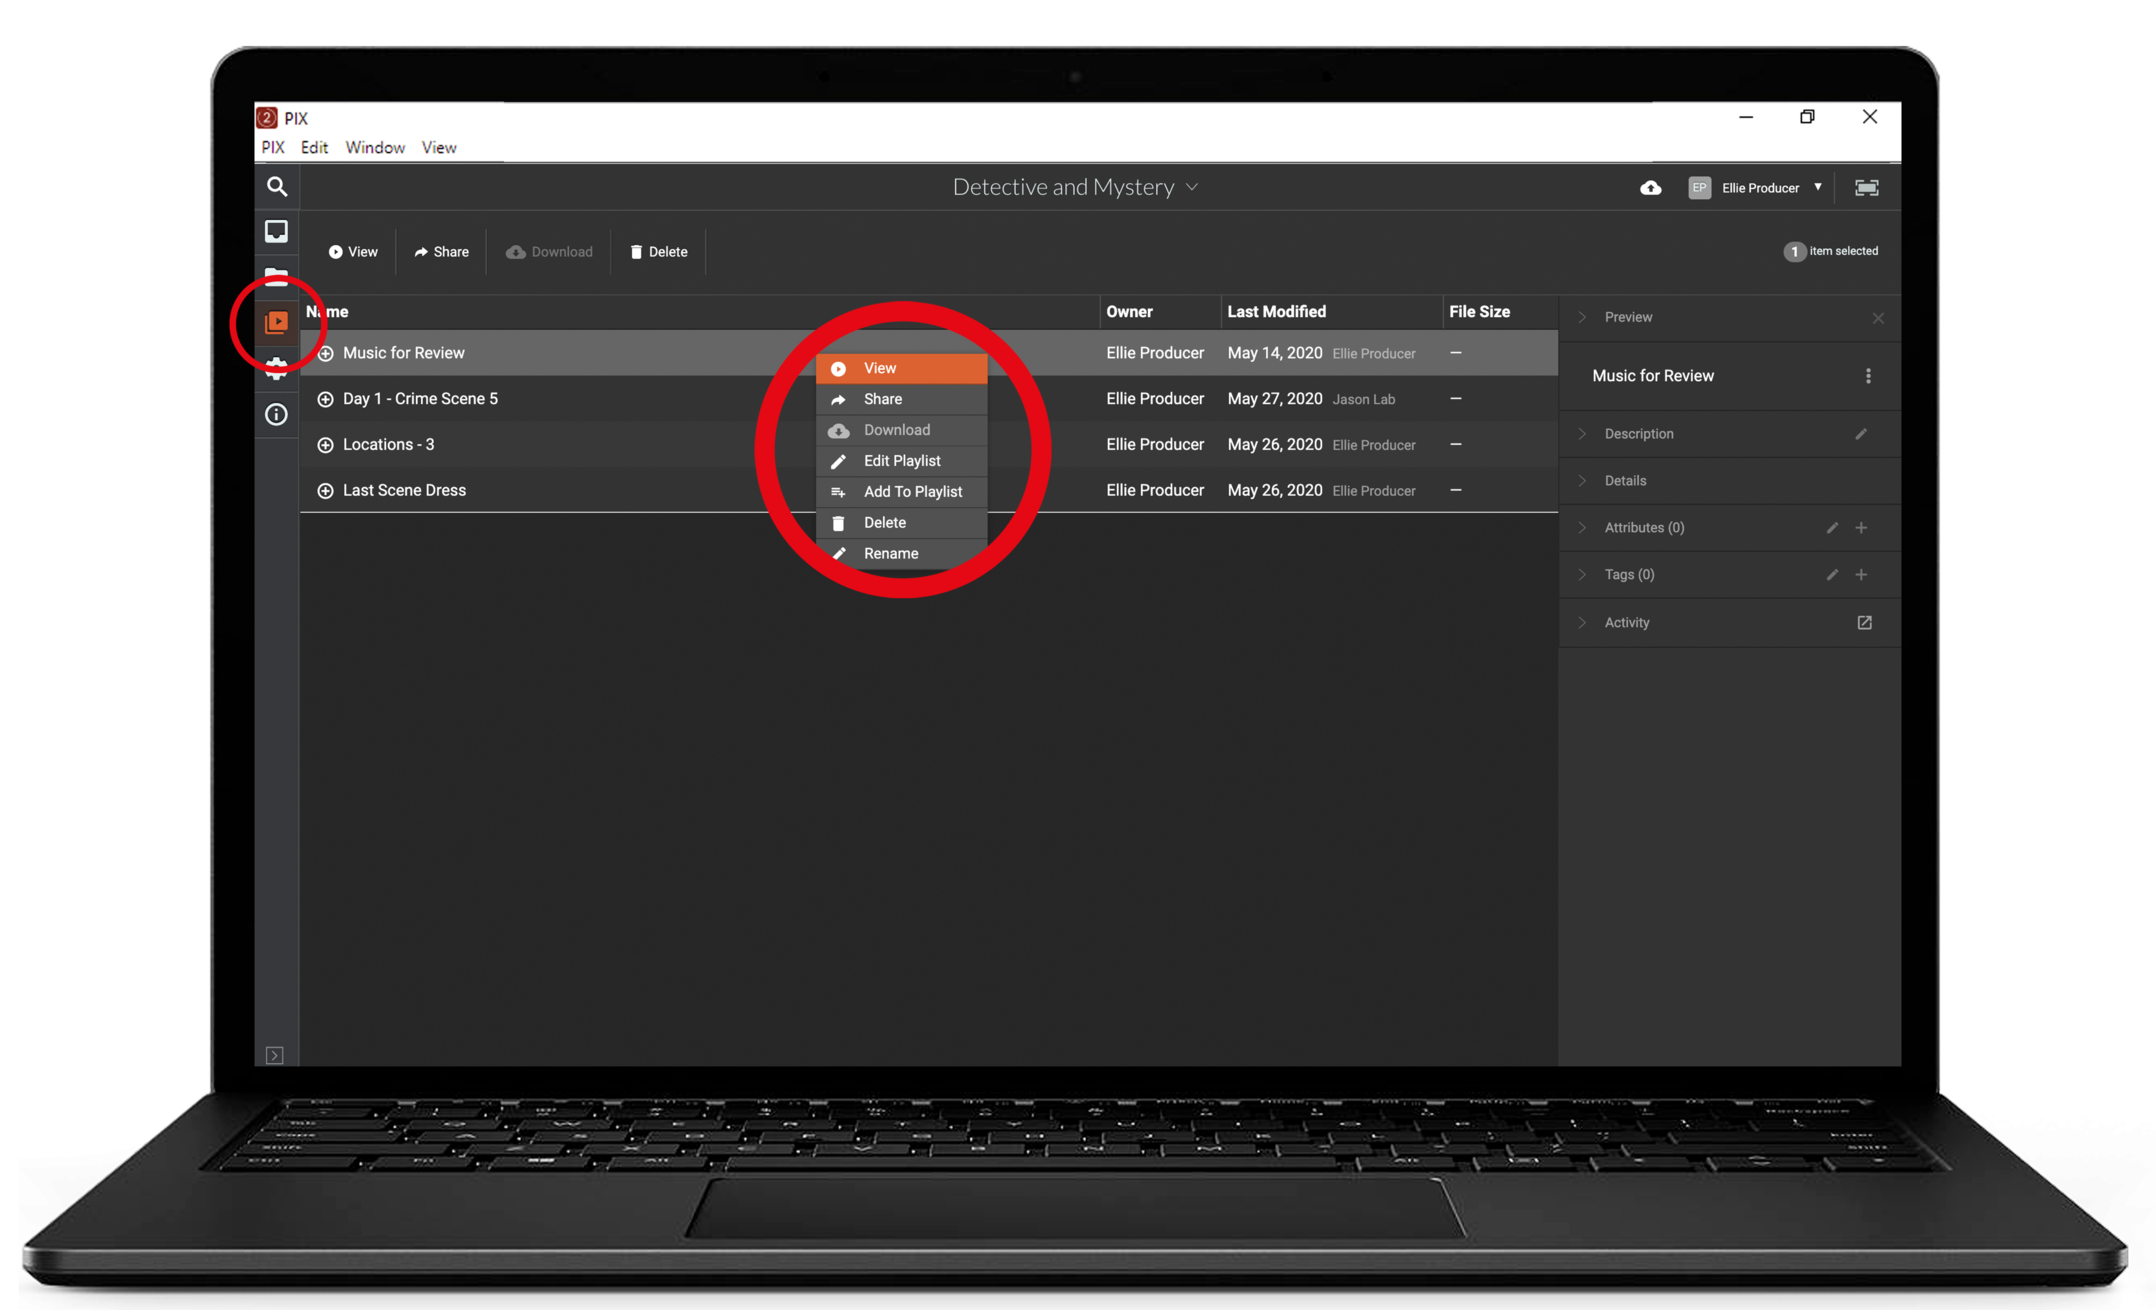
- Click the Playlist button in the navigation toolbar to navigate to the playlists you've created.
- Find the playlist you wish to edit.
- Right-click on the name of the playlist and click Edit Playlist.
You can also select Edit Playlist from the Info Panel, on the right-hand side of the screen.
Make your changes to existing files

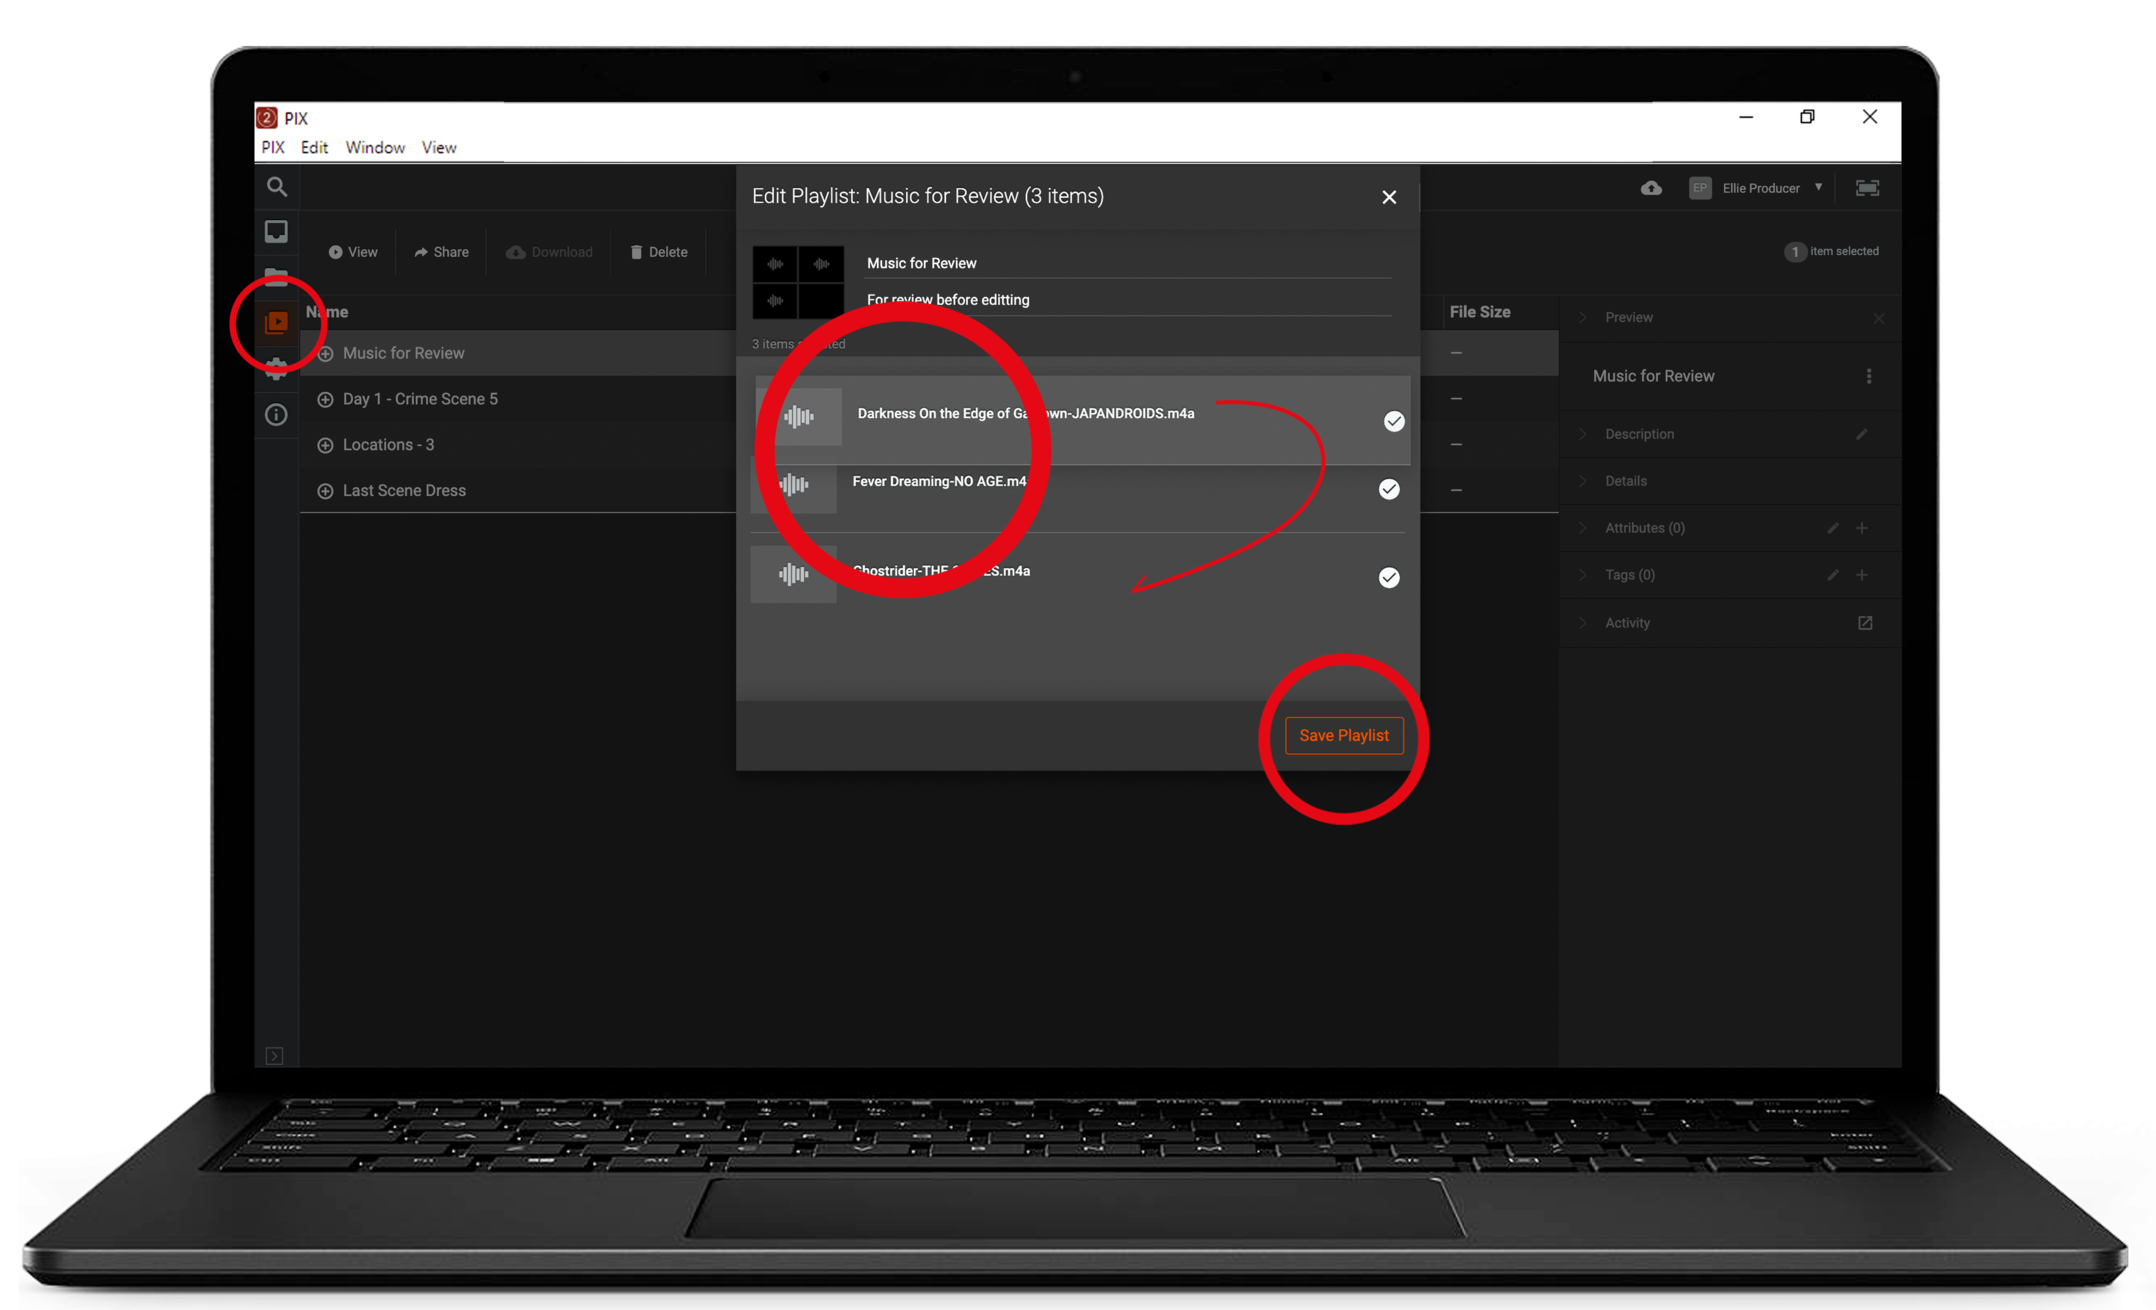
A playlist pop-up will appear where you can reorder and remove items in the existing playlist.
Reorder & Remove
- Drag and drop items into a new position.
- Use the Checkbox to unselect items you wish to remove from the playlist.
- Click Save Playlist to save changes.
Choose new items for the Playlist

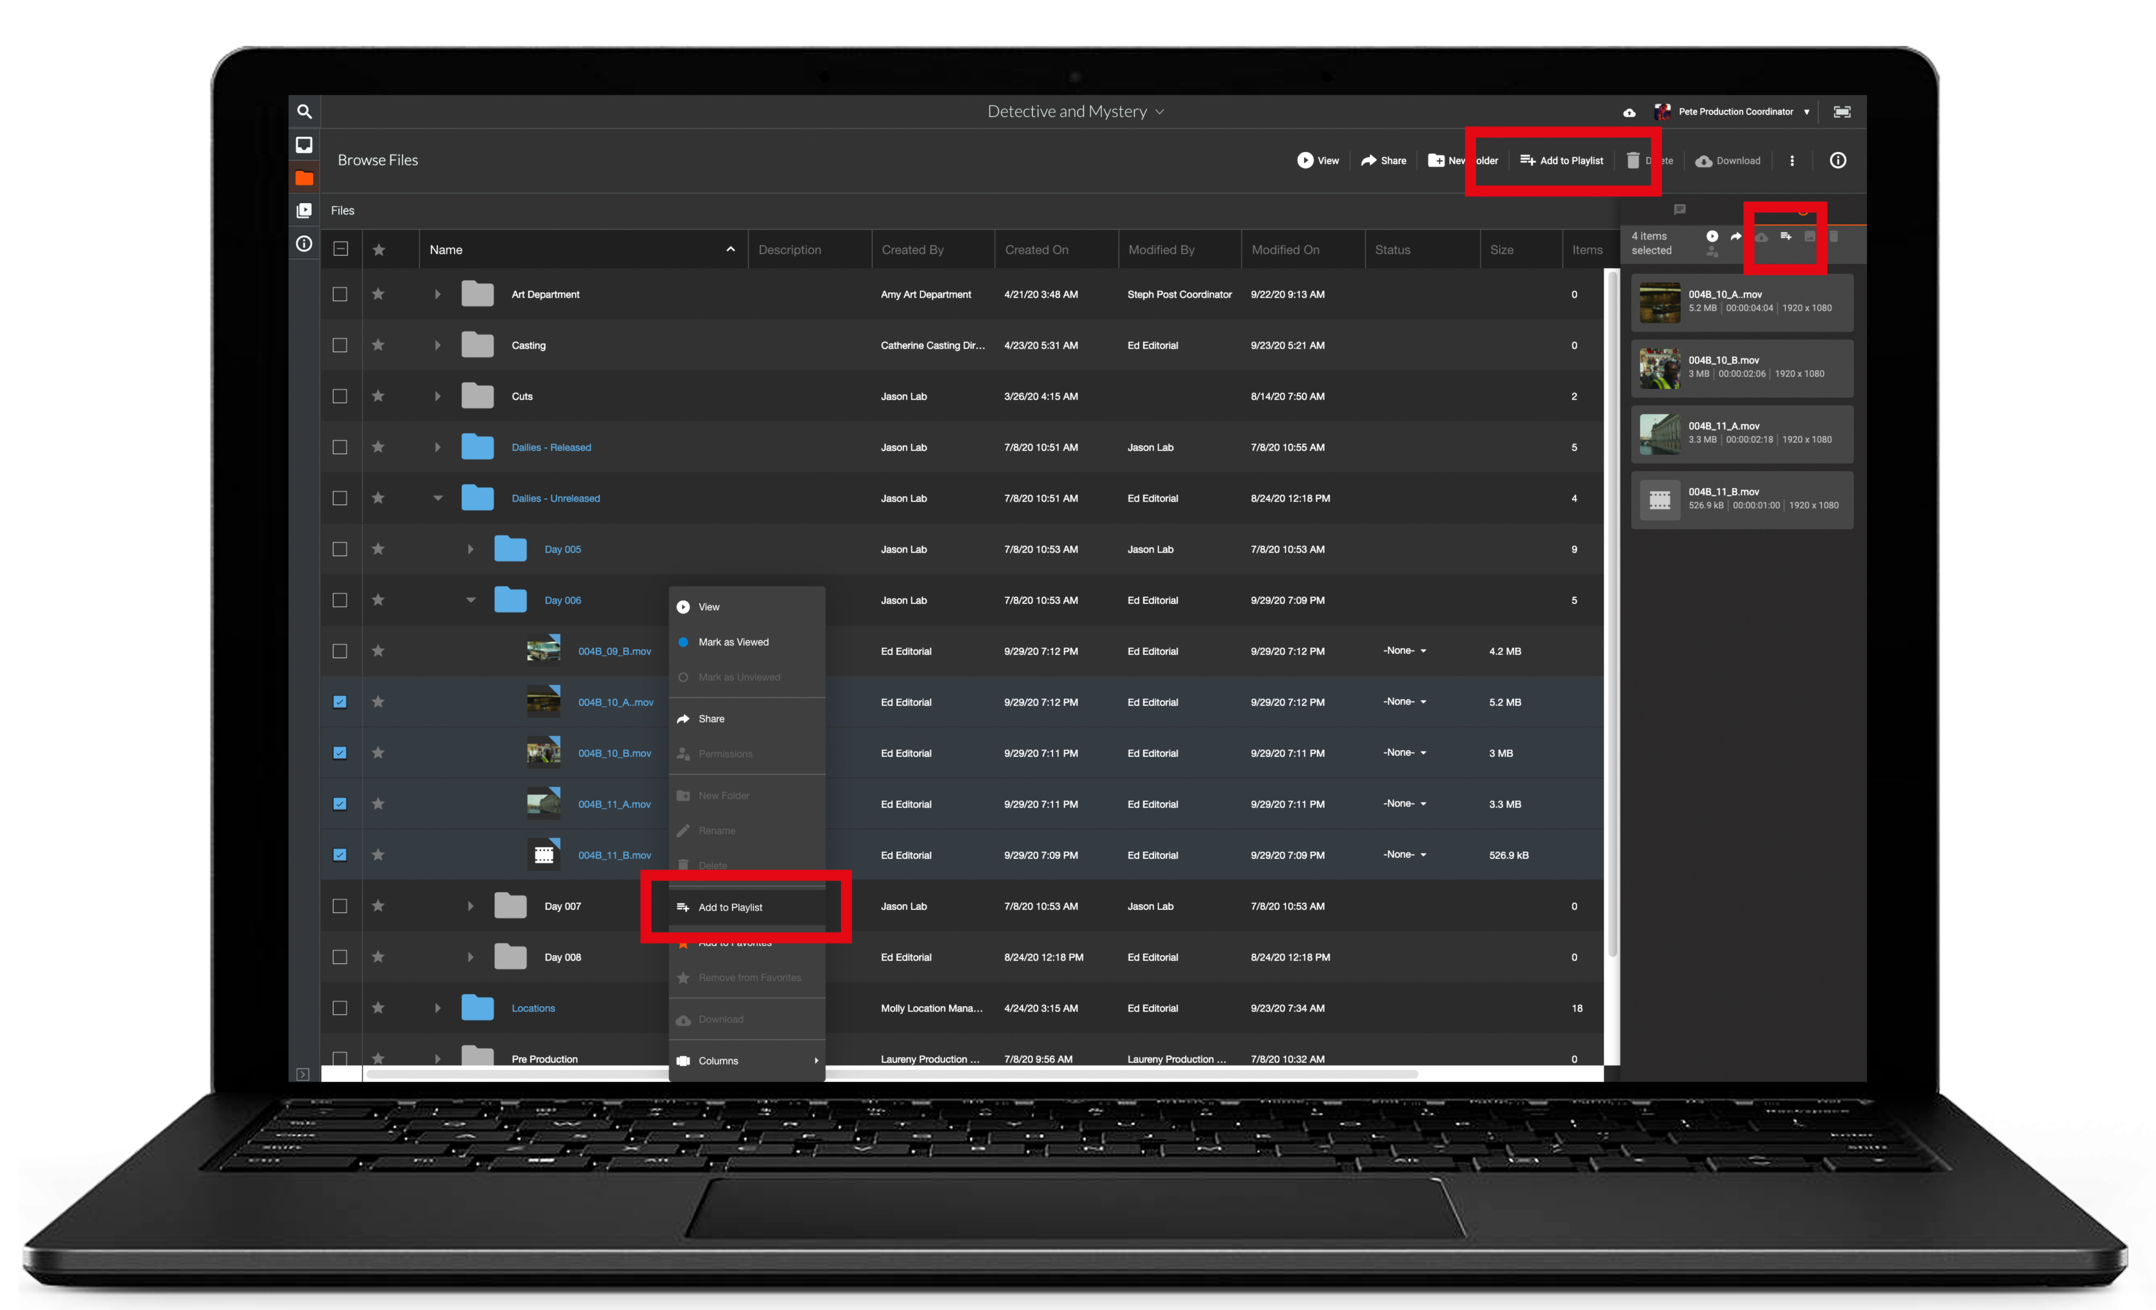
From your Inbox or Files section, select the items you wish to add to your playlist.
Click the Add to Playlist button in the top Toolbar.
Edit a playlist from the Info panel
Selected items are listed in the Info panel to the right of the viewing window.
Click the + button to add selected items to a playlist.
Alternatively, you can right-click on the selected files and click Add to Playlist.
Add the new items to the existing Playlist

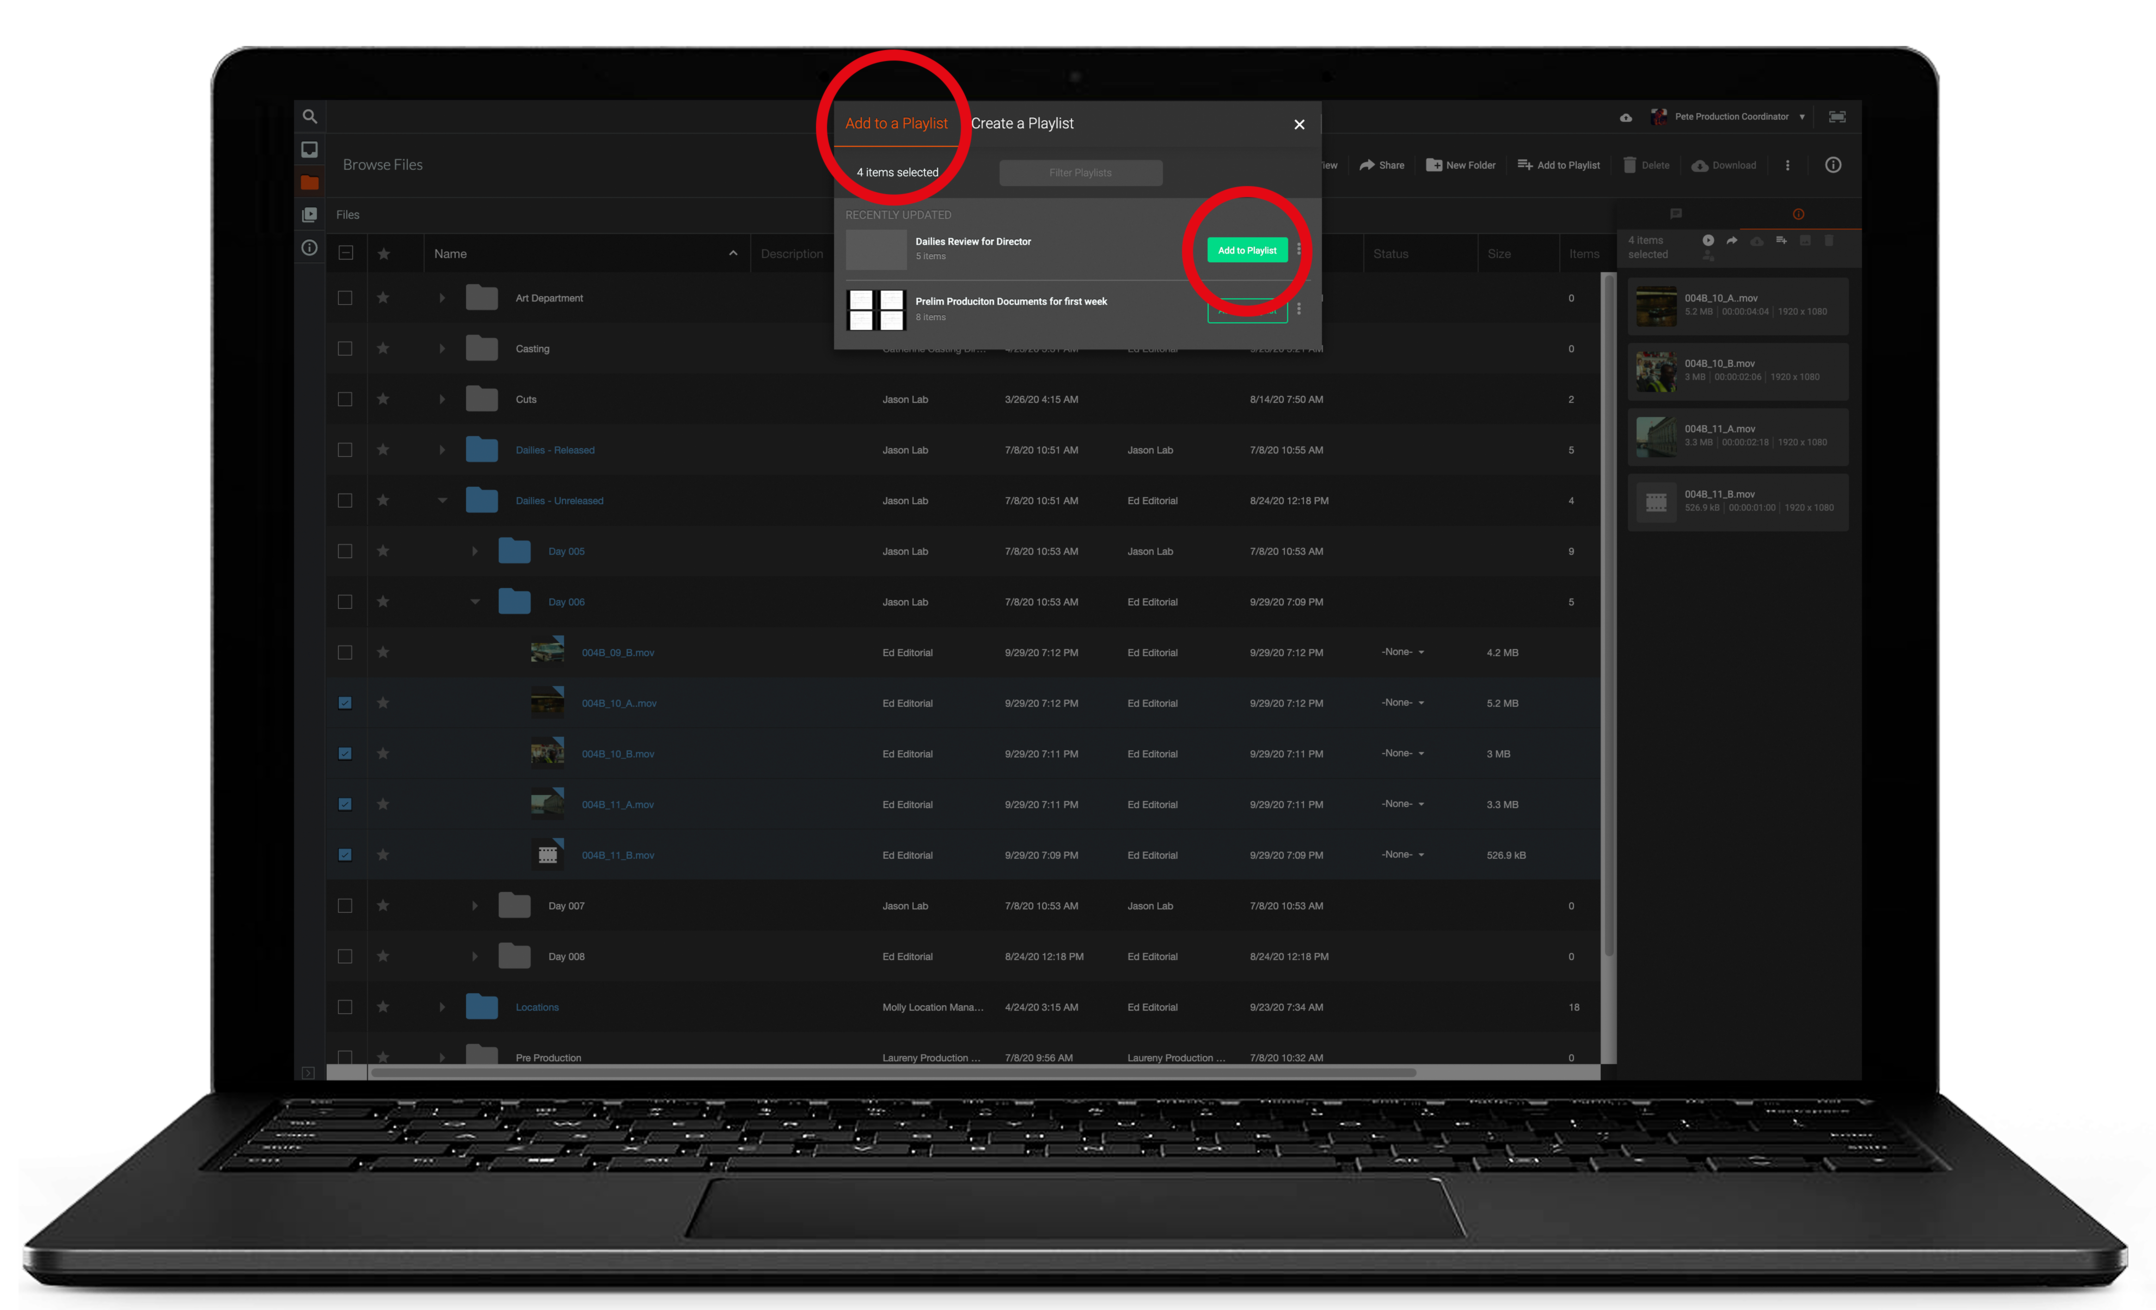
A playlist pop-up will appear giving you the option to add to an existing playlist or create a new playlist.
- Click Add to a Playlist
- Add items to the desired playlist by clicking Add to playlist