
Budget Payment Application
When a billing period is activated, you can create the budget payment application to send to an owner. Payment applications can be generated in the Budget tool.
In this article:
Create a Budget Payment Application
Before working with the budget payment applications, make sure that you have managed permissions for this workflow. As a project administrator, set the:
- Full Control option for the general contractor
- Collaborate option for the owner in the Budget Payment Application column
To create a budget payment application as a general contractor:
Select the Budget tool from the left navigation.
Switch to the Budget Payment Application tab.
Once a billing period is activated, you can click Create Payment Application.

Select the main contract by using the drop-down menu.
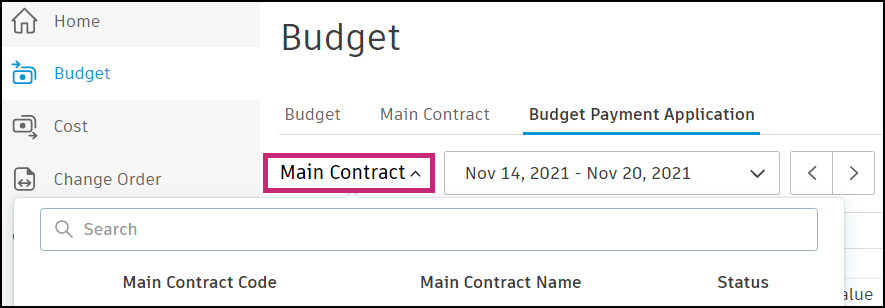
Select the correct billing period or use the arrows to navigate between periods.
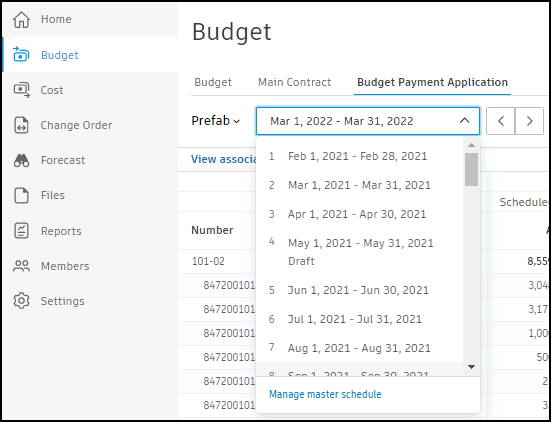
The budget payment application is created with the Draft status.
After creating a budget payment application, you can add any necessary documents or associated costs. To do that, click View Associated Costs. The details panel opens. In the Associated Costs section, you can adjust your budget payment application before sending it to an owner. You can:
Aggregate cost, which will overwrite the value in the Work Completed or Materials Stored column from associated costs. Learn more about materials in payment applications.
Note: To use this feature in the Budget Payment Application, ensure that all Main Contract schedules of value are linked with budgets.Note: To learn more about how data aggregation works, see Payment Application Data Aggregation.Create a new or add existing cost payment application. See the Link Budget and Cost Payment Applications section in the Cost Payment Application article.
Add an existing expense. To learn more, see the Add Expenses to Budget Payment Applications section.
Use the More menu
 to detach associated costs.
To learn how to add a change order to a budget payment application, see Add Change Orders to Payment Applications.
Create a Budget Payment Application Document
You can generate a document and add it to the budget payment application. The Document Packages in Cost Management article includes detailed step-by-step instructions. It's helpful to collate document package from associated cost payment applications and expenses. What's more, budget payment applications should be associated with contracts before generating the document. Associated contracts allow the sharing of documents.
After adding documents, you can proceed to complete your payment application.
Complete a Budget Payment Application
As a general contractor, after filling out information for your payment application and adding documents and relative attachments, you can click:
- Submit and send an email to an owner. The owner can view the read-only flyout in Cost Management and change status to the Approved or Revise and Resubmit.
- Set as Submitted to change the status without sending a notification to an owner. Click Set as Approved when the payment application gets approved. The next step is to click Set as Paid when it's paid. You can learn more about payment application statuses.
The From Previous Applications section in the active billing period is updated after the approval of the application.
Export Budget Payment Application Reports
You can generate reports for budget payment applications to share information with owners. For detailed instructions on exporting payment reports, including PDF and Excel options, see Export Payment Reports.