
Create Systems
Navigate to the Assets tool > Systems tab.
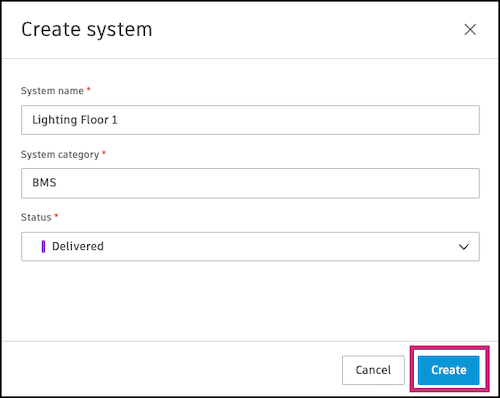
Click Create system.
 Tip: Click
 next to the Create system button to access the Import option. See create assets using an import template for more information about this workflow.
Enter a system name.
Note: System names must be unique.Select a system category. The drop-down menu will show system categories that project administrators have preconfigured in the Settings.
Select a status. The drop-down menu will show the status set associated with the category you selected previously. This is also set up by project administrators.
Click Create.
The system will open immediately. You can start adding assets and other systems you want to group, edit details, add references.
To add assets to a system, click Add assets.
Note: Any member with Edit permissions or higher can add assets or sub-systems to a system.
Select the assets that you want to group into this system. Use the search field and filter icon
 at the top right to search for assets by name or filter for certain assets respectively.
Click Add assets.
To add other systems, from the same Systems page, click the blue arrow icon next to Add assets instead,
 and select Add systems.
Select all the relevant systems. Use the search field and filter icon
at the top right to search for systems by name or filter for certain systems respectively.Click Add systems.
Edit system details.
- System status: Click the existing status and select a new status from the drop-down menu.
- System category: Click the existing category and select a new category from the drop-down menu.

To add references to project items like forms, issues, RFIs, and more that are relevant to this system, click Add references.

Select the project item that you want to reference and use the window to select an existing item or create an item.