Aerial Reconstruction
Aerial Reconstruction uses a collection of photos taken from a drone or aircraft. These photos are oriented around the object and using a target coordinate systems appropriate for the location the photos were taken. As an option, ground control points can be included in the photo capture and referenced to aid in registering the images for model generation.
This is a ReCap Data Service feature that requires Flex Tokens to process. Refer to Data Services and Tokens for more information.
Process
Begin by selecting the Create an aerial project icon in the Create 3D section of the Dashboard.
This will open an overlay window you can click to browse for files or folders containing photos for the project.

You can also choose the Add photos tool to begin selecting files to build the model from.
Navigate to the files you want to use and select them in the explorer window and click Open top add them to the images.
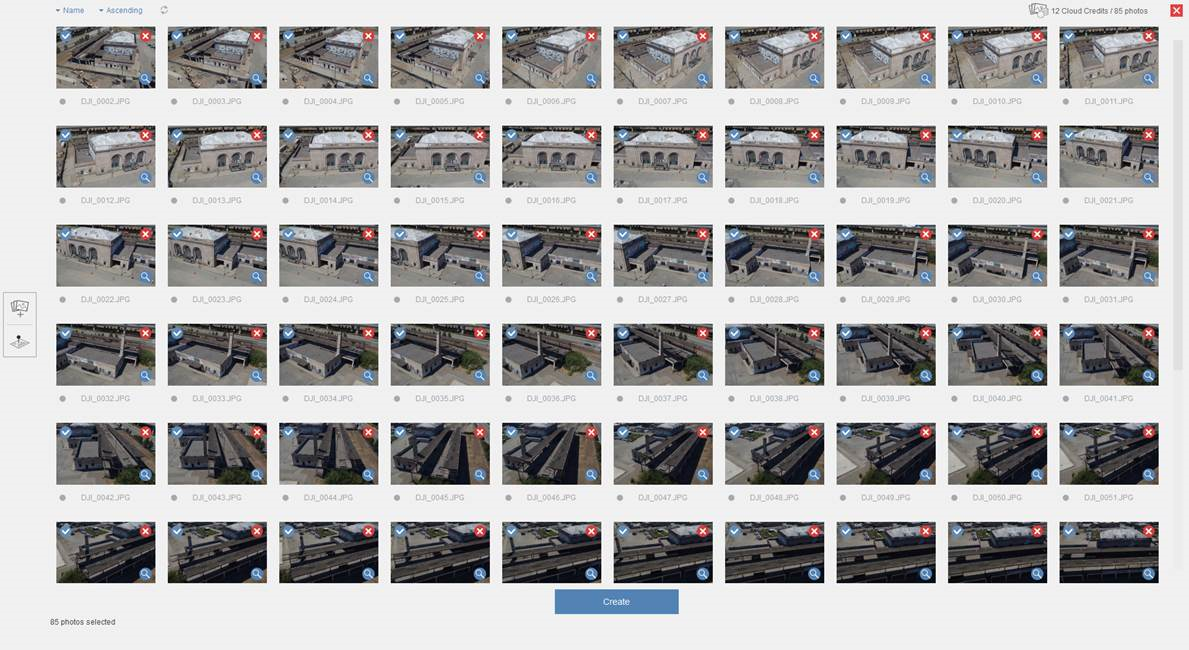
You can select specific images using the blue check mark. Not selecting any files would create the project based on all of the images in the queue. To remove images from the group you can select the red 'X' icon.

If local survey information for the project is available you can select the Ground Control Points icon to begin adding location data and relate it to the images in the project.
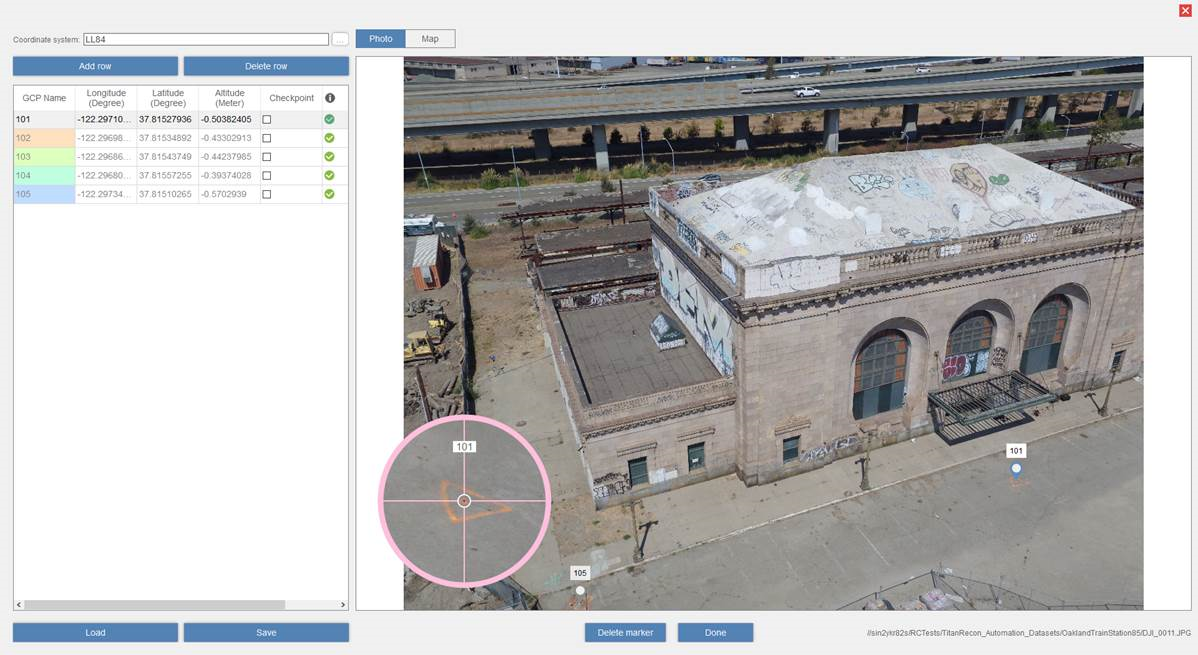
Using data collected in the field on the position of select points in the scan images and relate them to a global position.
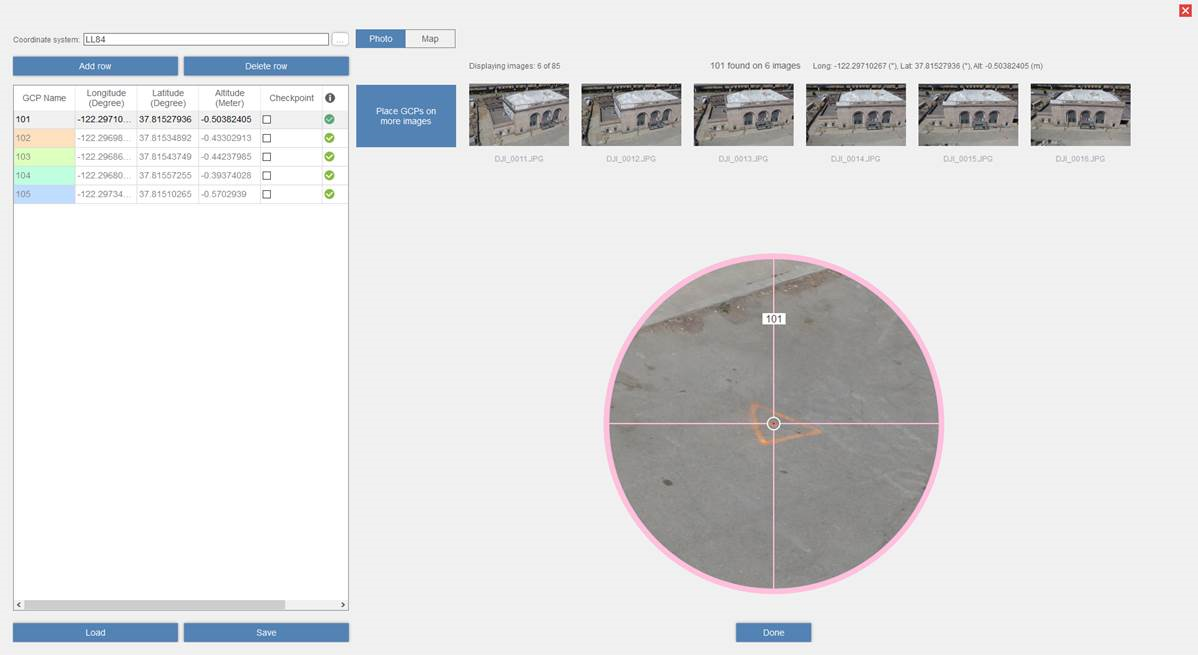
To properly locate the project each of the surveyed points must be related to four images.
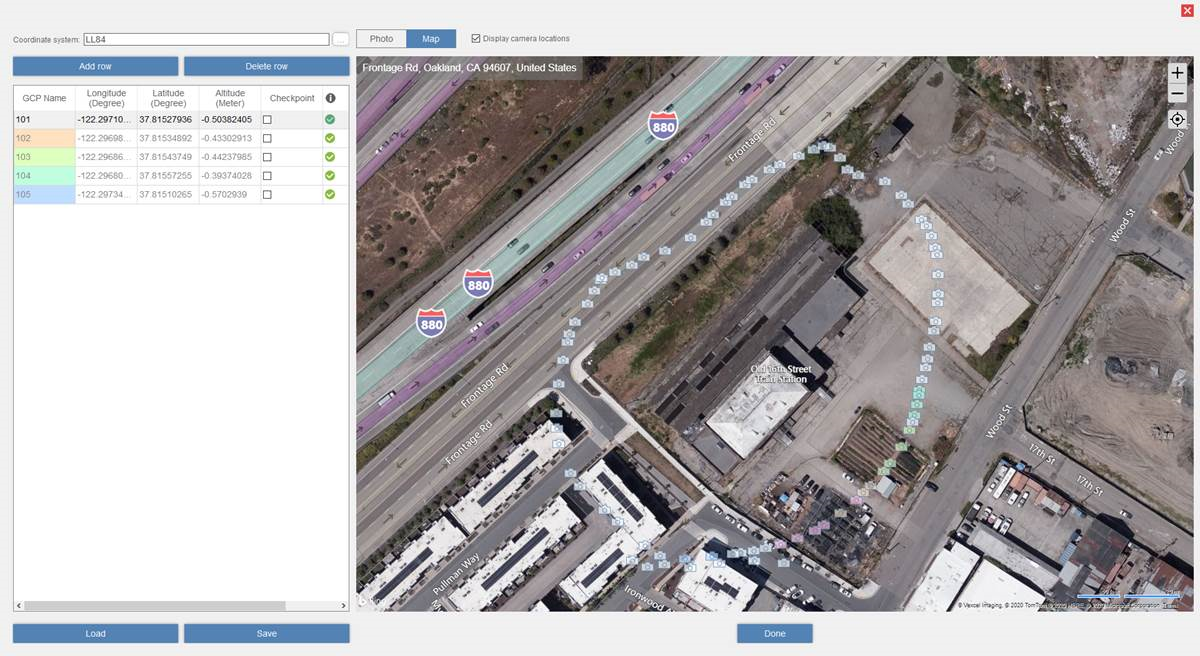
To further validate the data you can view the points in a Map view that will show the position of the images against a global map.
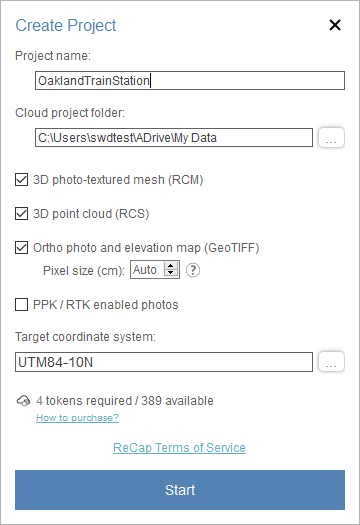
After all of the information is connected you can pick Create to begin the process. After giving the project a name and specifying your local Autodesk Drive location, you can select the following data types to include in the resulting file:
3D Photo-textured mesh
3D Point cloud
Ortho photo and elevation map
PPK/RTK enabled photos.
Setting a target coordinate system and then click Start to begin transferring the images and location data to the cloud for processing.
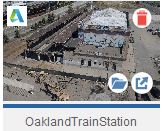
A status thumbnail will appear in the 'My Cloud Drive' area of the Dashboard. When the project is finished processing in the cloud you can download it to your computer for editing.
When the project is finished processing in the cloud, your project data is copied over to the mounted Autodesk Drive in your local machine. To go directly to your project files, click “View Files” that appear when you hover over the project thumbnail in the “My Cloud Drive” area of the Dashboard.
