• Help Home
  • English (US)
    1. English (US)
    2. 简体中文
    3. 繁體中文
    4. Čeština
    5. Deutsch
    6. Español
    7. Français
    8. Italiano
    9. 日本語
    10. 한국어
    11. Polski
    12. Português (Brasil)
    13. Русский
Autodesk ReCap
    • What's New
      • What's New in ReCap Pro
      • New Feature Archive for ReCap Pro and ReCap Photo
    • Release Notes
    • ReCap Pro User's Guide
      • Product Overview
      • Getting Started
      • Scan Project Workflow
      • Creating Scan Projects
        • Creating Scan Projects
        • Importing Scans
        • Parallel Import
        • Scan Settings
        • Indexing
        • Register Scans
        • Attach Navisworks Project
        • About the DeCap Command-Line Tool
      • Scan to Mesh
      • View and Navigate
      • Edit Point Clouds
      • Measurement, Annotations, and Markup
      • Saving & Exporting Your Project
      • Photo to 3D Within ReCap Pro
      • Glossary
    • ReCap Cloud-based Services
    • ReCap Photo User's Guide (2025 and earlier)
    Share
    • Email
    • Facebook
    • Twitter
    • LinkedIn

    Creating Scan Projects

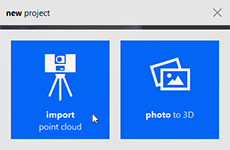
    To begin, click the new project button located on the home screen:

    In the new project dialog, click import point cloud.
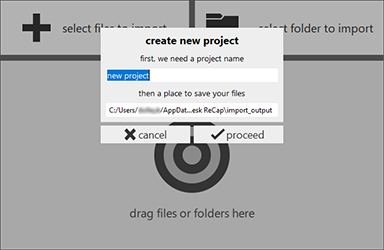
    You are prompted to name your project, and provide the directory you intend to keep the files for your project.
    Parent page: Creating Scan Projects

    Was this information helpful?

    Except where otherwise noted, this work is licensed under a Creative Commons Attribution-NonCommercial-ShareAlike 3.0 Unported License. Please see the Autodesk Creative Commons FAQ for more information.

    • Privacy Statement
    • Legal Notices & Trademarks
    • Report Noncompliance
    • © 2025 Autodesk Inc. All rights reserved