
You can work with Autodesk Vault from Inventor Nesting. You must have:
- A Vault account
- Access to a Vault server
- The Vault client installed and configured on your computer (shows as a Vault tab in Inventor)
You should be familiar with how to do standard tasks in Vault, such as check in a project, log in, map folders, and so on. There are many ways to work with Vault, so for more information on using it with Inventor, see this Autodesk Knowledge Network article:
Set up a Local Vault Project for Inventor Nesting
- In Windows Explorer, copy or cut the CAD files (IAM, DXF, IPT, and so on) that you plan on nesting.
- Paste the CAD files to the local folder you plan to use as the Inventor workspace that will be mapped as the Vault working folder.
- In Inventor, create a Vault project as you normally would, using the workspace folder and files you used in step 2.
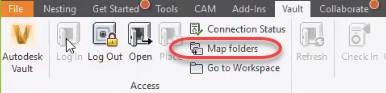
- Go to the Vault tab and log in to Vault.
- If you have not already done so, click Map Folders and map your local Inventor workspace to Vault.
You can also do this later when checking in your work, if you prefer.
Create a Nesting Study in your Local Inventor Workspace
After setting up a local Vault project, you can create a nest and save it to the Inventor workspace.
- In Inventor, go to the Nesting tab and enable the nesting environment.
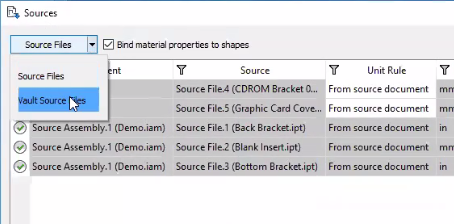
- On the Inventor Nesting ribbon, click Sources.
- In the Sources dialog box click that opens, click
Source Files.
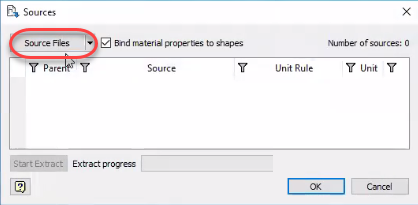 Note: Without Vault installed, this control is named Add.
 - Browse to the Inventor workspace you used when you created the local Vault project.
- Select the CAD files you want to extract and click OK to load them into the Sources dialog box.
- In the Sources dialog box, click Start Extract to extract the files into Inventor Nesting.
- Create a nesting study as you normally would.
- Save the INEST file.
The INEST file must be saved in the local Inventor workspace that is (or will be) mapped to Vault. You can save it in the root folder or a subfolder within the workspace.
Check in a Nesting Study
- Go to the Vault tab and click
Check In.
Tip: If you have not already mapped your Inventor workspace to Vault, you are prompted to do so.
The Vault Check In dialog box opens.
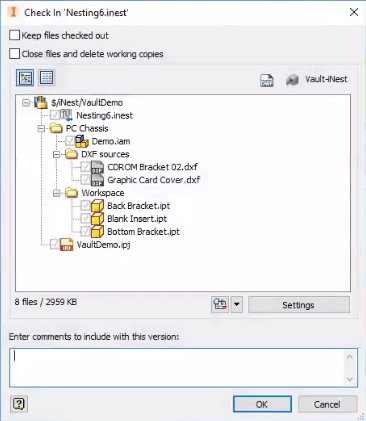
The dialog box shows your INEST and Inventor files along with all referenced files. You must check in all files if you want to be able to check out an INEST file later.
- Click OK to check in the files.
Browse Your Nest in Vault
Once you have checked in a Nest, you can browse through it with Vault.
- In Inventor, click Autodesk Vault on the Vault ribbon to start Vault.
- Log in to Vault.
- Browse through your project folders in Vault as you normally would.

Check out an INEST File from Vault
Before you check out an INEST file, make sure that the latest version of its associated project file (for example, an IPJ file) is checked in to Vault.
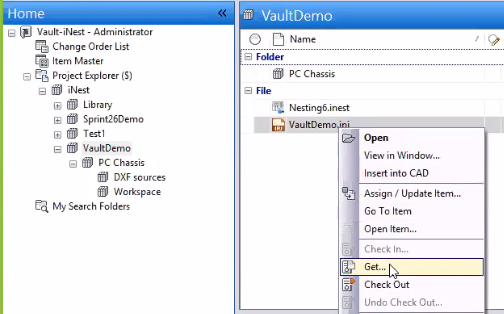
- In Vault, right-click the project file associated with the INEST file and select
Get.
The file is downloaded to your working folder as a read-only file.
- Optional: Right-click the project file again and select Go To Working Folder to open that location in Windows Explorer.
- In Inventor, if necessary, switch the project folder to the Vault working folder.
- Go to the Inventor Open dialog box and click
Browse To A File In The Vault And Open It.
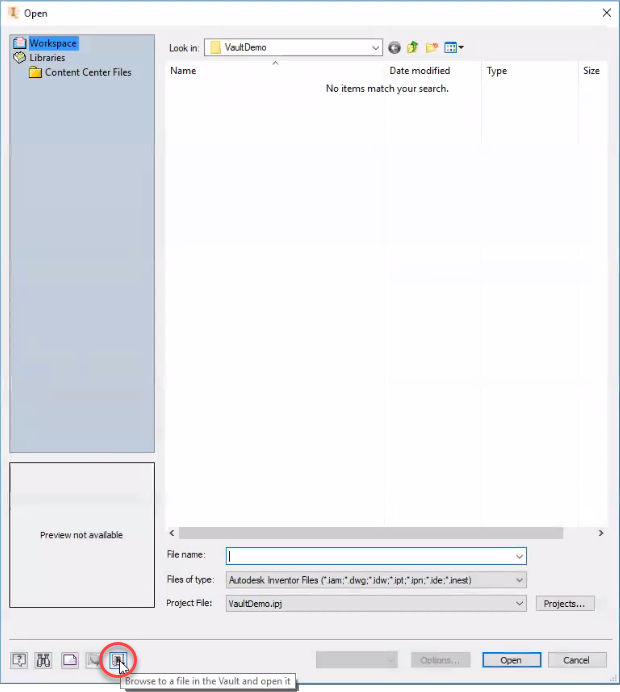
The Select File From Vault dialog box opens.
- In the Select File From Vault dialog box, navigate to the INEST file you want to open and select
Open (Check Out).
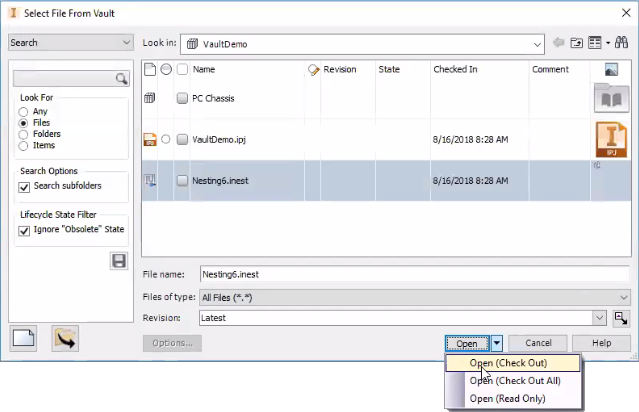
An information box opens, showing that you are checking out the file.
- If you are prompted to update properties for any files, click Yes To All.
All referenced files are downloaded to the working folder and the project opens in Nesting Utility.
Add Source Files from Vault to a Nesting Project
- Click Sources on the Nesting Utility ribbon to open the Sources dialog box.
- Select Vault Source Files from the Sources box.
 Note: Without Vault installed, this control is named Add, and is used to add files from the local disk.
 - Use the Vault browser to navigate to the Vault folder containing the files you want and select them.
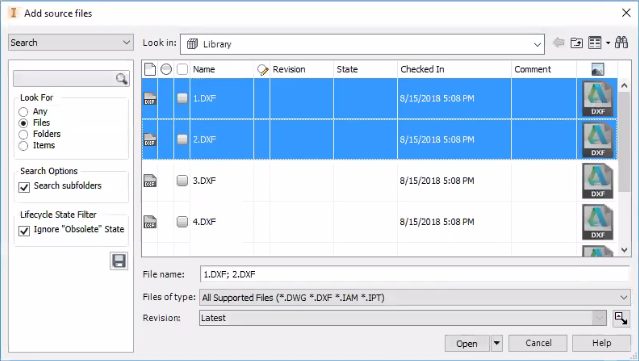
- Click Open.
The files are downloaded to your local working folder and are added to your project as read-only files. (If you want to add them as modifiable files, use Open (Check Out) from the Add Sources Files dialog box instead of Open.)