
Issue:
This article explains how to perform a clean uninstall of Autodesk products on Windows.
Environment:
- Windows
Causes:
A clean uninstall may be necessary if:
- You’re trying to upgrade to a new version and keep getting errors.
- You tried to install a product for the first time and installation stopped midway.
- You thought you installed it successfully, but the product won’t start.
Solution:
Note:
|
Autodesk Clean Uninstall
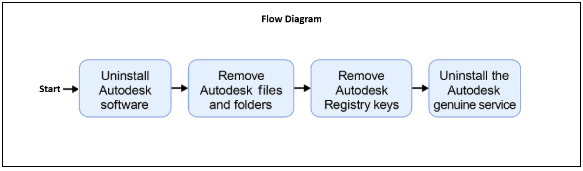
Follow and complete each solution step below in the order shown in the flow diagram to fully clean uninstall all Autodesk software.
Solution steps:
Uninstall Autodesk software:
- For versions 2021 and older:
Search "Uninstall Tool" on the Windows Start button.
Open the uninstall tool and select all the Autodesk software and remove them.
| Note: The Uninstall Tool is only available for Autodesk software versions 2021 and older. |
- For versions 2022 and newer:
- Click the Windows logo at the bottom left of your screen and type appwiz.cpl then press ENTER to open the control panel.
In the control panel uninstall all Autodesk software except the Autodesk Genuine Service.
Navigate to C:\Program Files\Autodesk\AdODIS\V1.
In folder V1 right-click "RemoveODIS.exe" and select "Run as administrator.
Navigate to C:\Program Files (x86)\Common Files\Autodesk Shared\AdskLicensing.
In the AdskLicening folder right-click "Uninstall" and select "Run as administrator" to uninstall Autodesk Licensing Desktop Service.
Download Microsoft Program Install and Uninstall Troubleshooter.
Check and remove any residual Autodesk software "except for the Autodesk Genuine Service". If there is more than one entry found the tool will need to be restarted.
| Note: The Autodesk Genuine service can only be uninstalled after all Autodesk software, files and folders, and registry keys are deleted. If you face issues uninstalling the Genuine service using the control panel after all steps in this article are completed, uninstall using: Microsoft Program Install and Uninstall Troubleshooter. |
Step 2 of 5:
Uninstall the Autodesk Identity manager component:
Open the Windows File Explorer.
Go to the folder: C:\Program Files\Autodesk\AdskIdentityManager.
Right-click on "uninstall.exe".
Run the file as Administrator.
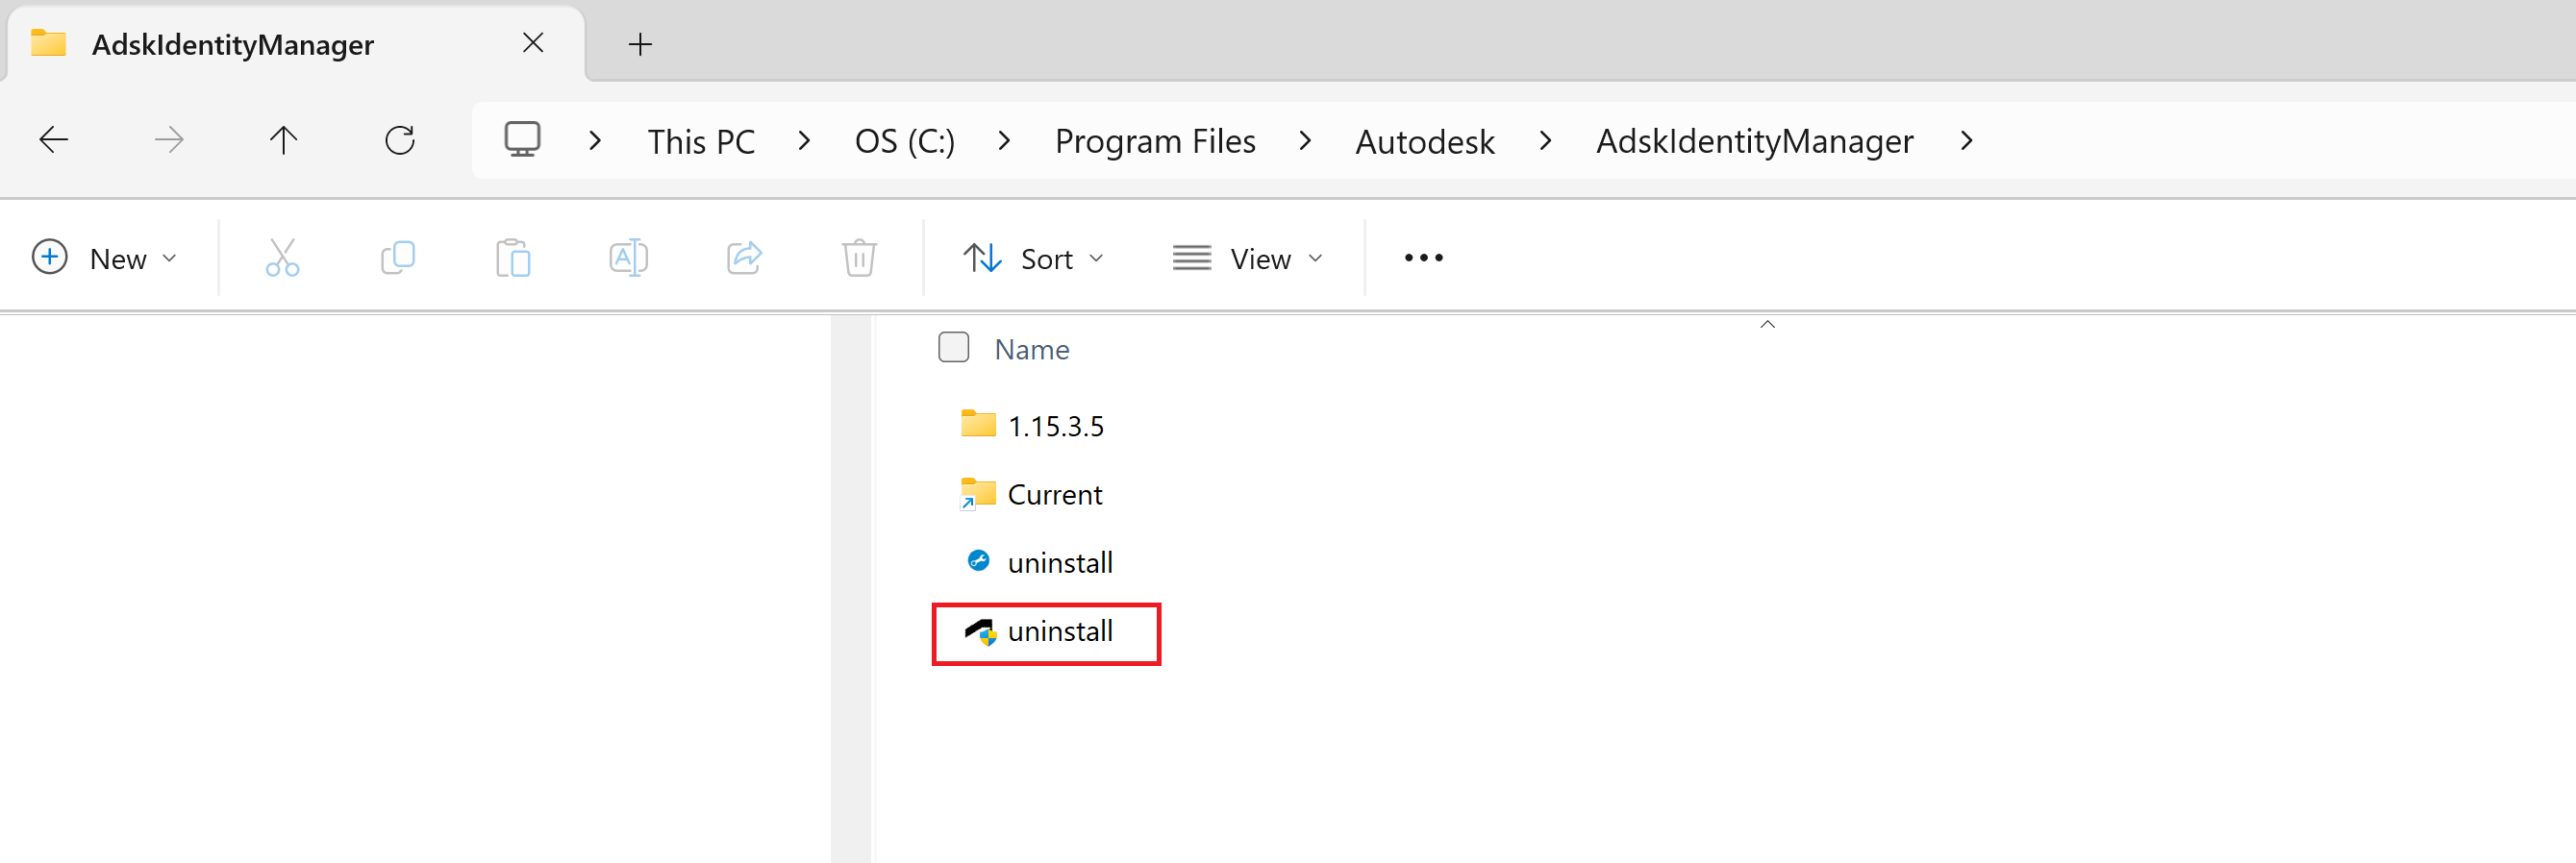
Wait until the folder becomes empty.
Step 3 of 5:
Remove Autodesk files and folders:
-
Click the Windows logo at the bottom left of your screen and type %temp% then press ENTER to open the Temp folder.
Inside the Temp folder select all the files and delete them, skip any file that can not be deleted.
| Note: Delete the files inside the Temp folder, do not delete the Temp folder. |
Navigate to C:\ProgramData\FLEXnet.
In the FLEXnet folder delete the three files starting with adsk.
| Note: One of the three files is a hidden file, see How to turn on hidden files and folders on Windows. |
- Delete the following folders:
| Note: If you have customized families or templates in any of the below folders, back them up by rename them or moving them to another folder instead of deleting. |
C:\Program Files\Autodesk
C:\Program Files\Common Files\Autodesk Shared
C:\Program Files (x86)\Autodesk
C:\Program Files (x86)\Common Files\Autodesk Shared
C:\ProgramData\Autodesk (This folder might be hidden)
%localappdata%\Autodesk (This folder might be hidden)
%appdata%\Autodesk (This folder might be hidden)
Step 4 of 5:
Remove Autodesk Registry keys:
- Open Windows Registry Editor (REGEDIT) and remove the following:
Computer\HKEY_LOCAL_MACHINE\SOFTWARE\Autodesk
- Computer\HKEY_CURRENT_USER\SOFTWARE\Autodesk
| Warning: Use the Microsoft® Registry Editor only at your own risk. Only after backing up the registry and the system.dat and user.dat files as outlined for your operating system in the Microsoft Knowledge Base and in the related solution, Backup system registry. Additional information about the registry is also contained in the Help topics in the Microsoft Registry Editor. |
Step 5 of 5:
Uninstall the Autodesk Genuine Service:
- Click the Windows logo in the bottom left of your screen and type appwiz.cpl then press ENTER to open the Control Panel.
- Uninstall Autodesk Genuine Service.