
Issue:
Causes:
Mapped Drives vs. UNC (Universal Naming Convention) File Paths
Mapped drives (e.g. "X:\Renders") that exist on PCs, external RAID or NAS devices that are used as scene asset repositories and/or network rendering destinations may cause problems with 3ds Max or Maya -- the software may not be able to find the files on different machines in a network or render farm setup, especially when using Backburner.
Not all PCs in a network may identify a particular mapped drive letter as the same location as other PCs. When 3ds Max or Maya searches for the mapped file path (network render session or opening a file) it may not be able to determine immediately if the mapped drive exists.
If this happens, the file path will not be found on those machines, causing job failure for network rendering or failure to load XRefs, bitmaps, or other external assets into 3ds Max or Maya when opened.
UNC names identify network resources by directly naming the exact machine, folder and file path locations on a network. These names often consist of three parts:
- The host PC name
- A share name
- An optional file path.
\\host-pc-name\share-name\file_path (machine name, shared drive or folder, sub-folder)

\\host-pc-name\folder-share-name\ (machine name, shared drive or folder only)
Setting file output/destination paths using UNC naming conventions allows all PCs on a network to have an exact machine/folder/file path "address".
NOTE: Use UNC paths instead of mapped drives for rendered output (especially when doing network rendering) and for scene assets, such as bitmap textures, XRef files, .ies files and so forth.
Solution:
For network rendering, create and share the destination folder:
NOTE: if your organization doesn't allow you to perform these steps, please consult with your network administrator or IT staff member (if applicable) to see if they can create the proper network shares. The example below is tailored towards 3ds Max, but is applicable to Maya as well.- Designate a master folder as the destination for each network rendering server's output. In this case, we have chosen C:\Net_Renders on the computer named "My_Workstation."
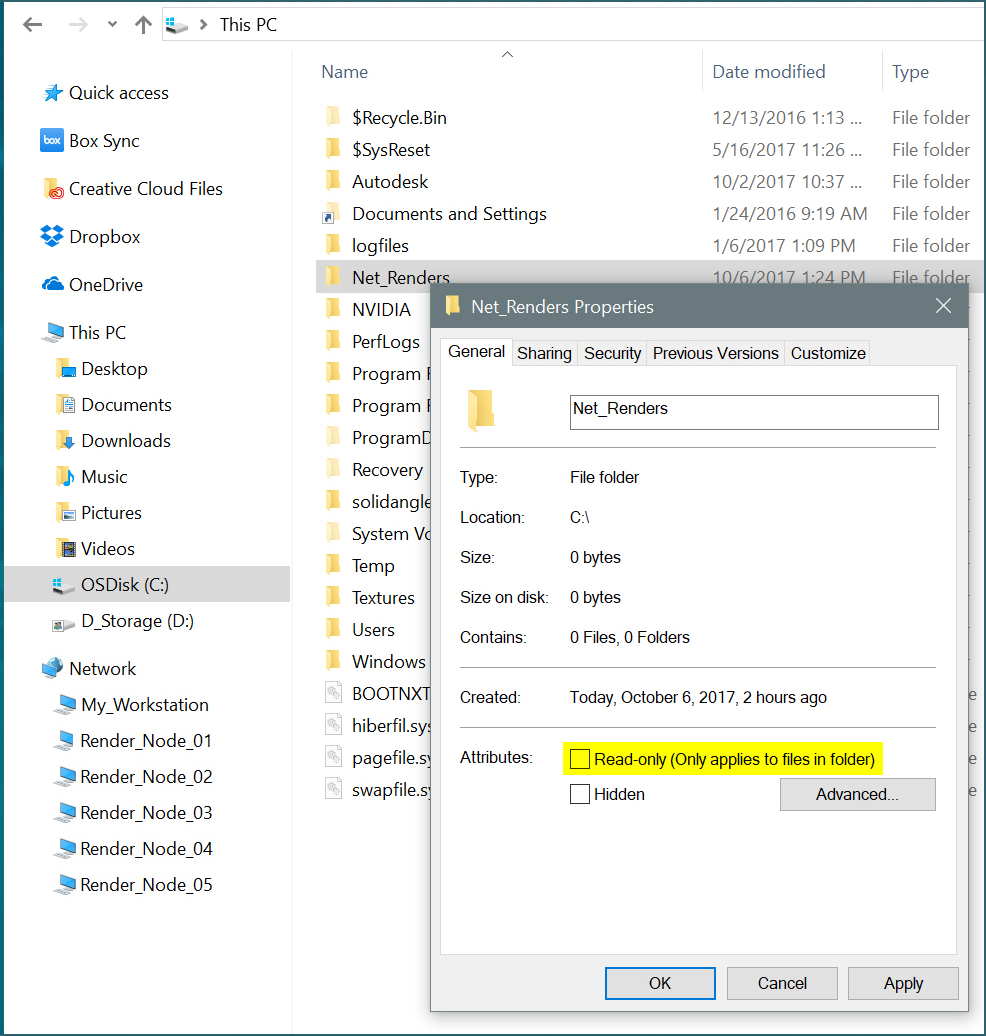
- Using Windows Explorer, browse to the C:\Net_Renders folder.
- Right-click on the Net_Renders folder to bring up the Properties menu. Under the General tab, make sure Read-Only is unchecked, then click on Apply.
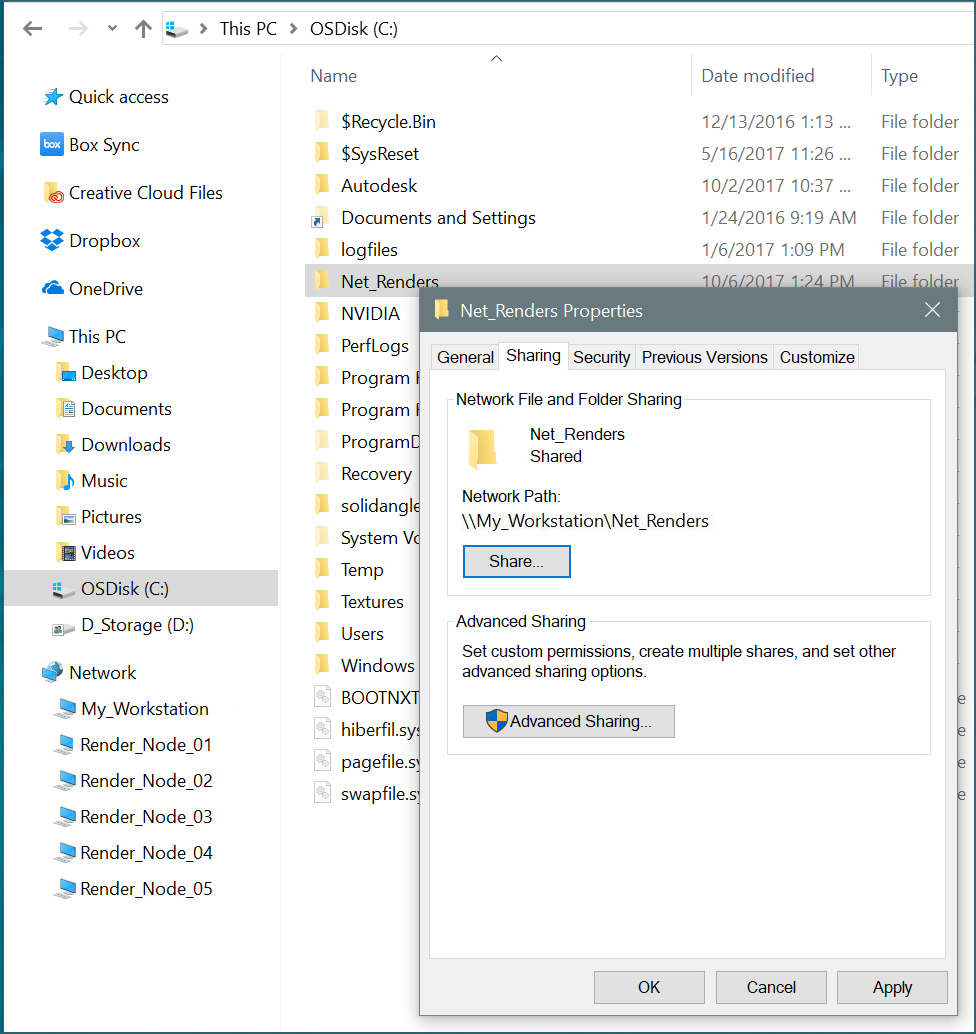
- Click on the Sharing tab, then click the Share button.
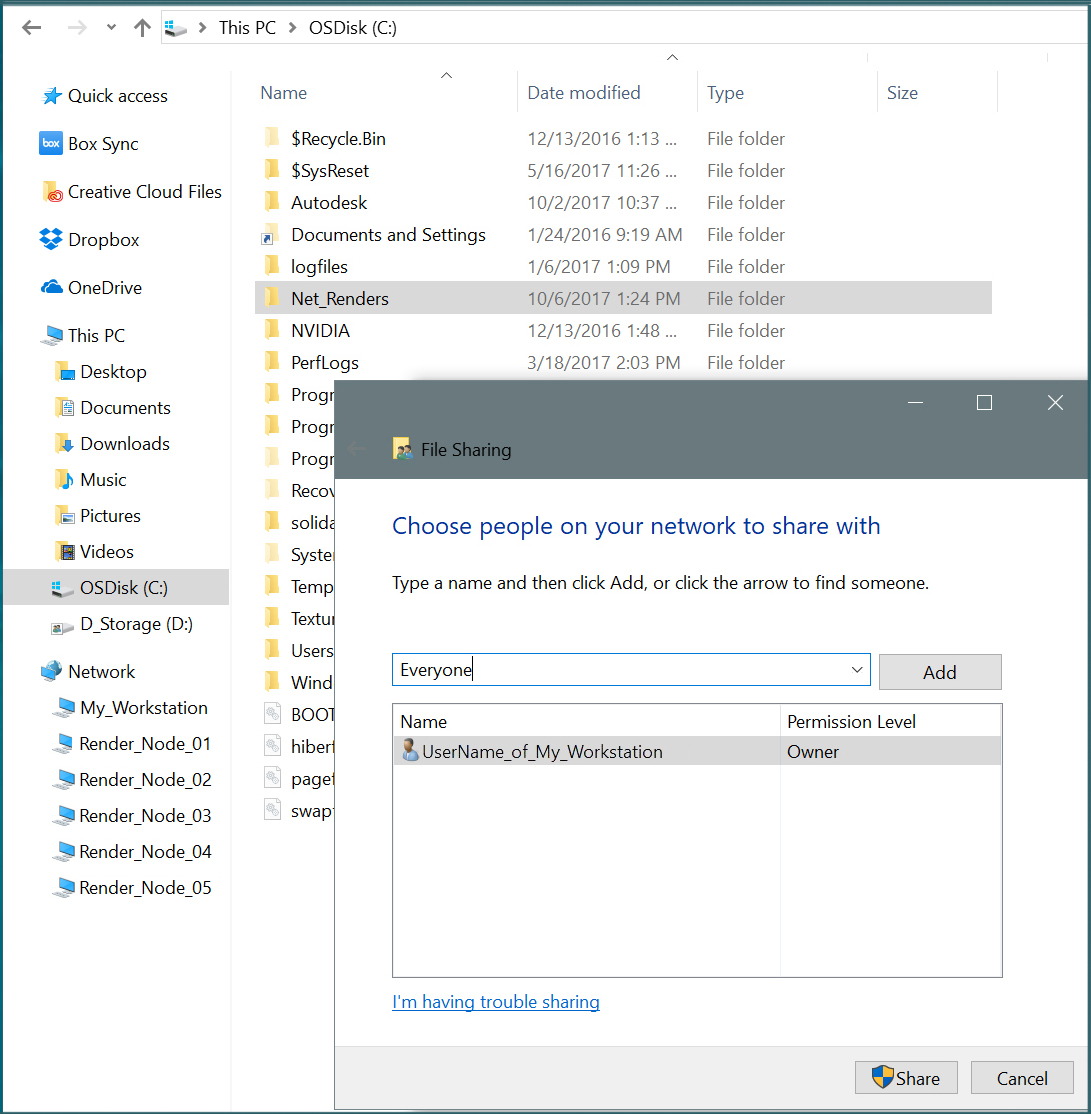
- From the drop-down menu, click on the people/PCs in the WorkGroup or organization you want to add, then add them. (For a secure home network, this might be "Everyone.") Then, click the Share button.
- When finished, click Done, then Close.
For 3ds Max, set the network rendering output to the UNC destination:
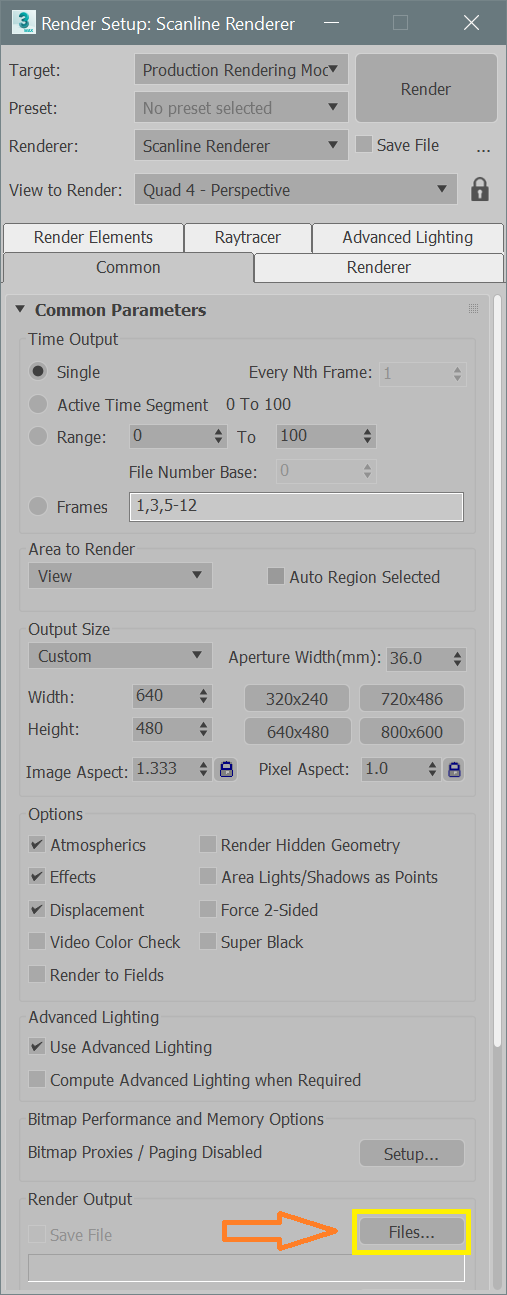
- Open your scene in 3ds Max and bring up the Rendering > Render Setup menu.
- In the "Render Output" group, select the "Files" button. This opens the "Render Output File" dialog.
- Browse to "Network" and then to the list of shared PCs on the network.
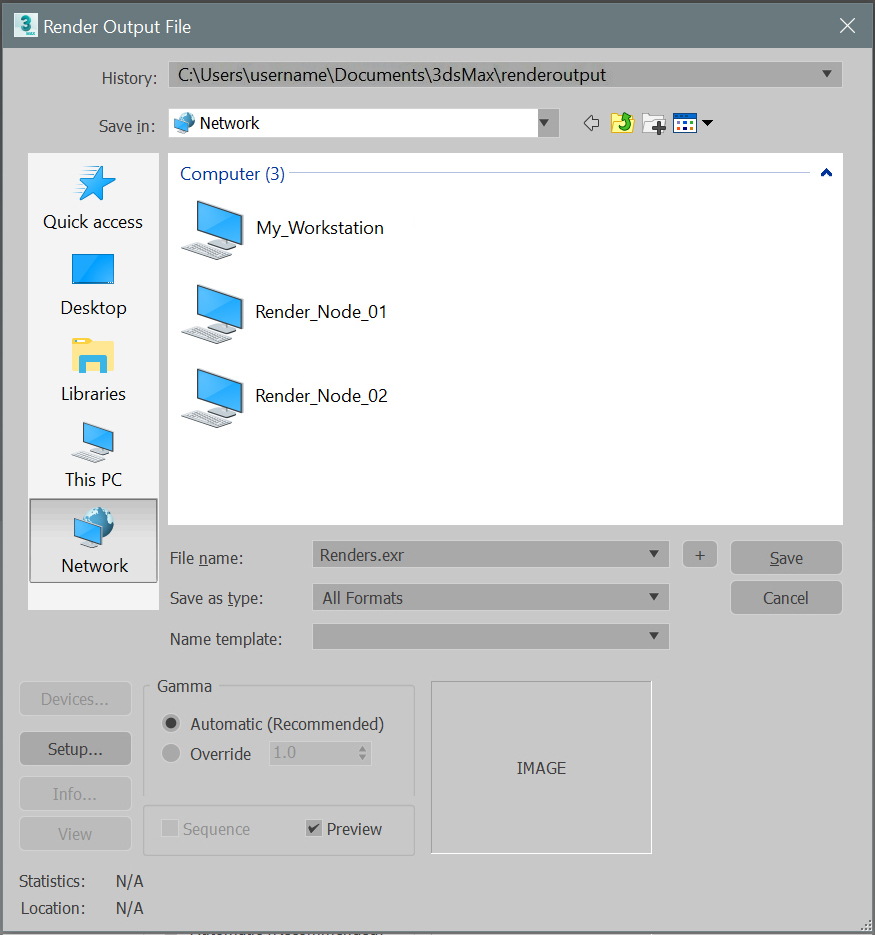
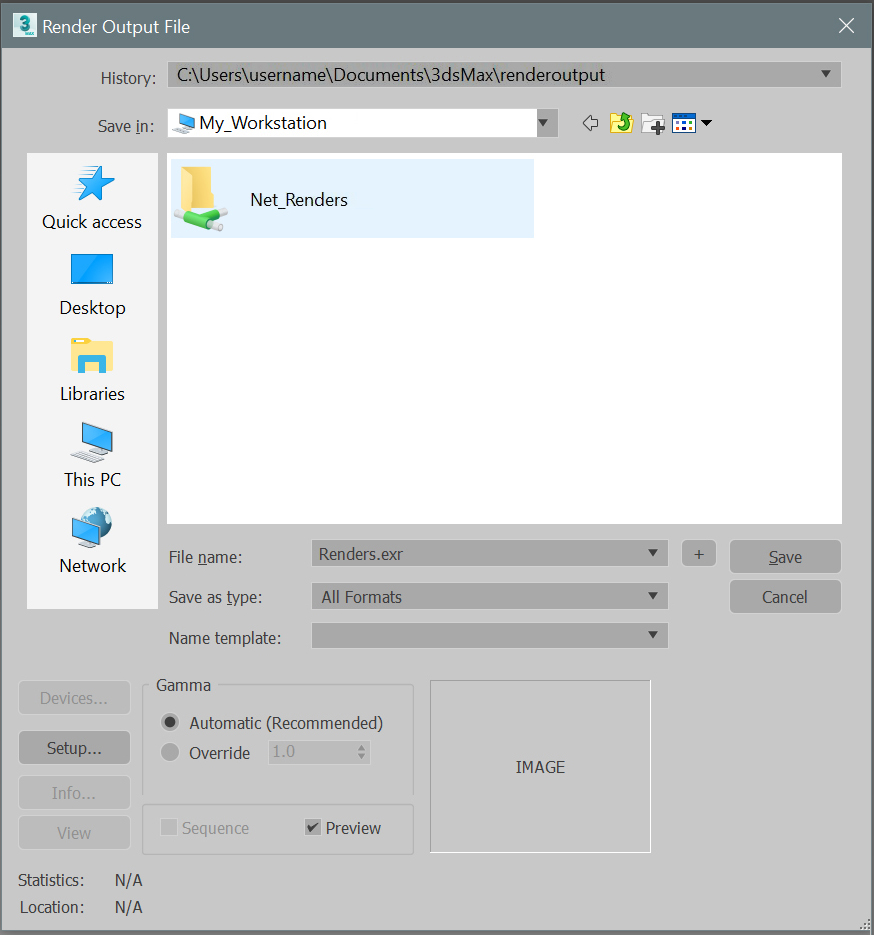
- Double-click on the machine name where your shared Render folder resides (in this example, "Net_Renders"), then pick that folder, as shown in the following image:
- Enter the desired render output file name, click Save as Type, then click Save and then choose the settings for the file type (.jpg, .tif, .tga, .exr, etc.)
- Click OK in the configuration dialog.
- You are now ready to render to your destination computer. Note that this UNC designation is saved in the .max file if you choose to network render. Each server computer will output to the UNC location specified.
Using UNC Paths for scene assets: Customize User Paths and Asset Tracking Menu
- You can add permanent UNC paths for your bitmap assets (to your 3dsmax.ini file) via the Customize > Configure User Paths > External Files tab. There, you can click on the Add button, and via the same UNC pathways described above, browse to bitmap folders on your local machine or shared NAS/RAID and add them. (Note: as above, these folders should be Shared and available via UNC paths.)
- After loading a 3ds Max scene file, you can manually re-path locally-pathed bitmap assets by going to File > Reference > Asset Tracking (Toggle, in 3ds Max 2018.) Once there, you can change local or mapped drive path assignments for bitmaps and other files used in your scene to UNC paths. (Again, these folders must have their Sharing properties set beforehand in order to be visible on your network.)
- Finally, you may also want to set your 3ds Max sessions to automatically use UNC paths by going to Customize > Preferences > Files tab, and clicking on the Convert file paths to UNC. This flag will then be set in your 3dsmax.ini file when you close and re-open 3ds Max.
See Also:
- How to set up a basic render farm.
- How to assign a file path using the Universal Naming Convention (UNC).
- "Missing External Files" appears when loading 3ds Max scenes or transferring projects to another workstation.
- Cannot Resolve Path to UNC Location in the Asset Tracking Toggle menu in 3ds Max
- How to optimize performance in very large 3ds Max scenes.