
Issue:
Newly installed releases of AutoCAD products on Windows systems have a ribbon based interface. You would like to know how to configure AutoCAD and restore the classic workspace that uses toolbars instead.
Causes:
The toolbar based interface, or classic workspace, was last included by default in AutoCAD 2015. The newer releases use the ribbon based workspace instead.
Note: This does not apply to AutoCAD for Mac, which does not have a "workspace" based interface like the Windows version.
Solution:
Use a script to streamline the manual steps
Download and run the script included in the Classic Workspace Script.zip file attached to this article:
- Click the attached ZIP file to download it.
- Extract the ZIP file to find the ClassicWS.scr script file.
- Start AutoCAD.
- Drag the ClassicWS.scr file into any drawing window or use the SCRIPT command to run it.
Add the toolbars with Customize User Interface for AutoCAD
- Drag and drop method:
Enter the CUI command to open the Customize User Interface window.
- Select a workspace or create one.
- Click the plus symbol to open the Toolbars tree on the left side.
- Drag the desired toolbars to the Toolbars tree on the right side.
- Click Apply and then OK to close the configuration editor.
Note: To learn more, watch this Screencast: Toolbars and Workspaces in AutoCAD 2015.
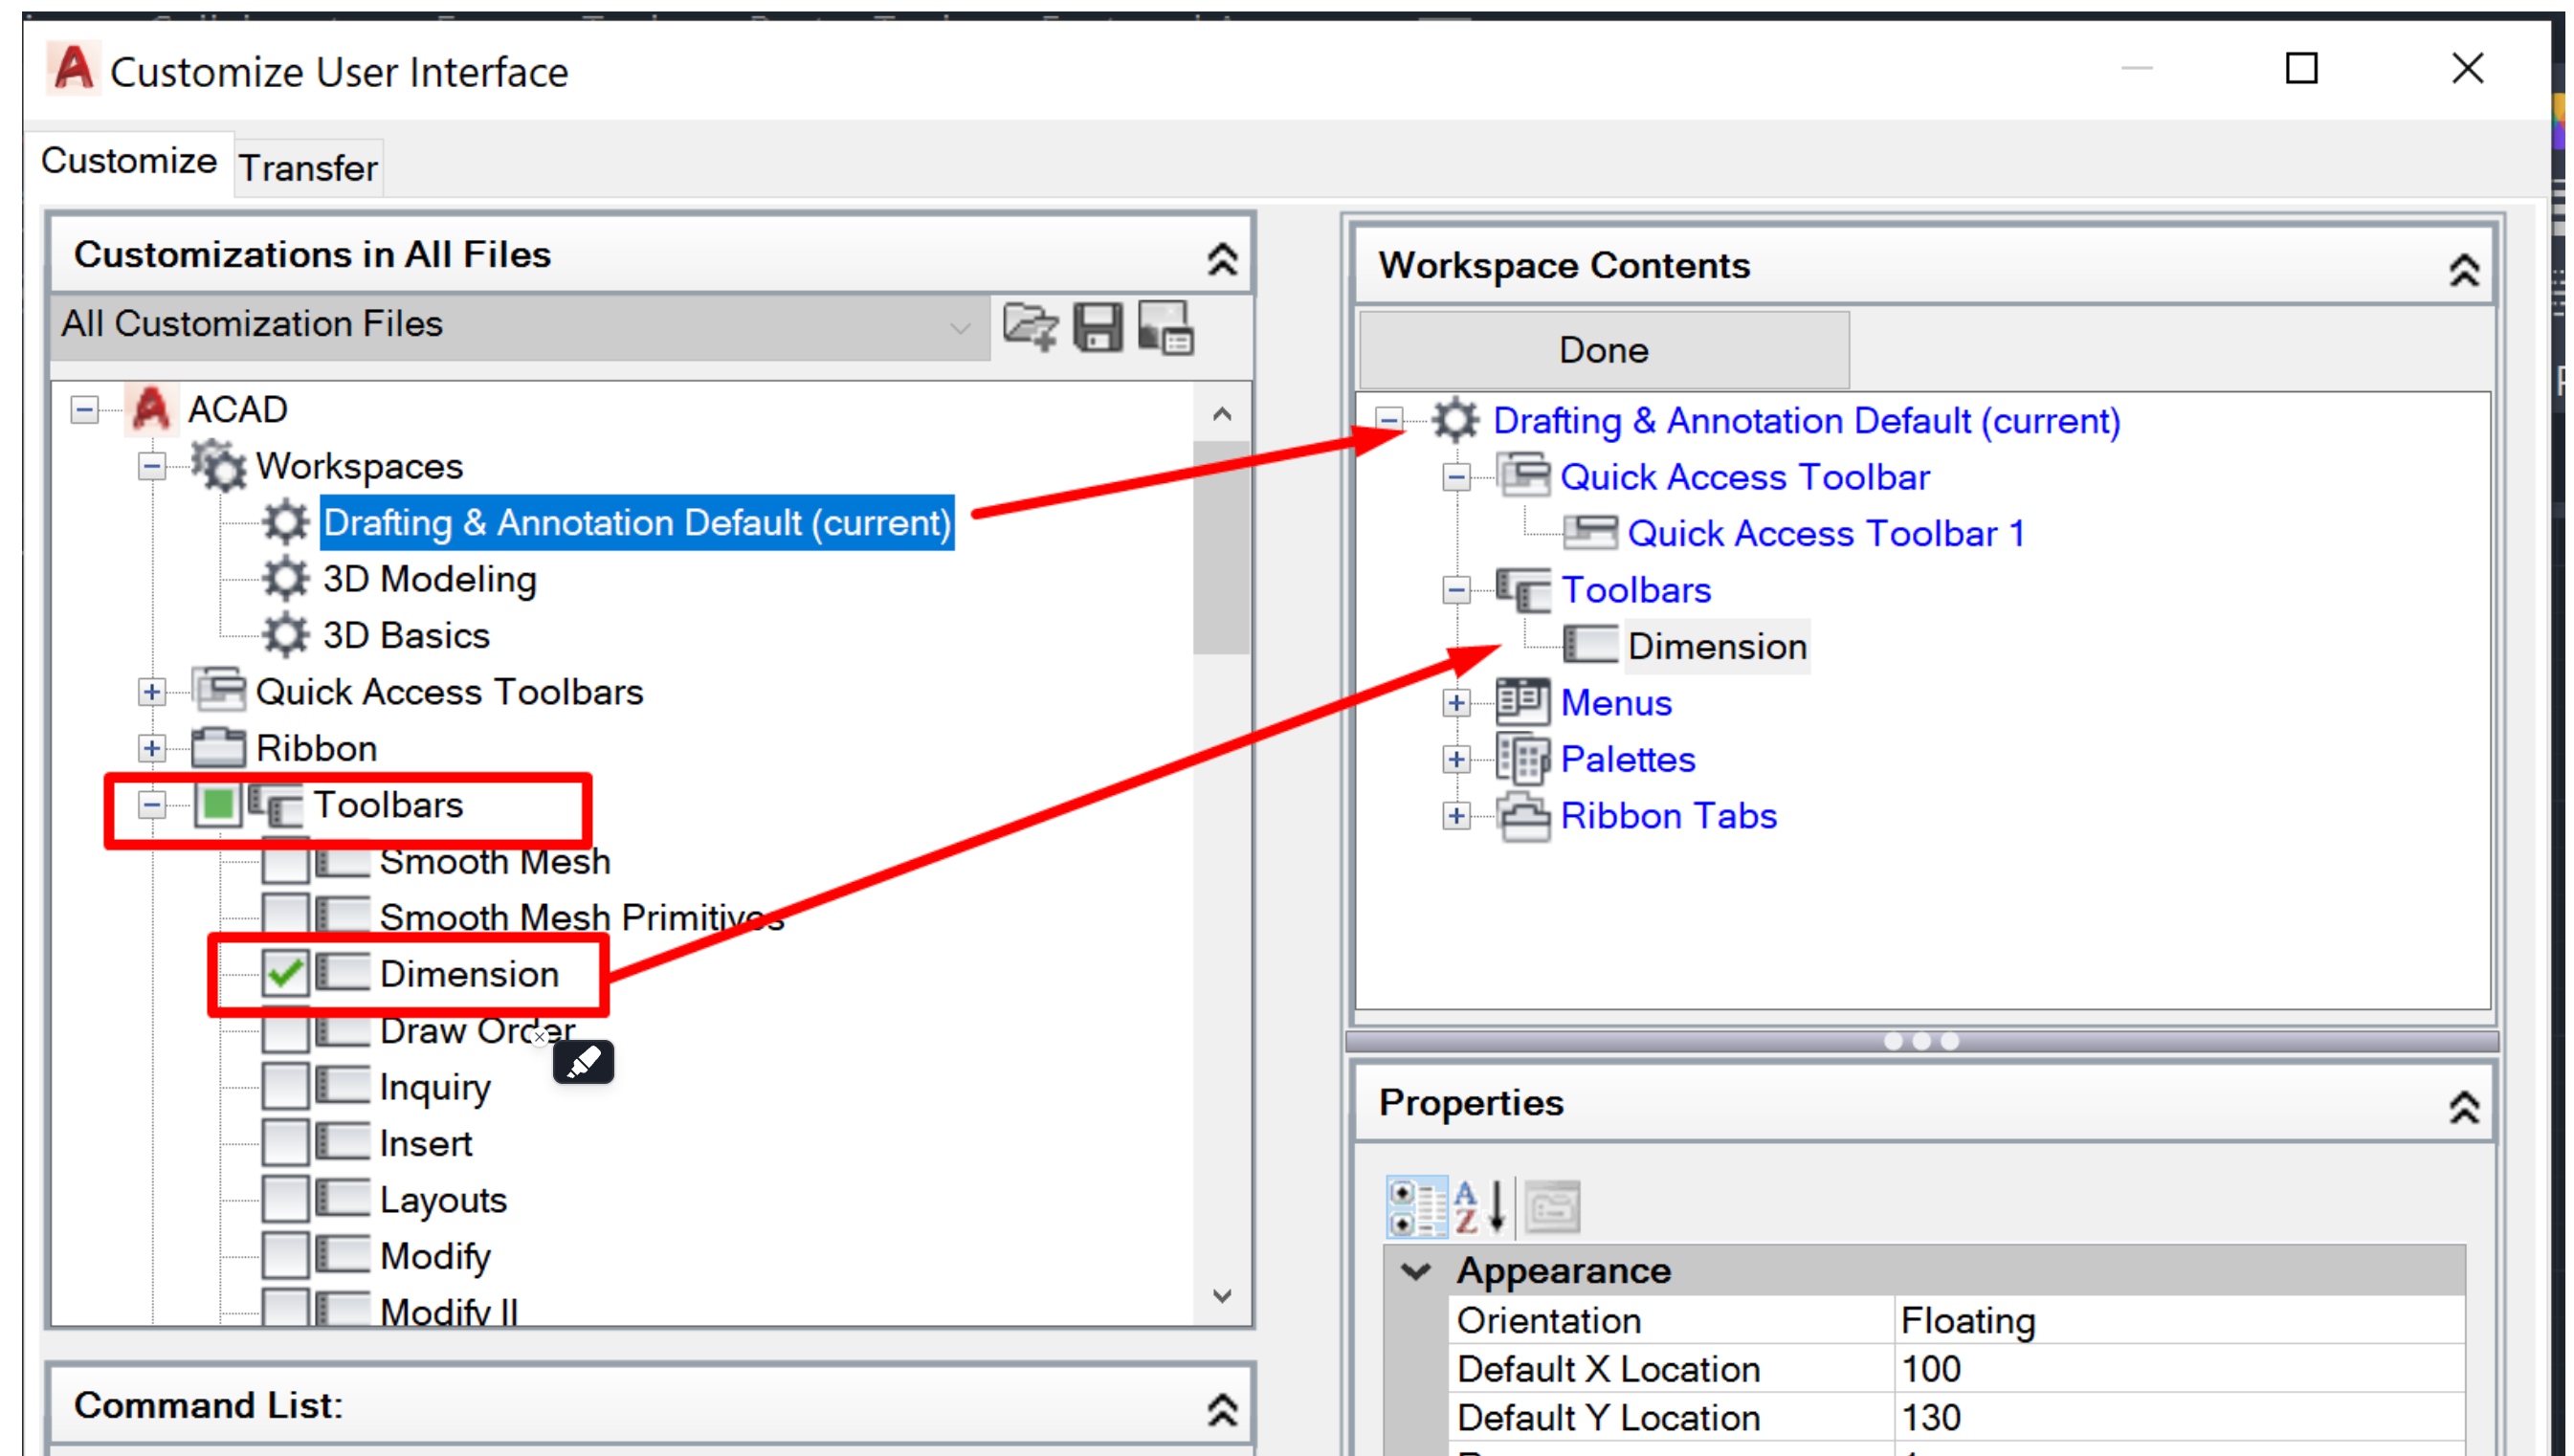
- Customize Workspace method:
Enter the CUI command to open the Customize User Interface window.
- Select a workspace or create one in the Customizations in All Files pane on the left.
- Click the Customize Workspace button in the Workspace Contents pane on the right.
- Click the plus symbol next to Toolbars in the tree on the left.
- In the list under Toolbars, check the box next to toolbars to add them to the selected workspace. They will be shown under Toolbars on the right (see below).
- Click Done on the right.
- Click Apply and then OK to close the configuration editor.
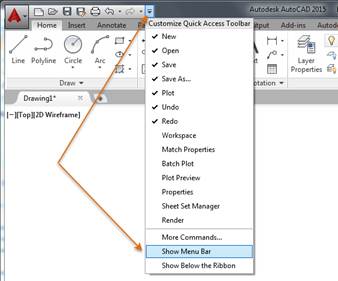
Manually add toolbars with the Quick Access Toolbar
- From the Quick Access Toolbar, select Show Menu Bar.
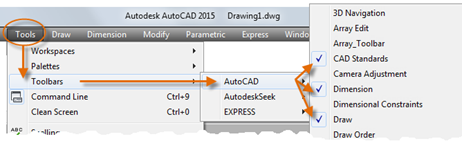
- From the Tools menu, select Palettes > Ribbon. Alternatively, enter RIBBONCLOSE on the command line.
- From the Tools menu, select Toolbars > AutoCAD.
- Select a toolbar and dock it around the canvas/drawing area.
- Select any other desired toolbars.
- Select Tools > Workspaces > Save Current As and save the workspace.
Import or Migrate the workspace from a previous version
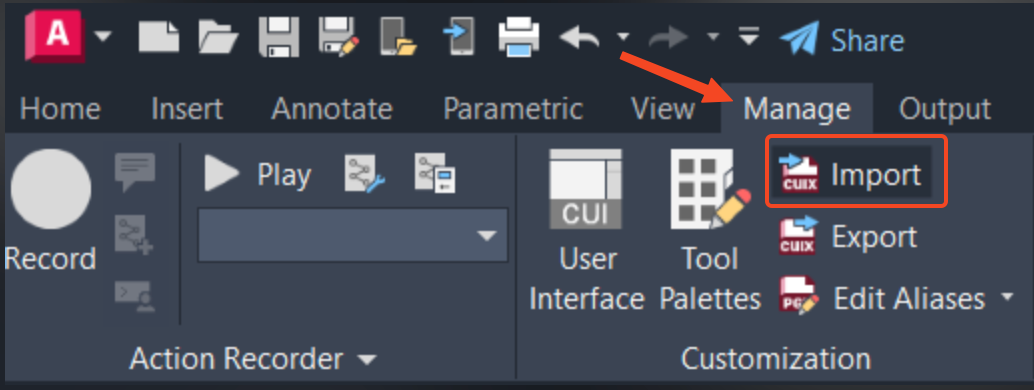
- Import the workspace:
- From the Manage tab in the ribbon, click Import.
- In the customization editor, click the Transfer tab. The current configuration file is in the right pane of the window.
- Extract the ZIP file to find the ClassicWS.scr script file
- In the left pane, load the configuration file, acad.cuix, from the extracted ZIP file, or AutoCAD 2014 or earlier.
- From the workspace list in the left pane, drag AutoCAD Classic to the workspace list in the right pane.
- Click Apply and then OK to close the configuration editor.
Note: To learn more, watch this screencast: Import AutoCAD Classic workspace from the previous version.
Migrate the workspace - If a previous version of AutoCAD is still installed on the system, or if its installation folders are still present:
- Go to Start menu > AutoCAD [LT] version - language > Reset settings to defaults.
- Complete the reset process.
- Once the software starts, close it.
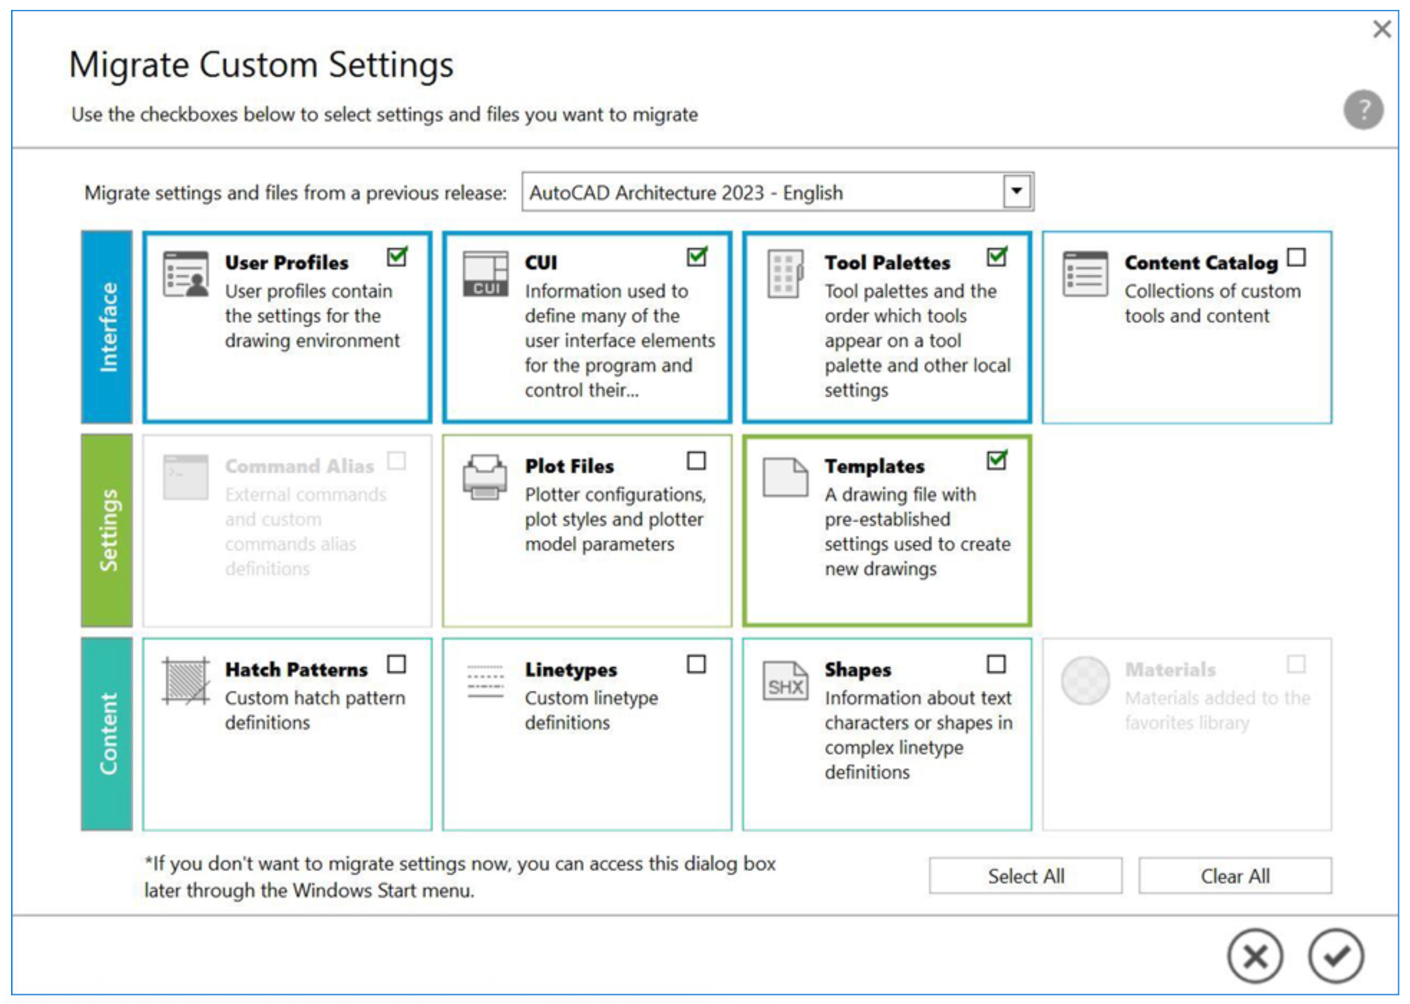
- Open the software again. The Migrate Custom Settings tool will display.
- Choose the desired version from the drop-down menu and other settings as needed.
- Confirm with the check mark.
Add the toolbars with Customize User Interface in AutoCAD Mechanical, Architecture and MEP
- AutoCAD Mechanical: The ACADMPP profile is different from the Vanilla (or plain) AutoCAD profile in AutoCAD Mechanical, check these specific workflows:
- How to restore the classic workspace in AutoCAD Mechanical (screencast)
- How to restore the classic workspace in AutoCAD Mechanical (alternate screencast) - Use the undocumented AM_MECHANICAL_TOOLBARS_FULL command.
- AutoCAD Architecture and MEP: How to Add Menus and Toolbars in AutoCAD Architecture or MEP
See Also:
- How to add a specific toolbar to a workspace in AutoCAD
- How to export, import, backup, and transfer settings to and from AutoCAD
- How to migrate settings from an older version of AutoCAD to a newer one
- Online help: FAQ: Where is the AutoCAD LT Classic workspace?
- FAQ: Where is the AutoCAD Classic workspace? | AutoCAD 2020 | Autodesk Knowledge Network