
Tutorial: Rendering a design
Rendering is the process of generating a photorealistic image by combining geometry, camera, texture, lighting and shading (also called materials) information using a computer program. You can use rendered images to communicate the appearance and functions of designs.
In this tutorial you:
- Apply materials to a design.
- Edit materials.
- Add a decal to represent a label or graphic.
- Change environment settings for the render.
- Create rendered images.
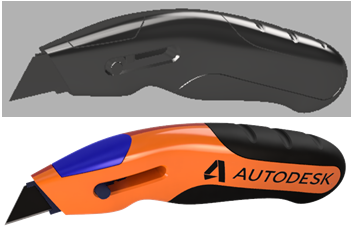
Utility knife with default materials assigned (top), materials assigned and rendered (bottom)
Prerequisites
Open the Data Panel if necessary
 and click New Project and enter the project Render Tutorial to create a project folder. If you do not want to create a new project, create a folder for this tutorial.
Open the Data Panel if necessary
and click Basic Training>07 - Rendering, to open the 07_Rendering_Utilty Knife design.Click File > Save as and save the design with the name Utility Knife in the Render Tutorial project or folder you just created.
Change the Workspace from Design to Render.

The following steps are done to ensure your render workspace has the same setup as assumed in this tutorial. Click
 Setup > Scene Settings, review the Settings tab, and ensure the following are set:
- Brightness - 1000.
- Background – Solid color, 178, 178, 178, (gray). Click the color swatch to check the color and change if necessary.
- Ground Plane – Unchecked.
- Flatten Ground – Unchecked.
- Reflections – Unchecked.
- Camera – Perspective.
- Focal length – 90.
- Depth of Field – Unchecked.
- Aspect Ratio – Viewport aspect ratio.
Click the Environment Library tab of the Scene Settings dialog and ensure the current Environment is Sharp Highlights. If Sharp Highlights is not the current environment, find it in the library then click and drag it onto the canvas.
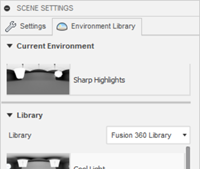
Click Close when done.