Activity 1: View existing members and groups
Fusion Manage requires a separate license and can be used with Fusion or independently. Learn more.
In this activity, you'll explore the Members and Groups section of administration and filter the members list by status.
Prerequisites
Before you can complete this activity, you must:
- Complete Tutorial 1.
- Complete all steps in Get started for administrators.
Steps
Access the hub administration using one of these methods:
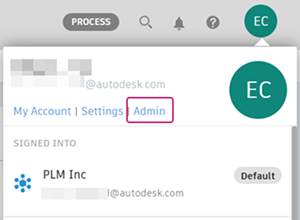
Option 1: In the top-right corner of the Fusion web client, click your profile. Select Admin.
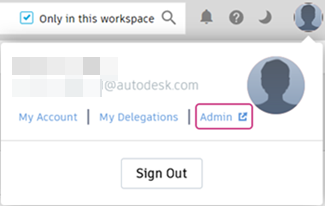
Option 2: In the top-right corner of the Fusion Manage site, click your profile. Select Admin.
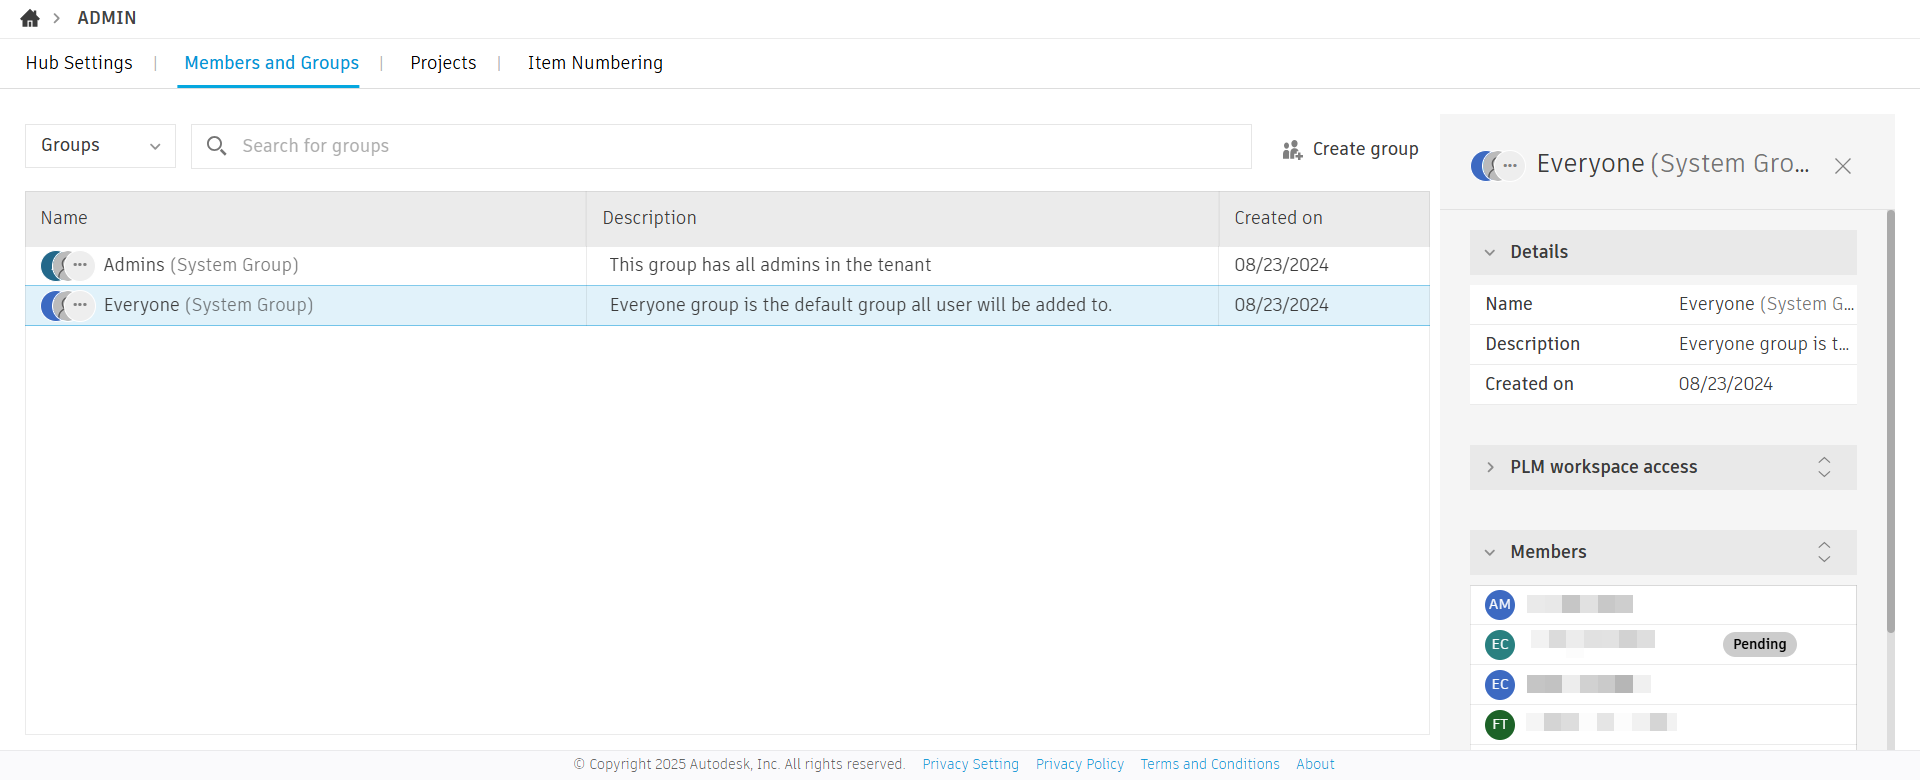
Explore an existing group. For example, the Everyone (System Group) exists by default and contains all hub members.
In the hub administration, click the Groups tab.
This view shows all existing groups in the hub. New hubs include default groups.
Click an existing group.
Review the group details, workspace access, and members.
Click close.
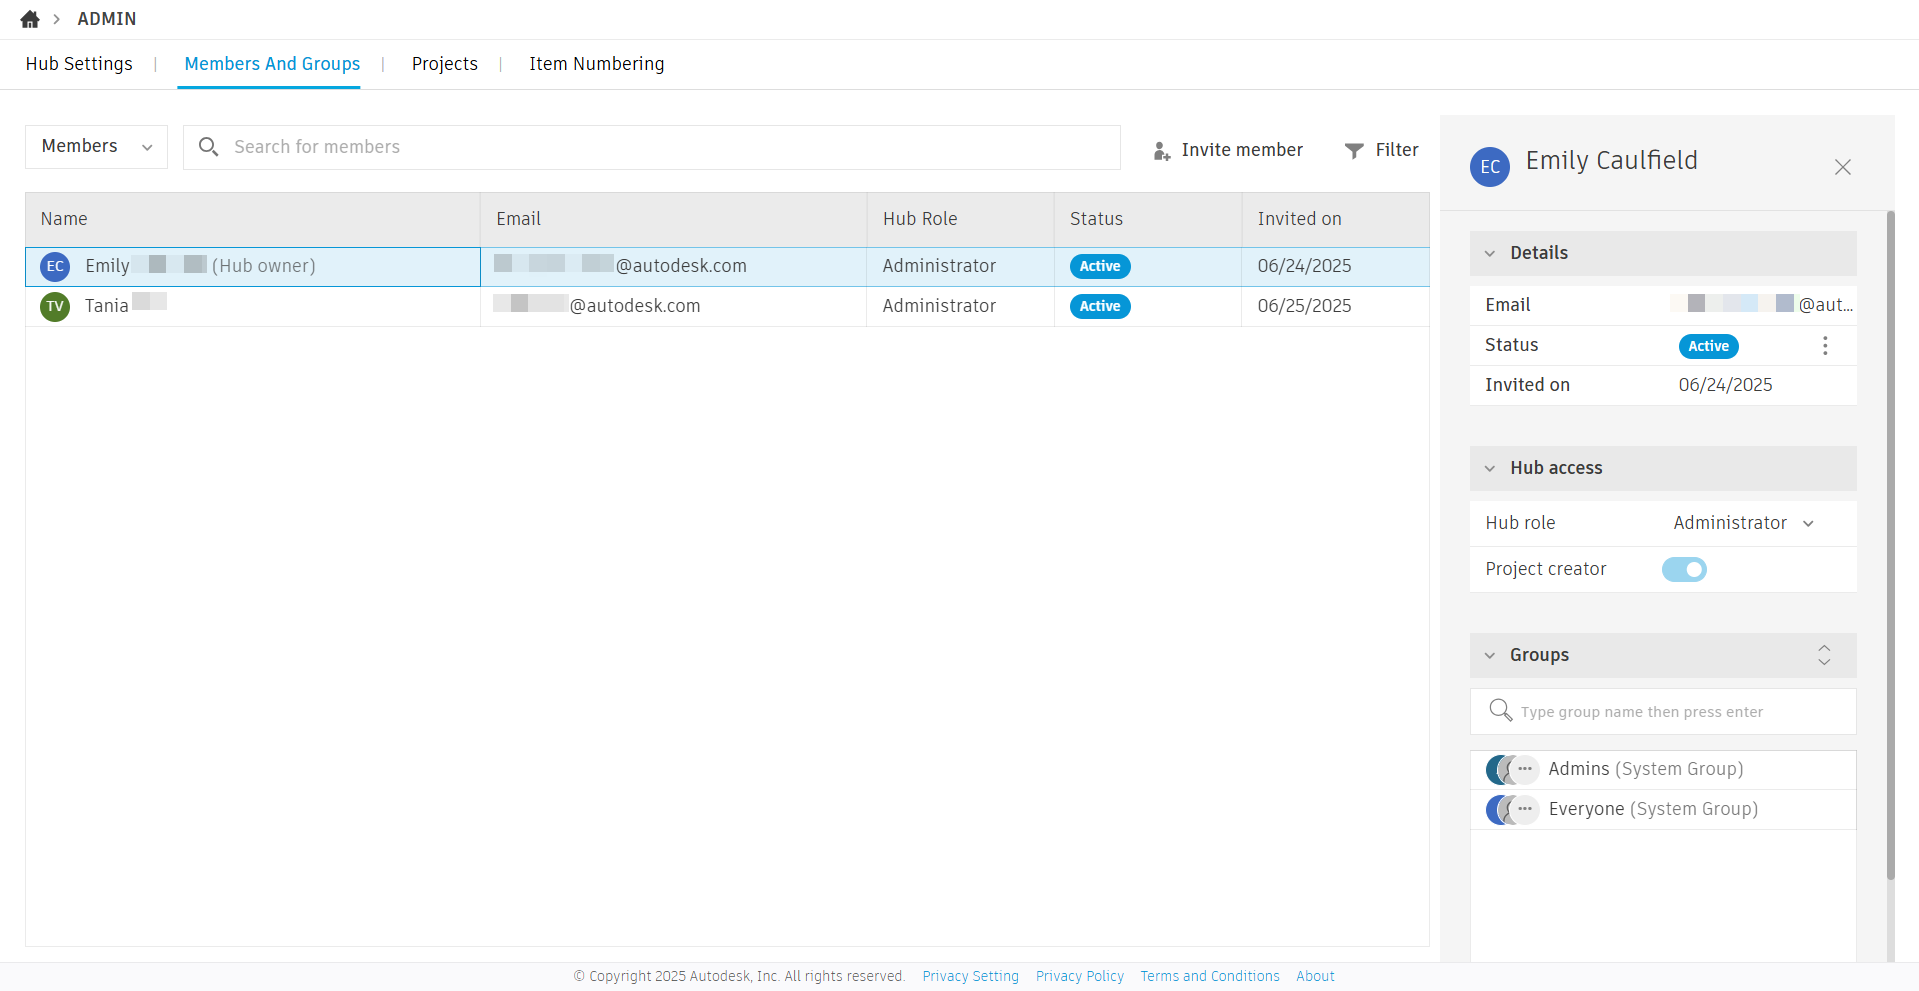
Explore the existing user list.
Note: If this is a new hub without invited team members, use yourself to complete this step.In the hub administration, click the Members tab.
This view shows all existing members in the hub.
Click an existing member.
Review the member details, hub access, and groups.
Click Close.
Filter members by status.
In the top-right corner of the Members tab, click Filter.
From the member status list, select Active. The list now shows only active members.
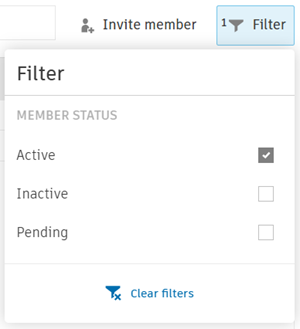
Clear the filter. Select Pending from the member status list. The list now shows members who have not yet accepted their invitation.
Activity 1 summary
In this activity, you explored the Members and Groups tabs of the hub administration and filtered members list by status.
