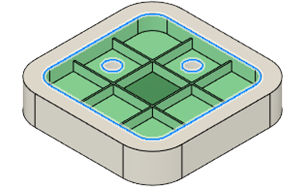
Select objects by seed and boundary
Learn how to use Seed And Boundary to automatically create a selection set that includes faces on a solid or surface body that are located between a set of boundary objects and a seed object in Fusion.

On the toolbar, click Select > Selection Tools > Seed And Boundary
 .
.The Seed And Boundary dialog displays.
In the canvas, select faces or edges on a solid or surface body to use as Boundary Objects that define the selection boundary.
In the dialog, click the Seed Object selector.
In the canvas, select a face to use as the Seed Object within the selection boundary.
In the dialog, click Update.
The faces on the body that span between the boundary objects and the seed object highlight in the canvas.
Optional: Manually add or remove faces or modify the Boundary Objects and Seed Object, then Update again, to adjust the result.
Click OK.
The faces are selected in the canvas and the Browser.
Tips
- Consider all possible paths between the boundary objects and the seed object. For example, if there are holes between the inside and outside of the body, then both internal and external faces will be included in the selection set unless you include the edges or faces of the holes as boundary objects.
- Once you complete the selection set, right-click anywhere in the canvas and select Create Selection Set to save the selection set in the Browser for quick reuse.
