
Set Up an Advanced Print View
If you're a Fusion user, this feature is not available in the Components or Drawings workspaces. Learn more about system workspaces.
Set up advanced print views for a workspace through the Advanced Print Views page.
To access the Advanced Print Views page:
- On the Administrator menu, click Workspace Manager.
- In the Workspace Manager, expand the workspace's panel.
- Click Advanced Print Views.
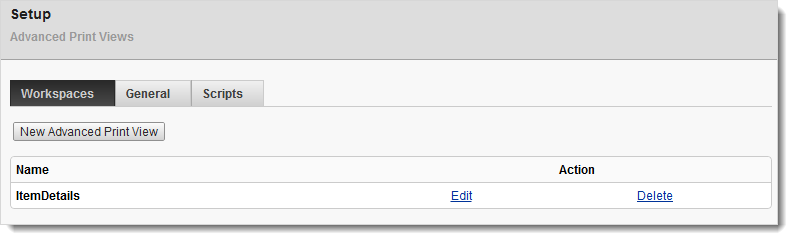
To create the view:
- On the Advanced Print Views page, click New Advanced Print View.
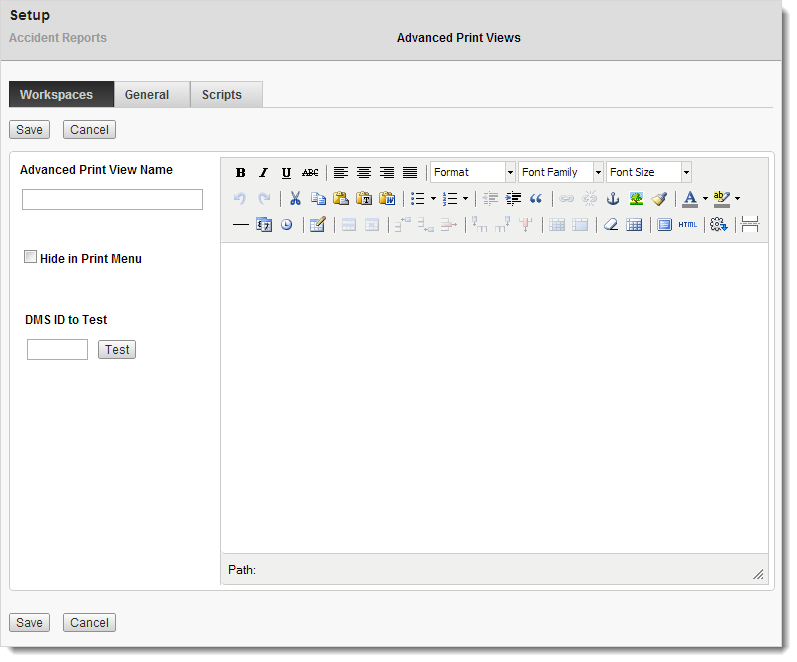
- Enter a name for the view.
- To hide the view in the Print task icon drop-down menu on the Workspace Page, select Hide in Print Menu.
To insert workspace artifacts (tabs):
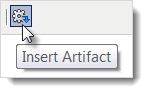
In the editor display, click where you want to insert the artifact.
On the editor tool bar, click the Insert Artifact icon.
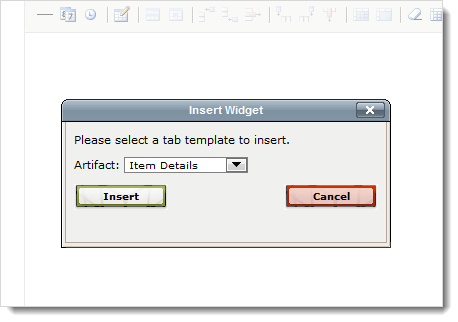
In the Artifact drop-down list in the Insert Widget dialog, select the tab with the data you want to appear in the print view. Tip: If you select the Item Details tab, you can insert individual tab sections.
Click Insert.
Insert other artifacts as needed, repeating steps 1-4.
To add content and apply formatting:
- In the editor display, enter additional text you want to appear in the view.
- To apply formatting to an element, select the element and use the appropriate editor tools.
To save the print view:
- Click the Save button.
To save the print view and close the page:
- Click Save and Close.