Create a center mark pattern
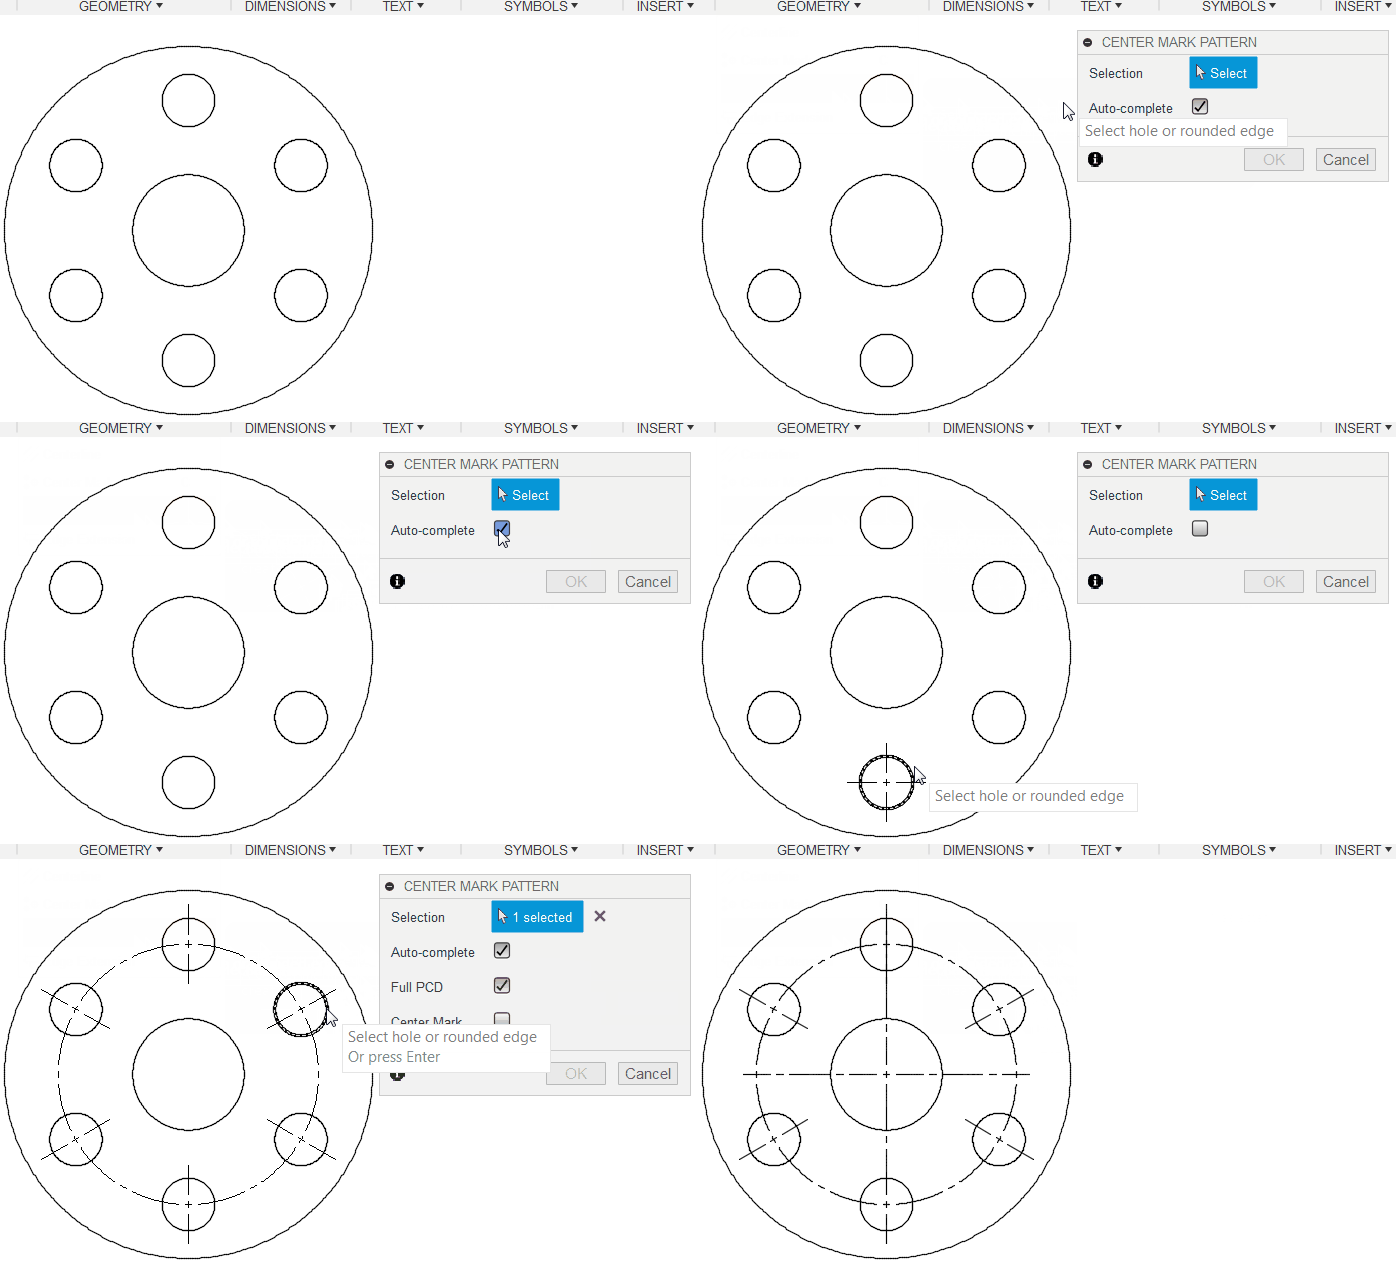
Create a center mark pattern by selecting the edges of features (e.g. holes) in the appropriate order to form the required center mark pattern.
Select Geometry > Center Mark Pattern
 .Note: The Auto-complete checkbox is checked by default. The Center Mark Pattern is created automatically when you click just one hole or rounded edge. Uncheck the checkbox to create the Center Mark Pattern manually if you are not happy with the automatic results.
Select a hole or a rounded edge.
Select additional edges.
In the dialog, select the desired options.
Select OK.

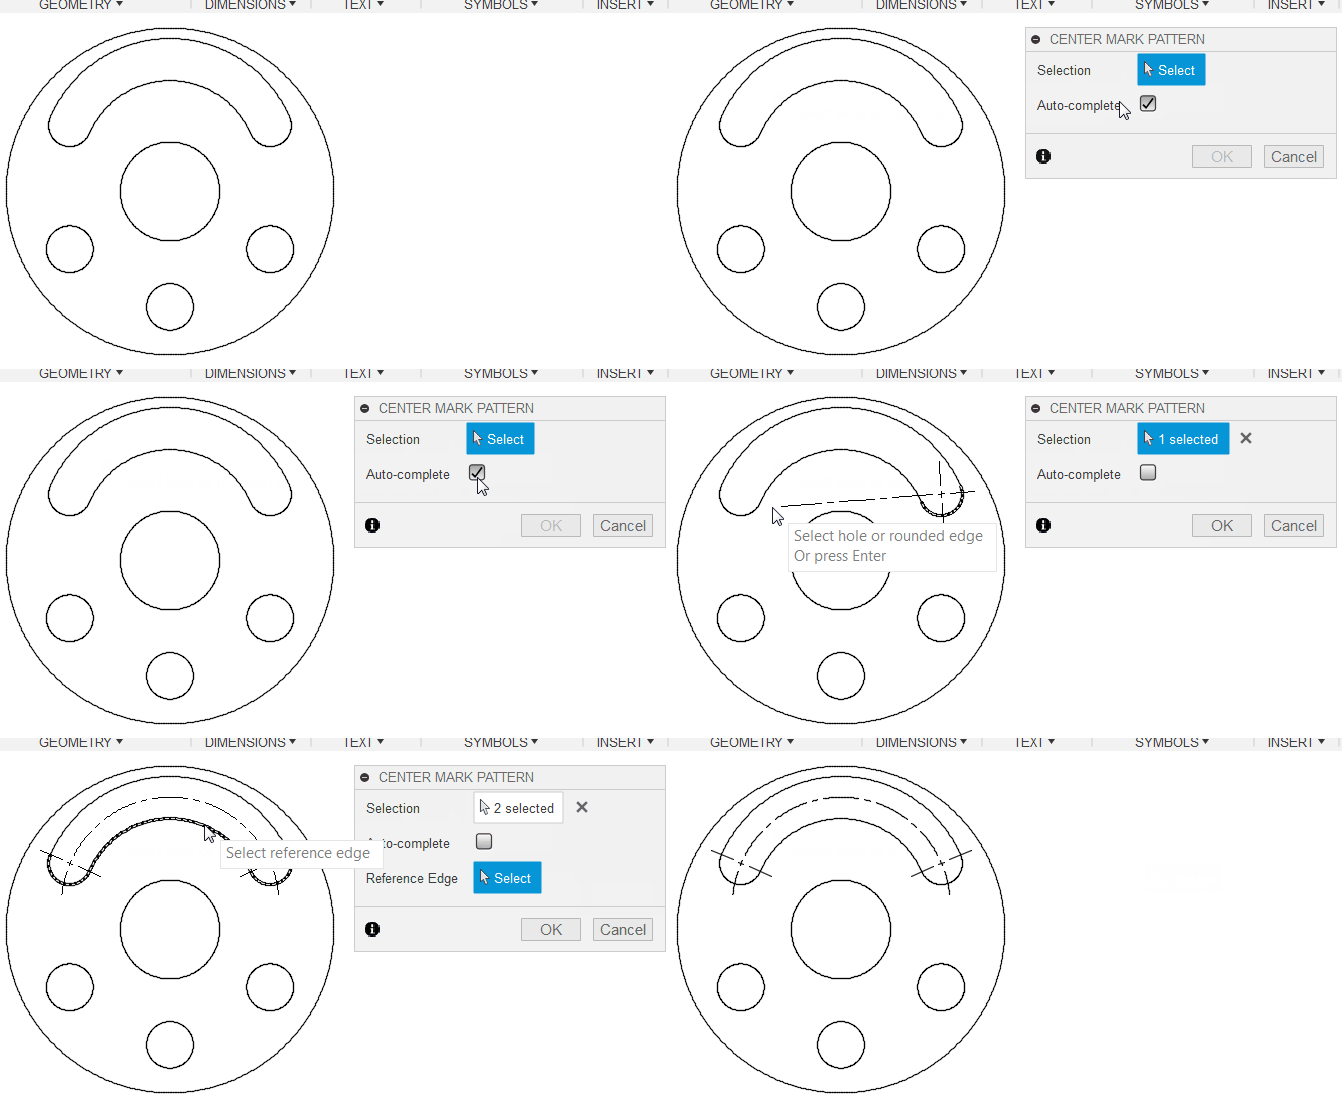
A Reference Edge has to be selected while creating a center mark pattern for a slot.
- Select Geometry > Center Mark Pattern
 .
. - Uncheck the Auto-complete checkbox.
- Select rounded edges.
- Click Select next to the Reference Edge in the dialog.
- Select the reference edge.
- Select OK.

Once complete, the center mark pattern remains associated to the selected edges. As a result, the center mark pattern updates automatically when changes are made to the model. For example, if a hole is removed from the model, on drawing update, the center mark pattern updates accordingly by removing the center mark from the corresponding edge.
Like existing center lines and center marks, the center mark pattern supports annotation associativity. Therefore, you are able to associate dimensions, leaders and symbols to the center mark pattern. Annotations associated to the center mark pattern also update automatically as changes are made to the model and/or the center mark pattern. If the center mark pattern is deleted, all annotations associated to the center mark pattern are also deleted. Similarly, if all of the edges used to create the center mark pattern are removed form the model, on drawing update, the center mark pattern is deleted from the drawing.
Examples of common circular and single direction rectangular center mark patterns

