In this part of the tutorial, assign the curves and surfaces you have created to new layers.
Open the tutorial file (optional)
If you successfully completed part 4, you can proceed directly to the next step, Assign curves to a layer.
If you were not successful in part 4, open the file called joystick_Part4.wire, located in the wire directory of the CourseWare project. This file contains the completed model from part 4.
Assign curves to a layer
Layers are a way of grouping related objects and organizing a scene. By default, all objects you create are assigned to the Default Layer.
First, create a layer.
- Show the Layer Bar. Choose Layers > Toggle > Layer Bar. The Layer Bar displays just below the prompt line and just above the view window area.

- Choose Layers > New
 to create a layer.
A new layer button called L1 appears in the Layer Bar.
- To rename the layer, in the Layer Bar, double-click the L1 layer.
Type the word Curves, and press
 (Windows) or
  (Mac).
Next, select all the curves assign to the layer. Use the Pick > Component
 tool which allows you to specify the type of object you want to select. In this case, set it to select curves only, so that all the curves can be easily selected using a drag box.
 - Choose Pick > Component and double-click the icon. The option box opens.
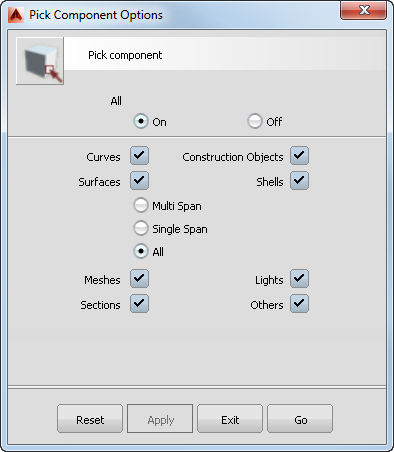
-
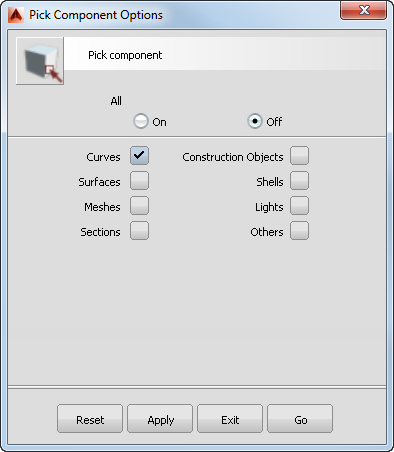
Deselect all the options except Curves and click Go.
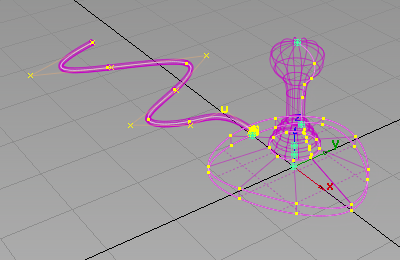
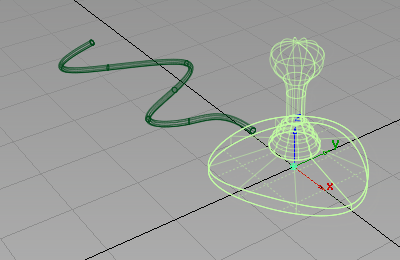
- Drag a pick box around all of the objects to choose all the curves.
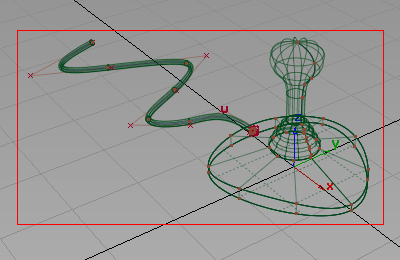
Only the curves are selected.
- Assign all the picked curves to the Curves layer. In the Layer Bar, press and hold with the
 on the Curves layer and choose Assign from the drop-down menu.
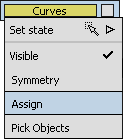
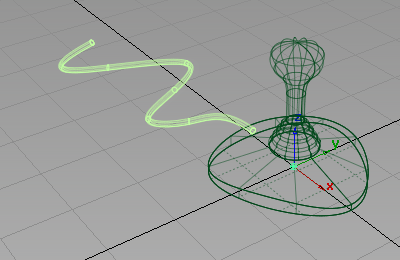
- Now turn off the visibility of the layer by choosing Visible from the same drop-down menu.
The curves are no longer displayed in the scene.

Assign the surfaces to layers
- Create another layer. Choose Layers > New.

A new layer button called L2 appears in the Layer Bar.
- Rename the layer. In the Layer Bar, double-click the L2 layer.
Type the word Joystick, and press
(Windows) or (Mac). 
- Choose Pick > Object
 .
. - Select the joystick base, sleeve, and handle.
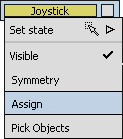
- In the Layer Bar, press and hold with the on the Joystick layer and choose Assign from the drop-down menu. All the picked surfaces are assigned to the Joystick layer.
Leave these surfaces visible, so you can continue working on them in the next section.
- Create another layer using Layers > New. Rename the layer Cable.
- Choose Pick > Nothing
 to deselect the joystick objects.
 - Choose Pick > Object and select the cable surface.
- Assign the cable surface to the cable layer.
- Make the cable surface inactive. Press and hold with the on the Cable layer, choose Set State, then Inactive.
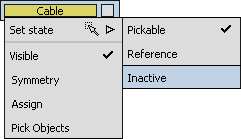
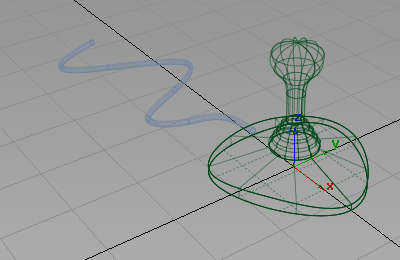
The cable surface is still visible, but is shown in pale blue and cannot be selected.
Save your work
- Choose File > Save As
 to save the current scene.
 - Save your work in the wire directory of the Lessons project. Name your file myjoystick5.wire.