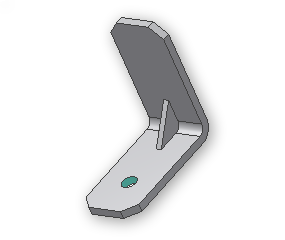
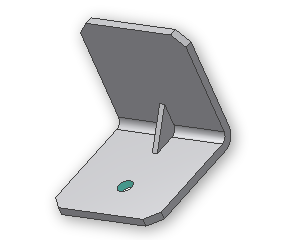
The third rule we create controls the dimensions of the bracket. Previously, we created a user parameter labeled mass. Our new rule modifies the width of the bracket based on the value of this parameter. In the first scenario, the width of the bracket changes according to the following values.
| Mass | Bracket Width |
|---|---|
| 100 | 1 in |
| 200 | 2 in |
| 300 | 3 in |
| 400 | 4 in |
Add Values
First, we add the set of possible values for the mass parameter. Use the menus in the Filters area to display only the Key parameters in the list. This filter makes it easier to focus in on the mass parameter.
- Right-click in any empty cell in the mass row, and select Make Multi-Value from the context menu.
The Value List Editor opens.
- In the Add New Item(s) field, add the values 200, 300, and 400 (the value of 100 should already be in the Value list).
- Click Add button to populate the Value list, and then click OK to accept the list and return to the Parameters dialog box.
You can click the drop-down menu in the Multivalue field of the mass row in the Parameter Editor to see the list of values.
- Click Done to complete the modification of the mass parameter.
Add the Rule
Next, we create a rule to control the bracket width.
-
 On the ribbon, click
Manage tab
 iLogic panel
 Add Rule
.
 - Name the new rule Width_Rule.
The first part of our rule states that if the mass is 100, the bracket width is 1 inch.
- In the rule text area of the Edit Rule dialog box, begin the rule with an If statement.
- Click the Model Parameters node in the Model tree, then locate the parameter labeled bracket_width under the Parameters tab to the right of the tree.
- Double-click bracket_width to insert the parameter name into the rule text. Although parameter names can be directly typed into the rule, double-clicking from the list eliminates the possibility of spelling errors.
- Set the bracket_width to 1 inch.

Copy Code Block
If mass = 100 Then
bracket_width = 1
Note: You can specify units in iLogic numeric expressions (for example, “1 in”). However, the examples in this tutorial do not follow this convention. When units are omitted, the units specified in the properties of the model document are assumed.The second part of our rule states that if the mass is 200, the bracket width is 2 inches.
- Use an ElseIf statement to set the bracket_width to 2 inches when the mass is 200.

Copy Code Block
If mass = 100 Then
bracket_width = 1
ElseIf mass = 200 Then
bracket_width = 2
- Add two more ElseIf statements to accommodate the remaining values of 300 and 400.
- End the rule with an End If statement.
The rule is complete.

Copy Code Block
If mass = 100 Then
bracket_width = 1
ElseIf mass = 200 Then
bracket_width = 2
ElseIf mass = 300 Then
bracket_width = 3
ElseIf mass = 400 Then
bracket_width = 4
End If
- Click OK to save this new rule.
Test the Rule
-
 Open the Parameters dialog box.
 - Set the value of the mass parameter to 100. Notice that bracket_width is set to 1 inch.

- Change the mass parameter value to 200, and notice that the bracket width changes again.

If you change the mass to 300, the width of the bracket increases to 3 inches. A mass of 400 results in a width of 4 inches. Try it!
Note: Click update to get the width parameter to affect the graphics.