 |
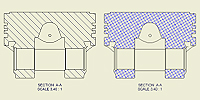
Hatch patterns are automatically applied to section views when you create them. The active Hatch style defines the pattern, scale, shift, and other attributes of the hatch. |
Modify the hatch pattern for an area in a section view
You can modify the hatch pattern for any area after placing a section view.
- In the graphics window, select the hatch pattern to change.
- Right-click and select Edit from the menu.
- Change attributes of the hatch pattern in the Edit Hatch Pattern dialog box:
- Select By Material to use the hatch pattern assigned to the material of the cut part.
- Select a hatch pattern from the Pattern list.
- Set the hatch Angle, Scale, Shift, and Line Weight.
- Select Double to create a crosshatch.
- Click Color and select a new color in the Color dialog box.
- To use a hatch pattern that is not available in the Pattern list, select Other in Pattern. Then add the hatch pattern using the Select Hatch Pattern dialog box.
- Click OK to close the Edit Hatch Pattern dialog box.
Use the By Material hatch pattern in section views
If material of a component is defined in the hatch pattern map, then the By Material hatch pattern is used whenever the component is cut. The By Material option is enabled for the component. Otherwise, the hatch pattern from the Hatch style assigned to the Section Hatch object in Object Defaults is used. The By Material option is disabled for the component.
- In the graphics window, select the hatch pattern to change.
- Right-click and select Pattern from the menu.
- If the material of the corresponding component is defined in the hatch pattern map, the By Material option is available. Select the By Material option to apply the hatch pattern defined for the materials of the component, or cancel selection of the By Material option to use the default hatch pattern defined in the hatch style.
Change the default hatch in cut views
Use the Style and Standard Editor to:
- Edit the current Hatch style or select another Hatch style for the Section Hatch object in Object Defaults.
- Change the default Section Hatch Angles on the General tab of the Standard style pane. Section Hatch Angles define hatch rotation for particular sectioned parts.
- Load hatch patterns from an external PAT file and set them in the Hatch style.
- Map materials to hatch patterns on the Material Hatch Pattern Defaults tab of the Standard style pane.
Hide or display hatching for parts in section views
You can hide the hatch pattern for a part in a view.
- In the graphics window, select the part in the view.
- Right-click the hatched area, and then select Hide to suppress the hatch display or clear the check mark from Hide to show the hatching.
Hide or display hatching for section views
You can hide or display all hatching in a section view.
- In the graphics window or in the browser, select the section view.
- Right-click and select Edit View. The Drawing View dialog box is displayed.
- Open the Display Options tab, and clear or select the Hatching option.
- Click OK to close the Drawing View dialog box.