-
 On the ribbon, click
Annotate tab
 Table panel
 Parts List
.
 - In the Parts List dialog box:
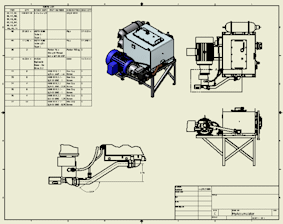
- Select the parts list source. Click the base view (VIEW1) in the drawing or in the Model browser. Notice that the Accumulator.iam file is selected as the source file.
- Select Parts Only in BOM Settings.
- Click OK to close the Parts List dialog box.
- A preview of the parts list displays. Place the parts list at the top-left corner of the drawing.
The parts list table is too long and does not fit into the drawing. In addition, tube and pipe-specific columns are not included in the parts list. You must filter the parts list and add parts list columns.
- To edit the parts list, right-click the parts list in the drawing and select Edit Parts List.
-
 In the Parts List dialog box, click Filter Settings.
 - In the Filter Settings dialog box, define a parts list filter:
- Select Standard Content from the Define Filter Item list.
- Select Standard Content Only.
 Click Add Filter. The Standard Content Only filter is added to the list of filters to apply.
- Click OK to close the Filter Settings dialog box.
-
 In the Parts List dialog box, click Column Chooser.
The Parts List Column Chooser dialog box displays. It shows a list of available properties and properties included in the parts list (Selected Properties).
Note: The parts list style determines properties displayed by default in a parts list. The current parts list style does not include the STOCK NUMBER and BASE QTY property. - In the Parts List Column Chooser dialog box:
- Select BASE QTY in Available Properties, and click Add. The BASE QTY property is moved to the Selected Properties list.
- Select STOCK NUMBER in Available Properties, and click Add. The STOCK NUMBER property is moved to the Selected Properties list.
- Click OK to close the Parts List Column Chooser dialog box.
Both BASE QTY and STOCK NUMBER columns are displayed in the Parts List dialog box.
-
 In the Parts List dialog box, click Group Settings.
 - In the Group Settings dialog box, define part grouping based on the Stock Number property:
- Select the Group option.
- Set STOCK NUMBER as the First Key.
- Clear the Display Group Participants box.
- Click OK to close the Group Settings dialog box.
- In the Parts List dialog box, click OK.
The parts list automatically updates.
- Drag the parts list lines to refine the parts list appearance in the drawing.

- Save the drawing document.