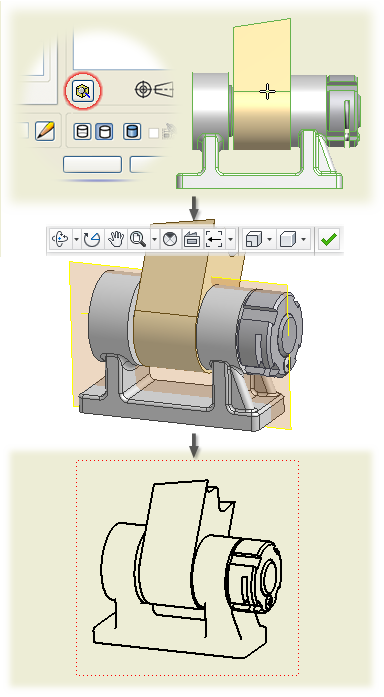
If the needed view orientation is not included in the Orientation list, you can set up a custom drawing view. Click Change View Orientation in the Drawing View dialog box and specify a custom orientation in the Custom View window.

- Open the Drawing View dialog box:
- To create a view, click
Place Views tab
 Create panel
 Base
on the ribbon.
Then select a model file in the Drawing View dialog box.
- To change orientation of an existing view, double-click the view.
- To create a view, click
Place Views tab
- Click Change View Orientation in the Drawing View dialog box.

- Use commands on the Custom View tab of the ribbon to set up the view orientation. For example:
 Click
Custom View tab
 Navigate panel
 Rotate at Angle
 on the ribbon.
 Then use options in the Incremental View Rotate dialog box to set the model orientation.
 Click Custom View tab
  Navigate panel
  View Face to rotate a model face to the projection plane.
  Click
Custom View tab
 Appearance panel
 Perspective
to rotate the model to the perspective position. Note: You can create a detail view from a perspective view, but cannot create other dependent views. Annotations on perspective views are limited.
- Click Custom View tab
 Exit panel
  Finish Custom View to accept the view orientation and close the Custom View window.
 - Click OK to close the Drawing View dialog box. Note: If needed, set additional options in the Drawing View dialog box before you click OK.
Tip: If the model file is open, you can set up the view in the model, and then place the view in the drawing by selecting Current from the Orientation list.
 Show Me how to change view orientation
 Show Me how to align a child view orientation with a base view