Why do I see so many appearances in the Document Appearances section of the Appearance Browser?

The appearances displayed in the Document Appearance section are the color styles that are cached in the document. Depending on the age of the document, how you managed style migration in the past, and how you used styles, the number of appearances in a legacy document may range from a few to many.
What do I do to keep my custom color styles as Appearances?
You need to create a custom library and populate the library with the appearances you want to keep from all documents containing a unique custom appearance. Create and populate a custom library
- On the Tools tab > Material and Appearance panel click Appearance
 - The Appearance Browser displays.
 - In the Appearance Browser toolbar (bottom), click
 (Manage) and click Create New Library.
 - Browse to the folder where the new library will be saved and specify a library name.
- Click Save. The library is visible in the Library list in the lower section of the Appearance Browser.
- Decide whether or not you will organize your library using categories. To create a category:
Right-click the new library in the lower left pane and click Create Category .

Name the Category.

- From the Document Appearances section, drag and drop all appearances you want to keep into the custom library. You can drop them on category nodes or on the library node.
How do I purge the unused Appearances?
- On the Manage tab > Styles and Standards panel click Purge.
- In the Purge dialog box, make certain the box next to Materials is checked. NOTE: If not purging styles, uncheck the Styles box.
- In the Compare materials against list, select the material library to compare against, the list updates to show the materials in the document.
- In the list section, set the "Purge?" value to "Yes" for materials you want removed from the document.
- Click OK. All list items designated "Yes" for purging are removed.
The migrated appearance looks different from what I want. Why so and how do I modify it?
Appearances display differently depending on the visual style in use. Shaded visual styles differ from Realistic visual styles due to the appearance properties used for displaying those visual styles.
When working with the Material and Appearance user interface, ray tracing is disabled (it is enabled by default when using the Realistic visual style), thus selecting an material or appearance that is consistent with your needs when ray traced may require modifying the appearance or creating a new appearance.
The Generic Appearance type exposes more properties than any other appearance type. The number of exposed properties changes based on the type. So, let's do a brief walk-through of an example of making a new appearance.
- In the Appearance Browser, on the bottom toolbar, click
 Create a new Generic Appearance. A new appearance is added to the Document section and opened in the Appearance Editor.
 - Specify the name.
- Adjust the Color: RGB 210, 210, 213.
- Adjust Glossiness: 92.
- Adjust Reflectivity: 59.
- Optional: Make any other property modifications you want.
The following image shows you what to expect based on the appearance definition and which visual style mode is active. On the left, it is the Shaded Visual Style and on the right the Realistic Visual Style.

As you can see, there is a difference in color and shininess. This is attributable to the properties that are not used in the Shaded visual style when rendering the scene. See the Appearance Editor documentation for details on which appearance type properties are supported in the Shaded visual style.
My appearance texture looks incorrect. How do I adjust it?

Custom color styles with texture maps may require some additional texture modifications. Adjusting textures requires being in the Appearance Editor or using the Appearance Editor documentation in-canvas tools. We will consider how this is done using the Appearance Editor and picking up the process from where it was in the previous question.
- In the Appearance Browser, edit the custom appearance.
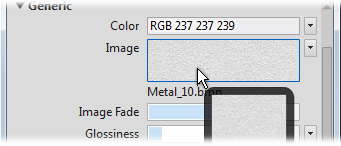
- In the Appearance editor, click the Image preview to access the Texture Editor.

- In the Texture Editor you can: switch images, modify the Position, Scale, and Repeat values. In this instance, Scale needs to be modified.

- Click the Source name to replace the image with another.
- Modify the Position of the map including rotation.
- Scale the map to suit requirements. To scale non-uniformly, click
 to break the aspect ratio link.
 - After making modifications, close the Texture Editor.
- In the Appearance Editor, click Apply, or OK if done editing Appearance.
- Close the Appearance Browser when done.