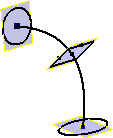
Blend multiple profiles, called sections, and transition them into smooth shapes between profiles or part faces.


To begin, sketch sections on separate planes to represent cross sections of the loft feature.
- On the ribbon, click
3D Model tab
 Create panel
 Loft
Loft
 .
. - On the Curves tab, specify the sections to loft. In Sections, click, and then to blend the shapes, select the sections in sequence. If you select multiple sections on any plane, they must intersect. Note: If more than one loop is in a sketch, first select the sketch and then select the curve or loop.Tip: To speed processing, turn off the Preview.

- To use a rail guide curve, right-click and then click Rails. Or in the dialog box, in Rails, click, and select one or more 2D or 3D curves. Sections must intersect rails. The loft rails control the loft shape between sections.
- If the part contains more than one solid body, click the Solids selector to choose the participating body.
- In Output, select solid or surface.
- To join the beginning and ending sections of the loft, select Closed Loop.
- To merge loft faces without a seam, click Merge Tangent Faces.
- Under Operation, click Join, Cut, Intersect, or new solid . If the Loft is the first feature in the file, the default operation is New solid.
- On the Conditions tab, specify the boundary condition for the listed sections and rails:
- Free Condition Applies no boundary condition.
- Tangent Condition Creates a loft tangent to the adjacent faces. Then set the weight of the condition.
- Direction Condition Specifies an angle relative to the section or rail plane. Set the angle and the weight of the condition.
- Smooth (G2) Condition Creates a loft curvature continuous to the adjacent faces.
Note: The selected sketch or edge highlights in the graphic. - On the Transition tab, Automatic Mapping is selected by default. If appropriate, to modify automatically created point sets, or to add or delete points, lear the check box.
- To modify, add, or delete, click the point set row.
- A default calculated map point is created for each section sketch. To specify a unitless value (zero represents one end of the line; one represents the other end. Decimal values represent positions between ends), click position.
Note: The selected point set or map point highlights in the graphics window. - To create the loft, click OK.
 Show Me how to create a loft
 Show Me how to use a rail to modify a loft
 Show Me how to use weight to control loft
 Show Me How to adjust loft point mapping