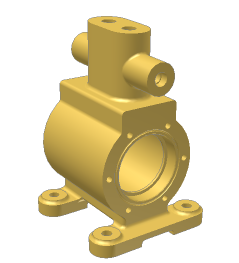
The components that are supplied in the Content Center libraries include iMates to make placement easier. Find the name of the insert iMate for the previously placed cap screw. Then open Housing.ipt and edit it to create an iMate with the same name.
- In the browser, right-click the previously placed cap screw, and then select Expand All Children. Make a note of the name of the insert iMate, Insert In1.
- Right-click the cap screw, and click Delete to delete it from the assembly.
- On the ribbon, click
Assemble tab
 Component panel
 Place
, and place one occurrence of the part Housing.ipt in the assembly.
 - Use the View Cube or Orbit to adjust the viewpoint to approximate the following image.

- Right-click the Housing part in the browser, and click Edit.
- Click
Manage tab
 Author panel
 iMate
to activate the Create iMate command.
 - In the Create iMate dialog box, click Insert
 , and then select the circular edge, as shown on the following image.
- Click the More button (>>) to expand the dialog box, and then type Insert In1 in the Name field.
- Click OK. The iMate is created in the part.
- Click the Return command to return to the parent assembly.