-
 On the ribbon, click
Place Views tab
 Create panel
 Detail
.
 - Click inside VIEW1 to use it as a parent view.
- In the Detail View dialog box:
- Click Toggle Label Visibility
 to hide the view label.
 - Click Rectangular
 in Fence Shape.
- Click Toggle Label Visibility
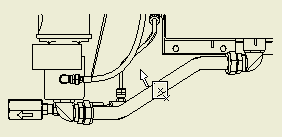
- Place the cursor in the middle of the desired detail area. Then click, and drag the cursor to include a part of the model as shown in the following image.

- Click to set the portion of the view to include in the detail view.
The detail view preview is displayed and you can drag it.

- Move the detail view to the desired position, and then click to place the view.
 Tip: Adjust the size and position of the detail view fence after you place the detail view. Move the cursor over the detail fence in VIEW1, and then drag the fence center or a grip point to the desired position.
 - Save the drawing document.