|
|
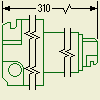
You can
break a view
in the drawing to shorten it.
Note: You can add one break per view per dialog box session. To add multiple breaks to the same view you must activate the Break dialog box for each break.
|
|
|
- On the ribbon, click
Place Views tab
 Modify panel
 Break
.
- Select the view to be broken. The Break dialog box is displayed.
- Select a break style from the Style field.
- Select the break orientation from the Orientation field.
- Adjust the break gap and line characteristics in the Display field. Display settings change to match the break style you choose.
- Set the break gap distance in the Gap field.
- Set the number of break symbols in the Symbol field. You can use one , two, or three symbols per break. Available only with the Structural break.
- Optionally, unselect the Propagate to parent view option.
Note: The Propagate to parent view option controls, if the break operation is propagated to the parent view.
- Click the drawing view to place the first break line.
- Click the drawing view to place the second break line.
|
Note: (Break Inheritance) For orthographic projection, breaks are inherited by a child view by default if the view projection direction is parallel to break lines.
Tip: To switch on or off the inheritance of the break, right-click the view, and select Edit View. Open the Display Options tab of the Drawing View dialog box, and select the Break option in the Cut Inheritance section.

