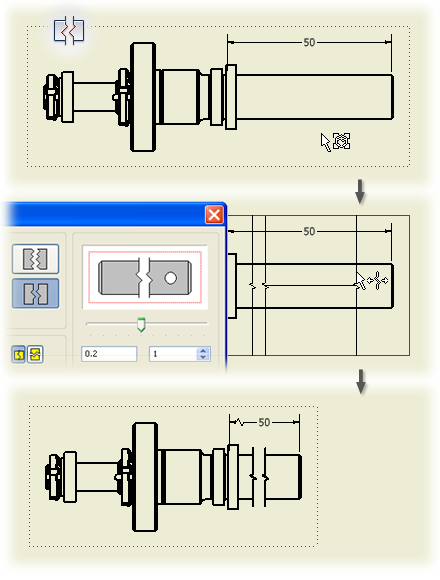
You can break a view when the component view exceeds the length of the drawing, and scaling the component view to fit the drawing makes the component view prohibitively small.
You can also break the view when the component view contains large areas of nondescript geometry. For example, you may have to annotate both ends of a shaft, but the center portion of the shaft is free of features. View breaks can be used anywhere along the length of the component. You can also use multiple breaks in a single drawing view.
Dimension lines that pass through a view break, where both points reside outside the area removed by the break, are modified with a break symbol to match the view break lines. Dimensions that pass through a break, where one or both points reside in the area removed by the break, are hidden from display.
You can also use views with breaks to create other views. For example, you can use a broken projected view to create a broken section view.
Views which can be broken
Broken views are created by altering established drawing views.
- Part view
- Assembly view
- Projected view
- Isometric view
- Section view
- Detail view
- Slice operation
Inheritance of the break
- You can propagate the break operation to the parent view. When you create a break, select the Propagate to parent view option.
- For orthographic projection, breaks are inherited by a child view by default if the view projection direction is parallel to break lines.
- The break inheritance is also supported for child isometric projected views, but breaks are not inherited by default.