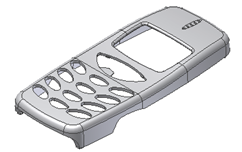
In this section, you create a mold design assembly and add the plastic part to mold. You then apply a material to the model.
For this tutorial, the orientation and position of the model do not need to be modified.
- Click Inventor
 and select Manage > Projects.
 - Set the project to Mold.ipj.
- Ensure that the Mold libraries are attached to this project file. In the Projects dialog box, click Configure Content Center Libraries
 .
. - In the Configure Libraries dialog box, scroll to the Inventor Mold libraries and ensure that the In Use check box is enabled. If the Mold Metric library is not enabled, you cannot add the mold base later in the tutorial.
- Click OK on the Configure Libraries dialog box.
- Click Done on the Projects dialog box.
- Click Inventor
 .
. - Select New to open the Create New File dialog box and start a new mold assembly.
- Click the Metric folder in the Create New File dialog box, click Mold Design (mm).iam, and then click Create.
- In the Create Mold Design dialog box, click OK to accept the defaults. The Mold Design environment is now available. Note: It is important to choose a descriptive name that easily identifies the mold file. In this tutorial, the default file name is used.
- On the browser, right-click the mold icon and make sure Prompt for file names is enabled.
- On the ribbon, click Mold Layout tab > Mold Layout panel > Plastic Part
 .
. - In the Plastic Part dialog box, select the MobileTopComplete.ipt part file, and click Open. This model contains the top section of a mobile phone.

- Left-click in the graphics window to place the part with the default alignment option.
- Click OK to accept the defaults on the File Naming dialog box.
- On the ribbon, click Mold Layout tab > Mold Layout panel > Select Material
 .
. - Assign the following material to the model.
- Manufacturer: Generic Shrinkage Characterised Material
- Trade name: Generic PC+ABS (Cycoloy)
- Click OK to close the dialog box.