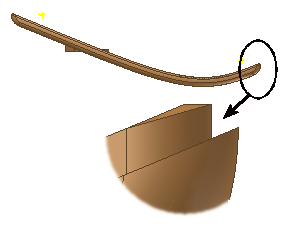
In this section, you modify the size of the lip features to adjust the parting surface. It avoids small undercuts in the model.
Note: Some of the operations in the next sections take time for the system to update.
- Drag the End of Part marker after the Lip1 feature.
- Reorient the model to the Back view and zoom in as shown in the following image.

- On the ribbon, click
View tab
 Visibility panel
 Analysis
 to turn on the results display for the Draft analysis that was created earlier. It helps identify the undercut.
 - Double-click Lip1 to access the Lip dialog box.
- Select the Lip tab to access the size parameters for the lip geometry.
- Change the 0.5-mm dimension to 0.7 mm. Click OK.
- Drag the End of Part marker after the Lip2 feature.
- Turn on the visibility of the Solid3. Notice that the separation between the two bodies is now a little larger.
- On the ribbon, click
View tab
 Visibility panel
 Analysis
 to turn off the results display for the Draft analysis.