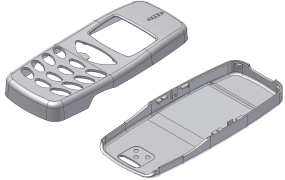
In this topic, you place two different components into the mold environment.
- Set the project to Mold.ipj.
- If you did not complete the General Mold Workflow tutorial, ensure that the Mold library is attached to this project file. In the Projects dialog box, click Configure Content Center Libraries
 . In the Configure Libraries dialog box, scroll to the Inventor Mold libraries and ensure that the In Use check box is enabled. Click OK. If this library is not enabled, you cannot add the mold base later in the tutorial.
 - Click Inventor
 to start a new mold assembly.
 - Select New to open the Create New File dialog box.
- Click the Metric folder in the Create New File dialog, click Mold Design (mm).iam and then click Create.
- In the Create Mold Design dialog, click OK to accept the defaults. The Mold Design environment is now available.
- In the Mold Design browser, right-click the mold icon and choose Prompt for file names in the context menu. You can control the names and locations of system generated files. Note: The enabled or disabled state of the file name setting is persistent between sessions. If the setting is not checked, the File Naming dialog box does not appear.
- On the ribbon, click Mold Layout tab > Mold Layout panel > Plastic Part
 .
. - In the Plastic Part dialog, select Exp-Mobile Top.ipt in the Mold folder and click Open.
- Left click in the graphics window to place the part with the default alignment option.
- Click OK on the File Naming dialog box to accept the defaults. The Inventor part file is placed in the Mold Design environment. This model contains imported geometry of the top section of a mobile phone.
- Click Plastic Part
 again.
 - Select Exp-Mobile Bottom.ipt and click Open.
- Click in the graphics window to place the bottom part as shown in the following image.

- Click OK on the File Naming dialog box to accept the defaults. This model contains the exported geometry of the bottom section of a mobile phone.
You have assembled two plastic parts in the mold assembly. Additional parts can be added, if necessary. In this tutorial, you only add two components.