We now turn the part into two unique parts.
There are multiple ways to create a part from the existing model. Two common methods are:
- Use Save As to create a part containing all the features in an editable state.
- Create a table driven iPart, and suppress or enable unique features.

Before we create a new unique part, we create the sketch to locate the tapped hole on both parts.
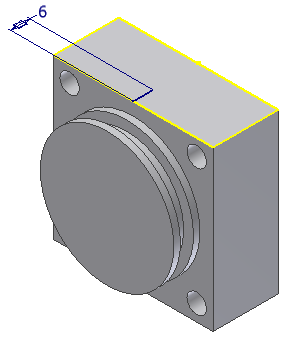
- Start a new sketch on the top face as shown in the following image.Tip: Use the ViewCube to navigate to the Top view.

- Create and dimension a line 6 mm from the midpoint of the front edge. Make sure it is either perpendicular to the front edge or parallel to a side edge.
- Finish the sketch.
-
 Save the file.
 - Click

 Save As
 Save As, and name the new part End Cap Front
 - You are now working in the new file, and the origin file End Cap Back has been closed.
We are now ready to add the unique features to End Cap Front.