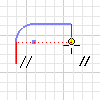
Constraints are automatically applied as you sketch. After the geometry is created, you can add one or more constraints to stabilize sketch shape or position.
The lower right corner of the status bar displays the number of dimensions required to fully constrain a sketch. Apply constraints or dimensions to reduce this number to zero and fully constrain the geometry.
Use the Degrees of Freedom glyphs to illustrate which geometry is unconstrained, partially constrained or fully constrained. As constraints are applied to the geometry and degrees of freedom eliminated, the glyphs disappear. Likewise, as constraints are deleted and degrees of freedom added, the glyphs appear.
Constraint inference and persistence
Constraints are inferred when sketching new or modifying existing geometry. This process of inference decides which constraints are available to the geometry as the shape and orientation are varied. As a constraint is inferred, the constraint symbol is shown, as well as dotted alignment lines, if applicable.
Constraint persistence determines if inferred constraints are maintained after the geometry is created. If constraint persistence is turned off, constraints are not created automatically. Varying inference and persistence settings can affect the results of sketch operations.
Tips for applying constraints
Stabilize shape before sizeApply geometric constraints before dimensions so that sketch shape is less likely to distort.
Use Autodimension to apply constraints after positioning geometry.
Place dimensions on large elements before small ones. To minimize distortion, first define large elements that tend to determine sketch size. Dimensioning small elements first might restrict overall size. Delete or undo a dimension if it distorts the shape of the sketch.
Use both geometric constraints and dimensions Some constraint combinations can distort underconstrained portions of the sketch. If distortion occurs, delete the last constraint placed, and consider using a dimension or a different constraint combination.