In this task you will import an existing CAD model into a new project, and then orient the model correctly within the mold.
- Select
 and enter Speedo tutorial in the Project name text field of the Create New Project dialog.
 - Click
 , click
  Browse and navigate to the tutorial file (typically C:\Program Files\Autodesk\Simulation Moldflow Adviser xxxx\tutorial).
 - Click
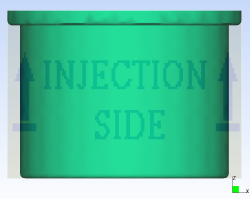
 Bottom view on the ViewCube. The mold parting plane is in the X Y plane with the sprue entering the mold from the positive Z direction (from the top of the screen).
 Currently the open section of the model is presented towards the sprue.
- Click
 to open the Geometry tab.
 - Click
 . The Rotate pane appears.
 - Click
 Rotate X icon twice.
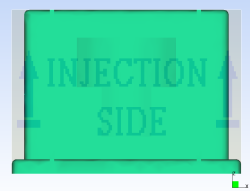
Tip: Alternatively you could have entered 180 in the X text box and clicked Apply.Note: To specify a customized angle to rotate the model, enter the appropriate values in the X, Y and/or Z text box and click Apply.The model is now oriented correctly within the mold.