To edit texture space
- Select the item (see Interactive Geometry Selection for more information) and go to the Texture Space tab in the Presenter window to choose another texture space.
Alternatively, right-click an item which has a texture applied to it and click a new texture space on the Presenter
 Texture Space context menu.
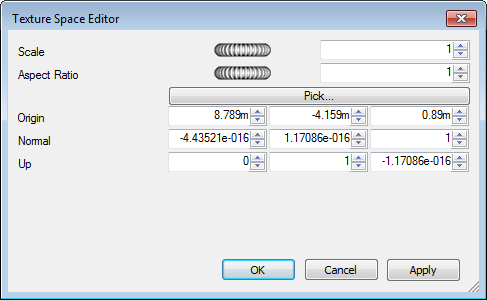
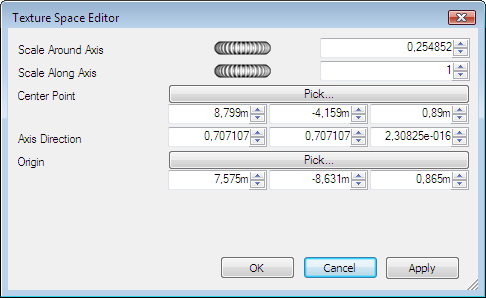
 - You can fine-tune an item’s texture space further by clicking Edit on the Texture Space tab of the Presenter window. The relevant Texture Space Editor opens.
Either the plane texture space editor:
Or the cylindrical texture space editor:
Or the spherical texture space editor:
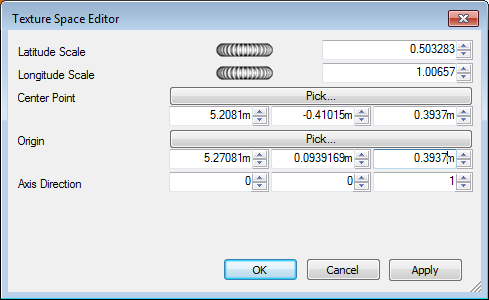
- Edit each of the individual parameters and click Apply to see the results of the edit. Clicking Pick allows you to interactively pick a point in the model rather than individually typing in X-, Y-, and Z- coordinates.
- Click OK.
- Once edited, you can always reset a texture space to the Autodesk Navisworks-defined version by clicking Reset on the Texture Space tab.
- Click Ortho if you want Autodesk Navisworks to align the texture space with the nearest axis.
- Click Fit if you want Autodesk Navisworks to fit a single repeat of the texture to the item. This is of particular use when you are mapping an image to the exact size of the item it's being applied to.