All rooms are phase-specific in a project. When you add a room to a plan view or create a room by adding a row to a room schedule, the room is automatically assigned to the phase specified for the view.
As the project progresses, you can report room areas for different phases. Also, the same room name and number can exist in the same or different locations of the model, as long as they are in different phases. To achieve this, do not switch the phase in the same plan view, but make duplicate plan views with dedicated phases.
You can make edits to room-bounding elements in one phase without affecting other phases. For example, you can delete room-bounding walls in one phase and, provided those walls do not exist in other phases, not impact room boundaries in other phases. Revit ignores any room-bounding elements that do not exist in the active phase in which you are working.
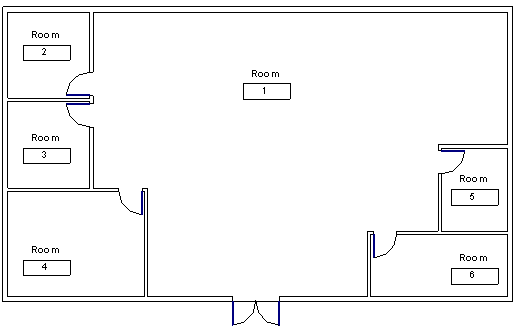
Rooms become part of the phase as you place them in the view. In the following picture, rooms placed on Level 1 of the model are specific to Phase 0, which represents existing conditions.

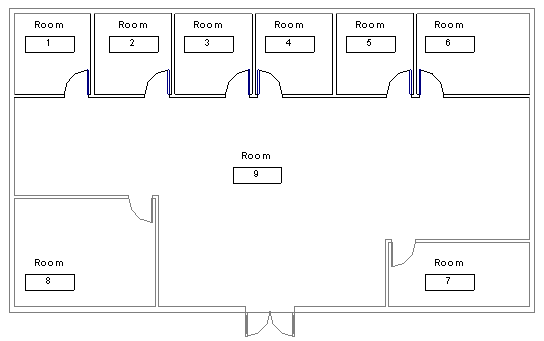
In the next picture, rooms placed on Level 1 of the model are specific to Phase 1, which represents new construction.
Notice that the same room numbers and names can display in the view, and room tags occupying the same location can have different names and numbers.

Related topics