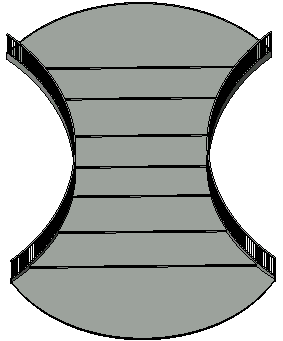
You can define stairs by sketching boundaries and risers instead of having Revit calculate the stair run automatically. This method gives you more control when sketching the footprint of the stairs.
To sketch boundary and riser lines
- Open a plan or 3D view.
- Click Architecture tab
 Circulation panel
 Stair drop-down
 (Stair by Sketch).
 - Click Modify | Create Stairs Sketch tab
 Draw panel
 Boundary.
 Sketch the boundaries using one of the drawing tools.
- Click Riser.
Sketch the risers using one of the drawing tools.
- Optionally, specify a railing type for the stair. See Specifying the Railing Type for New Stairs.
- Click
 (Finish Edit Mode).
 Revit generates the staircase with the railings automatically applied.
Example

Stairs sketched using Boundary and Riser tools

3D view of stairs sketched using Boundary and Riser Tools
Railings for stairs with landings
When a landing is included in stairs created by sketching boundary and riser lines, split the boundary lines where they meet the landing so the railing accurately follows the landing and the slope of the stairs.
- Select the stairs and click Modify | Create Stairs Sketch tab
 Modify panel
 Split.
 - Split the boundary lines where they meet the landing.

To modify stairs sketched with boundary and riser lines
Select the stairs, and use the drawing tools to change the footprint. Modify the stair's instance and type parameters to change its properties.
Tips
- Do not connect left and right boundary lines to each other. You can sketch them as single lines or multi-segmented lines (for example, straight lines and arcs connected).
- Connect riser lines between the left and right boundaries.
- The top riser line on a run of stairs represents the actual riser without a tread.