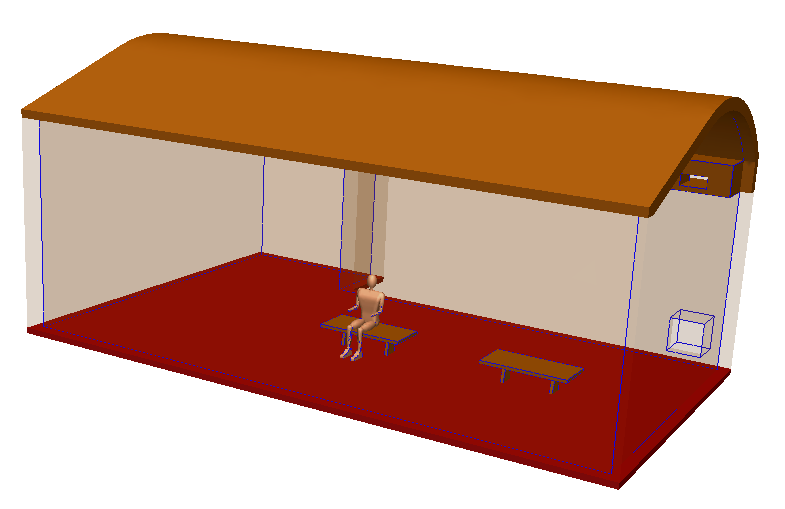
In this Exercise, you used Autodesk® Simulation CFD to simulate the flow and temperature distribution within a museum exhibit hall for two design days:
- The hottest projected summer day-time temperatures
- The coldest projected winter day-time temperatures
Recall that...
The Goals of the Exercise:
- Evaluate the flow and temperature distributions for summer and winter design days.
- Assess whether the occupant thermal comfort level is within acceptable bounds.
- Understand the reasons for the current occupant comfort levels, and determine if modifications to the ventilation strategy are necessary.
Process Wrap up
Now is a good time to sit back and recall the steps you took to complete this design study:
- You assigned the flow and thermal settings for the Summer scenario.
- You cloned the Summer scenario to create the Winter, and modified the two temperature conditions that were different.
- You used the Solver Manager to automatically run both simulations, and monitored their progress with the Solution Monitor.
- Using the Decision Center, you then compared the temperature, flow, and occupant thermal comfort using a series of Summary Images and a Summary Plot for the two design days (summer and winter).
- And had fun too!
Design Verdict
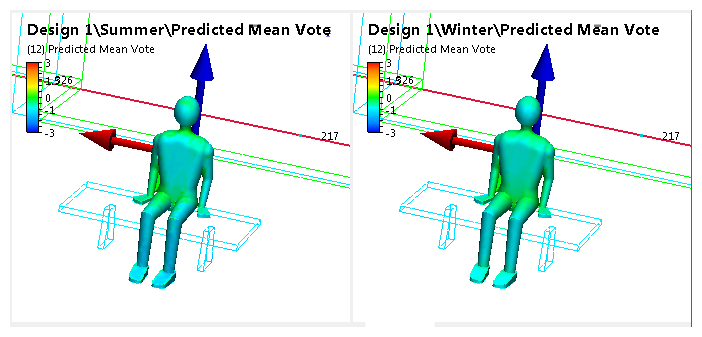
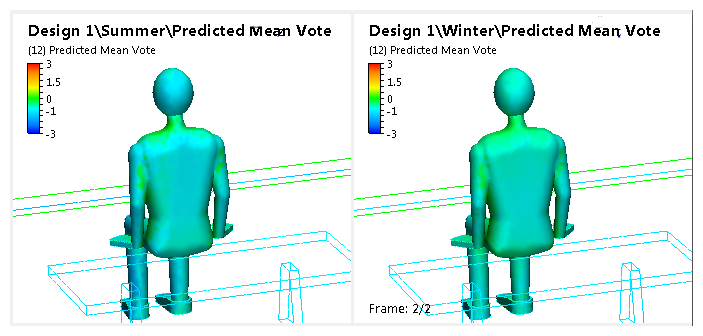
Based on the results, it is clear that the Summer ventilation strategy may not provide the optimum occupant experience, while the Winter strategy seemed to be better.
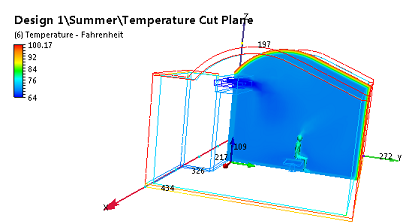
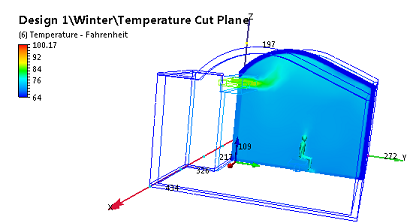
In the summer design day, the occupant's front appears fairly comfortable...
But the back is going to get pretty cold. The winter strategy, however, provides a more comfortable experience for the occupant's back:
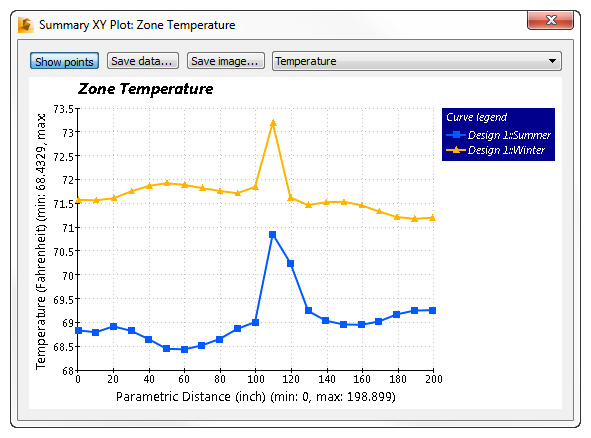
The Summary Plot showed a significant temperature gradient (nearly 2 degrees) across the occupant's body in the Summer scenario, but only a 1 degree gradient in Winter:
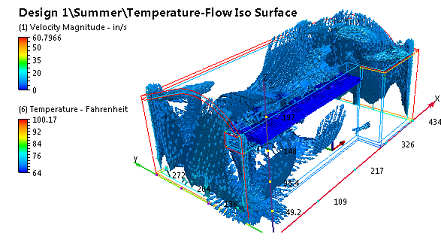
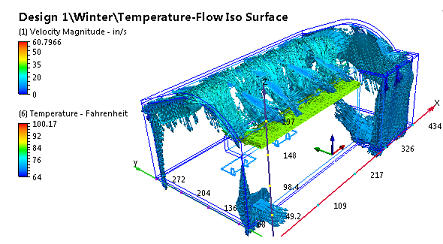
The flow results indicate a strong jet impinging on the occupant's back in the Summer scenario. In the Winter case, the flow circulates about the hall due to buoyancy before engaging the occupant:
|
|
|
|
These results suggest a couple of potential changes that could be made to the summer ventilation strategy:
- Reduce the supply flow rate.
- Increase the temperature set point.
Both of these actions can lead to energy savings and reduced cost.
Another typical next step is to continue to fine-tune the ventilation strategy. This is done simply by cloning the Summer scenario again, modifying one or more conditions, and running the simulation. Use the Decision Center to compare results, and continue to develop insight into the optimum air flow and thermal management strategy for the hall.
With Autodesk® Simulation CFD, you can broaden the scope of the design variations by comparing the effects of different supply and return locations as well as different wall heights and locations. By leveraging the process we used in this Exercise, exploring design variations is quick and easy thanks to the Design Study and the Decision Center. The result is the insight needed to improve design performance and system efficiency.
This Exercise demonstrated how the Autodesk® Simulation CFD Design Study can provide significant and meaningful insight into room ventilation and the occupant thermal experience. Even in this relatively simple example, the Design Study provided insight into ways to improve occupant comfort, reduce energy consumption, and drive down energy costs.
Congratulations! You have completed the exercise. Click here to return to the Tutorials Title Page.