The Design Study Builder is an automation tool for defining a complete design study before launching Autodesk Simulation CFD from CAD.
For example, to determine the optimal heat sink placement in a lighting assembly, an engineer creates several designs with the instance management tool of the CAD system. The designs are similar and will use the same analysis settings and materials. He uses the Design Study Builder to create a design for each CAD design, and assigns setting to CAD objects. The engineer then launches the completely defined design study into Autodesk Simulation CFD, and runs the scenarios.
Model Preparation
Prepare the CAD model
- Create a unique CAD design for each geometry variation.
- CAD systems manage geometry variations differently: Autodesk® Inventor uses "i assemblies." Solid Works uses "Configurations."
Create CAD Entity Groups
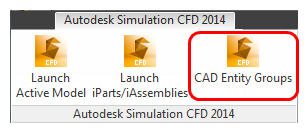
- Create a CAD Entity group for each boundary condition and material, and add the appropriate surfaces or parts to each group.
Launch the Design Study Builder
- Select the option to launch multiple instances. (Each CAD launcher uses different terminology.)
- From the list of CAD designs, select the instances to be used in the design study.
Define the design study
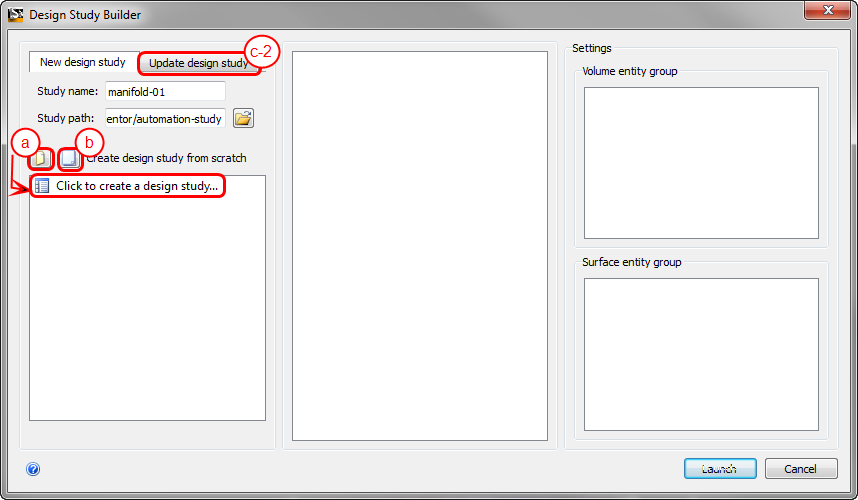
There are three ways to define the design study:
- To define all settings, click the New icon, and Click to create a design study....
- To use a Template, click the Template icon. Browse, and select from the list.
- Add a design to an existing design study:
- Create a new design variation in your CAD system. Open the Design Study Builder.
- Click Update design study, and select the design study to modify.
- Clone a design in the Design Study Builder, and associate the new CAD design with the cloned design (as described below).
This is an alternative way to add a design to an existing design study. Unlike the Design Study Manager, this method does not require cloning in Autodesk Simulation CFD prior to returning to the CAD system.
Settings and Cloning
To Create Settings
- Right click on the scenario branch, and select the type of setting.
- Specify the values in the quick edit dialog.
Assign Settings
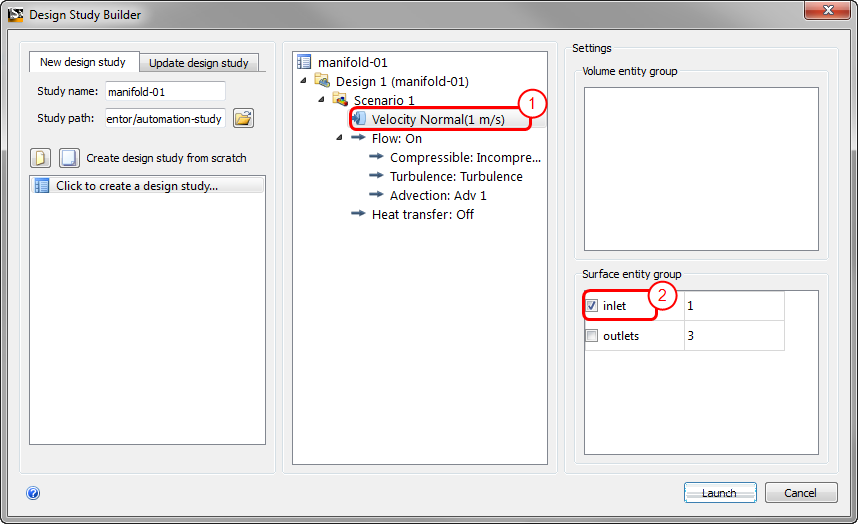
- Select the setting to be associated from the list.
- Check the Entity Group in either the Volume entity group or Surface entity group sections. The setting will be assigned to every entity in the group. The number of entities in the group is adjacent to the group name.
Clone
To copy a design or scenario, right click on the item, and click Clone.
Associate Designs and Launch
Associate Designs
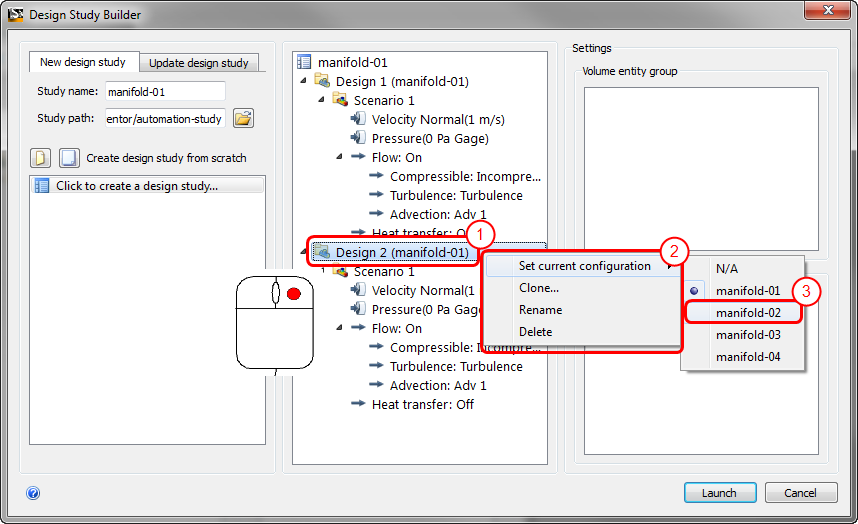
- Right click on a design.
- Select Set current configuration.
- Select the CAD design from the list.
The CAD design name appears beside the design name in the tree:
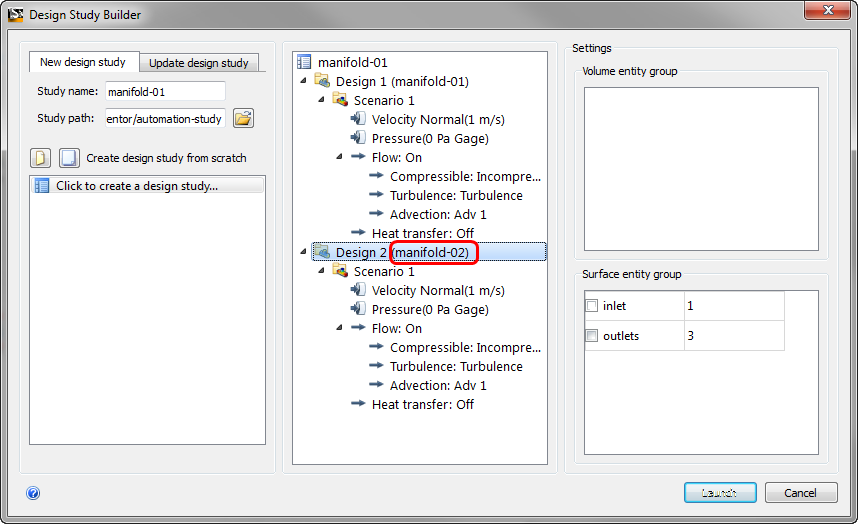
Launch
To launch Autodesk Simulation CFD, click Launch.