In this step, we examine the velocity results using particle traces.
Particle traces show the path of the fluid as it passes around solid obstructions. Use them to understand the flow path, circulation, and regions of swirl.
To hide the vectors, right click on the plane, and select Vector. Select None.
Right click on the plane, and select Shaded. This is so we can see the active plane when we create the traces.
To orient the plane, left click on it, and click this icon from the context toolbar:
Z
Right click on the plane, and click Traces...
Click Add points, and click several points on the plane.
Click Add trace set to see the traces.
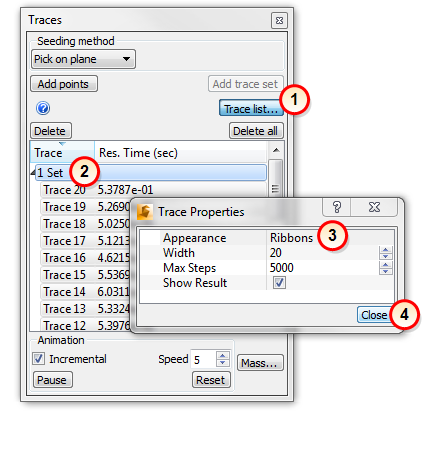
To change the trace appearance to ribbons:
- Click Trace list...
- Right click on Set, and select Set properties...
- Change the Appearance to Ribbons.
- Click Close.

To animate, click the Start button. Check the Incremental box.
Change the Appearance to Comets.
Click Reset to stop the animation.
To delete the traces, click Delete all. Close the Trace dialog.
To remove the Plane, right click on it, and click Remove.
Removing the traces and the planes makes the next step easier.